
Self Propelled Mower Not Working: DIY Repair Guide 2025
So, your self propelled mower not working like it should, and now you’re pushing what feels like a 90-pound anchor across your lawn—been there. Actually, I fix this exact problem about three times a week in my shop, and honestly? Most of these repairs are way easier than people think. If you’re dealing with other common issues beyond the drive system, check out our complete lawn mower troubleshooting guide that covers everything from starting problems to cutting issues.
Table of Contents
▼- Why Your Self Propelled Mower Stopped Working: Common Causes
- Drive System Diagnosis: Step-by-Step Troubleshooting Guide
- Honda Self Propelled Mower Repair: Model-Specific Fixes
- Toro Drive System Repair: Recycler & Personal Pace Models
- Belt & Cable Replacement: The Most Common Fix
- Transmission & Wheel Assembly Repairs
- Brand-Specific Troubleshooting: Craftsman, Husqvarna & Troy-Bilt
- When to DIY vs When to Call a Pro: Cost Comparison
- Keeping Your Self-Propelled Mower Running Right
I’m Jake Harrison, and after 15 years running a lawn care business and another five writing about mowers, I’ve diagnosed more dead drive systems than I can count. Here’s the thing nobody tells you – that fancy self-propelled feature that sold you on the mower? It’s usually held together by a $15 belt and some cables that wear out faster than your favorite pair of work boots.
Last Tuesday, a customer named Mike rolled in looking defeated. His two-year-old Toro stopped propelling mid-mow, and he was convinced he needed a whole new mower. Twenty minutes and one replacement belt later, he was back in business for under $30. That’s the kind of money-saving fix I want to show you today. And if you’re in the market for a new self-propelled model after this repair, our self propelled lawn mower buying guide covers the top-rated options for every yard size.
Why Your Self Propelled Mower Stopped Working: Common Causes
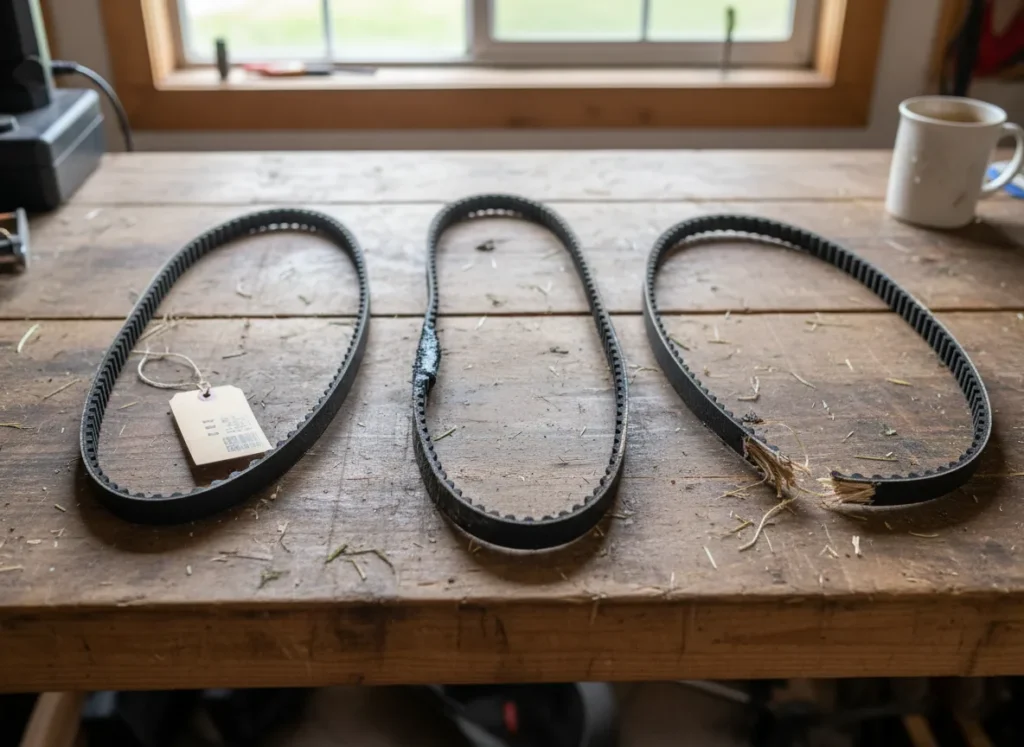
Let me save you some diagnostic time here. After seeing hundreds of lawn mower not self propelling cases, the failure points are pretty predictable. And honestly? That’s good news, because predictable means fixable.
The drive belt is your number one suspect – probably accounts for 60% of the self propelled lawn mower not propelling issues I see. These belts live in a hostile environment: grass clippings, dirt, moisture, and constant tension. Most last 2-3 seasons before they either snap, stretch out, or slip so badly they’re useless. For detailed instructions on belt replacement across different mower types, our lawn mower belt replacement guide walks you through the entire process with photos and brand-specific tips.
Here’s what belt failure looks like: Your mower starts fine, engine runs perfectly, but the wheels won’t engage when you squeeze the drive bar. Or maybe they engage for a few feet and then nothing. Sometimes you’ll smell burning rubber – that’s your belt slipping and getting chewed up. Don’t ignore that smell.
Drive cables are the second most common culprit. These connect your drive control bar to the transmission, and they stretch, fray, or snap over time. I learned this one the hard way when my own push mower not self propelled anymore, and I spent an hour troubleshooting before I noticed the frayed cable hanging loose. Cost me $12 and about five minutes to replace once I actually found the problem.
Transmission issues show up differently. If your wheels engage but the mower moves sluggishly or makes grinding noises, you’re probably looking at low transmission fluid or worn gears. Honda calls theirs a “Smart Drive” system, Toro uses “Personal Pace” – different names, similar problems when they fail.
Wheel assemblies can also kill your self-propulsion. The drive gears inside the wheels wear down, especially on rear-wheel drive models, where all the torque goes through those two wheels. If one wheel spins freely while the other engages, you’ve got a wheel assembly problem, not a belt issue.
And sometimes – not often, but sometimes – it’s something stupid simple. The drive control lever might be out of adjustment, or there’s so much grass packed under the deck that it’s jamming the drive system. Always check the obvious stuff first. I once had a guy bring in a mower that “wouldn’t self-propel” because he’d never engaged the drive control correctly. We all felt a little silly that day.
Drive System Diagnosis: Step-by-Step Troubleshooting Guide
Okay, let’s figure out what’s actually wrong with your lawn mower self propel not working. This systematic approach will save you from replacing parts you don’t need to replace – ask me how I know about that particular expensive lesson.
Start with a basic operational test. On level ground with the engine off, squeeze your drive control bar and try pushing the mower forward. Does it move freely, or do you feel resistance? If there’s significant resistance with the bar engaged, something in your drive system is binding up. If it rolls too freely (easier than it should), your belt’s probably shot. If your mower won’t start at all before you can even test the drive system, head over to our lawn mower won’t start troubleshooting guide first.
Now fire up the engine and engage the drive. Listen carefully. A squealing sound usually means a slipping belt. Grinding or clicking often points to transmission or gear problems. No sound at all? Likely a cable or engagement issue.
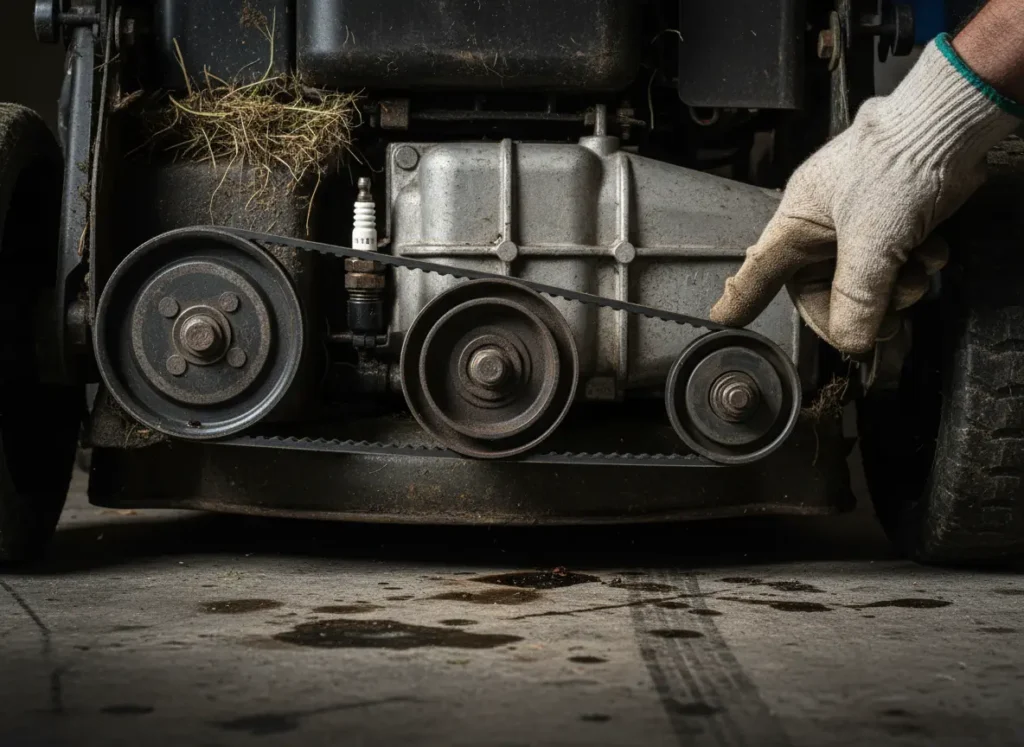
Check your drive belt next – this is where most problems hide. You’ll need to flip the mower on its side (spark plug side up, always) or remove the deck. Look for a black rubber belt connecting the engine pulley to the transmission. Here’s what to look for:
The belt should be tight with minimal play – you should only be able to deflect it about half an inch with finger pressure. Excessive slack means it’s stretched beyond usefulness. Check for cracks, fraying, glazing (shiny spots), or chunks missing. Any of these conditions means replacement time.
While you’re in there, spin the pulleys by hand. They should rotate smoothly and freely. Wobbling, grinding, or resistance indicates bearing problems. And here’s a pro tip – check for debris wrapped around the pulleys. I’ve seen everything from twine to plastic bags completely disable a drive system.
Cables need inspection too. Follow each cable from the control bar to its connection point. Look for:
- Fraying or broken strands
- Corrosion at the connection points
- Excessive slack or stretching
- Proper routing without sharp bends
Test the cable tension by operating the drive control while watching the cable movement. It should pull smoothly and return completely when released.
For transmission diagnosis, you’ll need to check the fluid level if your model has a dipstick (most don’t, unfortunately). Some transmissions are sealed units, others have fill plugs. Your owner’s manual will tell you which type you have. Low fluid shows up as sluggish performance or grinding noises.
Finally, check those wheel assemblies. Jack up the drive wheels (block the mower securely first) and try turning them by hand with the drive engaged. They should resist turning evenly. If one spins freely, that wheel’s drive mechanism has failed internally.
Honda Self Propelled Mower Repair: Model-Specific Fixes

Honda lawn mower self drive not working brings its own set of quirks, and I’ve probably rebuilt more Honda Smart Drive systems than any other brand. The good news? They’re built really well. The bad news? When they do fail, the parts cost more. For a complete comparison of Honda versus other top brands, check out our Honda vs Toro lawn mower comparison to understand the engineering differences.
The Honda GCV170 self propelled not working is something I see regularly, mainly because it’s one of their most popular engines. Honda’s Smart Drive uses a unique speed control that connects directly to your handlebars – squeeze harder, you go faster. When this system fails, it’s usually one of three things.
First, check the Smart Drive cable. Honda’s design puts more stress on this cable than simpler systems, and it stretches over time. You’ll notice the problem gradually – first, you have to squeeze really hard to get full speed, then eventually even maximum squeeze won’t engage the drive properly.
Replacing the Smart Drive cable on a Honda mower not self propelling takes about 30 minutes. Disconnect at both ends (take a picture first so you remember the routing), thread the new cable through the same path, and adjust the tension at the transmission end. Honda’s service manual specifies exact measurements, but basically, you want about 1/8 inch of free play at the control lever. For more details on Honda’s specific models and their reliability, our Honda HRN lawn mower review covers real-world performance testing.
Honda’s belt system uses a rubber belt that’s actually pretty durable – I’ve seen them last five seasons with proper maintenance. But when they do fail, you need to remove several components to access it. Here’s the quick version for HRX and HRR models:
Remove the grass bag and rear door. Take off the drive cover (usually four bolts). Disconnect the Smart Drive cable at the transmission. Loosen the transmission mounting bolts to release belt tension. The old belt should slip right off once everything’s loose.
When installing the new belt, make sure it’s properly seated in all the pulley grooves. Honda uses a specific belt profile – don’t cheap out with a generic hardware store belt. It won’t last. OEM Honda belts run about $25-30, and they’re worth every penny.
The transmission itself rarely fails on Hondas, but when it does, you’re looking at a $150-200 repair or replacement. Symptoms include the drive engaging but barely moving the mower, oil leaking from the transmission housing, or loud grinding that doesn’t go away after belt replacement.
For older Honda models with clutch cables (pre-Smart Drive), the troubleshooting is simpler. Cable stretched? Adjust it. Cable broken? Replace it. Clutch slipping? Either the cable needs adjustment or the clutch itself is worn (less common).
One weird Honda-specific issue: the blade brake clutch can sometimes interfere with drive engagement on certain models. If your blade stops when you release the handle but the drive seems weak, that clutch might need adjustment. It’s an unusual problem, but I’ve seen it three or four times.
Toro Drive System Repair: Recycler & Personal Pace Models
Now, Toro lawn mower drive not working issues are a completely different animal than Honda problems. Toro’s Personal Pace system is clever – it automatically matches your walking speed – but that complexity means more potential failure points. If you’re considering a Toro zero turn instead of a walk-behind, our Toro TimeCutter review covers their riding mower lineup in detail.
The Toro 22 Recycler self propelled not working is probably my most frequent repair call. The Personal Pace system uses spinning weights and springs inside the transmission that adjust speed based on how hard you push the handle. When it works, it’s smooth as butter. When it doesn’t, it’s frustrating as hell.
Personal Pace transmissions can develop “dead spots” where certain speeds don’t engage properly. You might find that light pressure works fine, but pushing harder doesn’t increase speed like it should. Usually, this means the internal weights are sticking, or the springs have lost tension. Sometimes you can fix it by cleaning and lubricating the mechanism, but often you’re looking at transmission replacement.
Toro lawn mower power drive not working problems on older models (non-Personal Pace) are usually straightforward belt and cable issues. These use a traditional single-speed or variable-speed drive that’s pretty reliable. The belt replacement is easier than Honda’s because Toro designed better access panels.
For belt replacement on Recycler models:
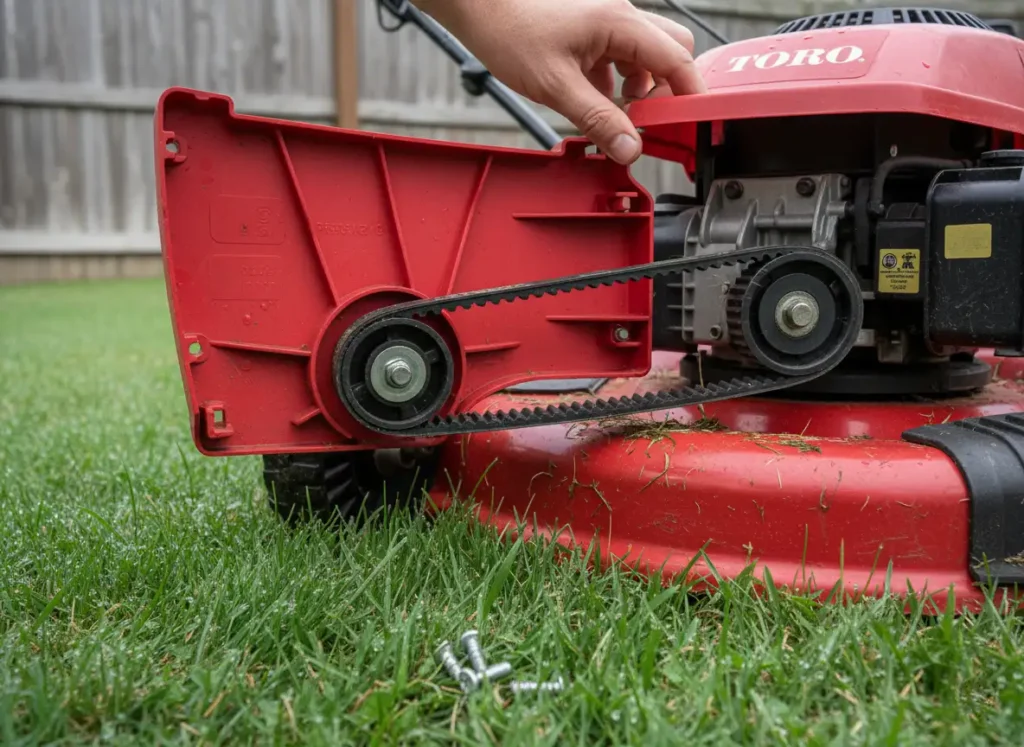
The drive cover has three or four screws – remove them and the cover lifts right off. Disconnect the drive cable at the transmission (squeeze the plastic tab and pull). Release the belt guard if your model has one. Loosen the transmission to create slack, slip off the old belt, and install the new one.
Toro belts are also specific to their models – don’t substitute. They’re available at most hardware stores for $15-20. While you’re in there, check the belt guides and make sure they’re not bent or damaged. A misaligned belt guide will eat through a new belt in one season.
The Personal Pace system has its own cable that controls not just engagement but also the speed sensitivity. This cable is thicker than standard drive cables and has a unique end fitting. If your Personal Pace system engages but doesn’t vary speed properly, this cable might be stretched or binding.
Here’s something specific to Toro that catches people: the rear-wheel drive key. Some Toro models use a small plastic or metal key that connects the wheel to the drive shaft. These can shear off if you hit something solid while mowing. Symptoms are obvious – one rear wheel spins freely while the other drives normally. The fix is cheap (about $5 for the key), but you need to remove the wheel to replace it.
Toro’s transmission fluid is generally not user-serviceable on Personal Pace models – they’re sealed units. If you’ve got low transmission power, grinding noises, or leaking fluid, you’re probably looking at replacement rather than repair. Transmissions for these models run $100-150.
One last Toro-specific tip: clean that undercarriage religiously. The Personal Pace transmission sits low and collects more grass and debris than other designs. Pack-on buildup can actually prevent proper speed adjustment. I’ve “fixed” Personal Pace systems just by scraping out the packed grass and hosing everything down.
Belt & Cable Replacement: The Most Common Fix
This is where we get into the nuts and bolts of fixing your self propelled lawn mower not self propelling. Belt and cable replacement accounts for probably 70% of drive repairs I do, and they’re totally doable in your driveway with basic tools.
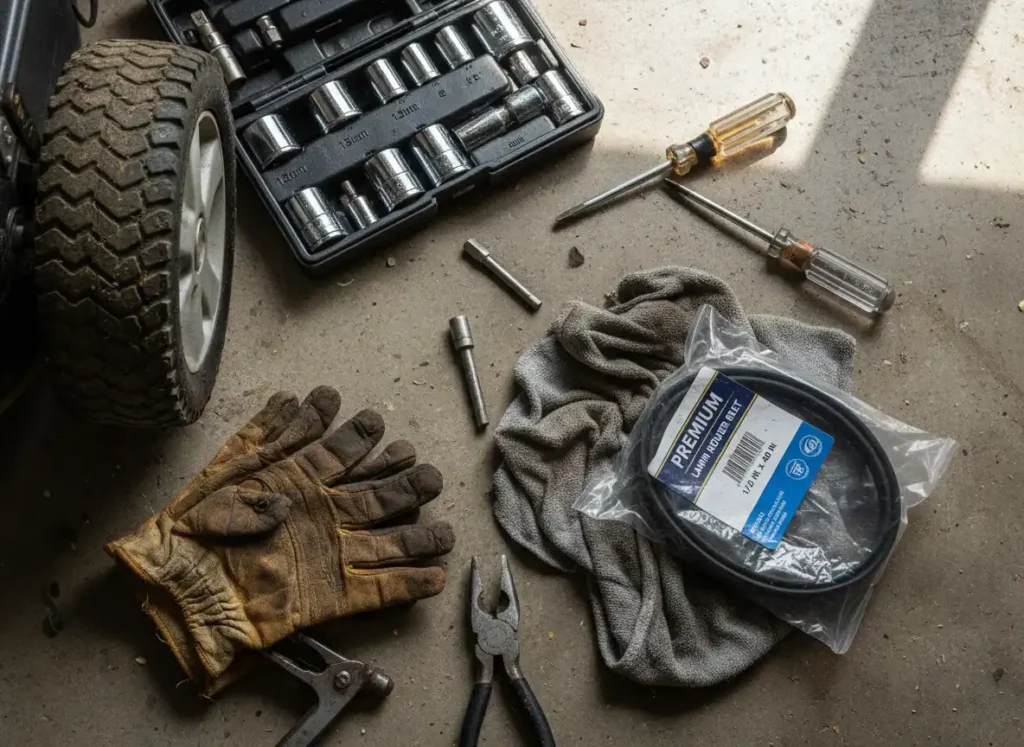
Tools you’ll need:
- Socket set (usually 10mm and 13mm)
- Screwdrivers (Phillips and flathead)
- Pliers
- Wire brush
- Gloves (those old belts are gross)
- Shop rags
Before you start, take pictures of everything. Also, make sure you understand the different lawn mower parts and whether OEM or aftermarket replacements are right for your situation.
Before you start, take pictures of everything. Seriously, use your phone and document how cables are routed, how the belt wraps around pulleys, and where every spring connects. You’ll thank me later when you’re trying to remember if that spring hooks on the left or right side.
Safety first – disconnect the spark plug wire and zip-tie it out of the way. I’ve seen mowers start unexpectedly during repairs when someone accidentally engaged the blade control. Don’t be that person. The Consumer Product Safety Commission (CPSC) reports that improper maintenance procedures cause over 75,000 injuries annually.
For belt replacement on most walk-behind mowers:
Tip the mower on its side, spark plug facing up. This prevents oil from draining into the cylinder. Remove the drive cover – it’s usually held by 3-4 screws or bolts. Some models require removing the rear door or the entire handle assembly to access the belt; check your manual.
Once you’ve got access, take note of the belt routing before you remove it. The belt typically wraps around an engine pulley, through a series of guides and idlers, and connects to the transmission pulley. Some systems use a belt keeper or spring-loaded tensioner – document how these connect.
Loosen the transmission mounting bolts to create slack in the system. You don’t usually need to remove them completely, just back them off enough to push the transmission forward. The old belt should now slip off easily.
Before installing the new belt, clean all the pulleys with a wire brush. Built-up grass and debris can cause premature belt failure. Check that all pulleys spin freely and aren’t damaged. Inspect the belt guides and keepers – if they’re bent or broken, replace them now while everything’s apart. While you’re working on the underside, inspect your mower blade condition – a dull blade puts extra strain on the drive system.
Route the new belt following your photos or the diagram in your owner’s manual. Make sure it’s properly seated in all pulley grooves – you should hear it snap into place. Tension the system by sliding the transmission back and tightening the mounting bolts. Don’t overtighten; the transmission needs some flex for the belt tensioner to work properly.
For cable replacement:
Start at the handle control. Most cables connect via a Z-bend or barrel fitting that unhooks with needle-nose pliers. Some have a metal clip that needs to be removed. Disconnect the control first.
Follow the cable down to its connection at the transmission or drive clutch. These connections vary wildly by brand and model – Honda uses barrel ends, Toro often uses threaded adjusters, Craftsman tends to use spring-loaded clips. Take pictures before disconnecting anything.
When routing the new cable, make sure it follows the original path without sharp bends or kinks. Cables routed incorrectly will bind or fail quickly. Most cables have plastic guides or clips along the way – use them all.
Once connected at both ends, adjust the cable tension. You typically do this at the transmission end. The goal is to have the drive fully disengaged when the control is released and fully engaged when the control is squeezed. Most systems need about 1/8 to 1/4 inch of free play at the control lever.
Test the system before reassembling everything completely. Start the mower and engage the drive on level ground. It should engage smoothly without jerking and disengage cleanly when you release the control. If it engages but seems weak, you may need to tighten the cable adjustment slightly.
The total job usually takes 30-45 minutes once you’ve done it once. Belts run $15-25, cables $10-20. Way cheaper than the $120 most shops charge for this repair.
Transmission & Wheel Assembly Repairs
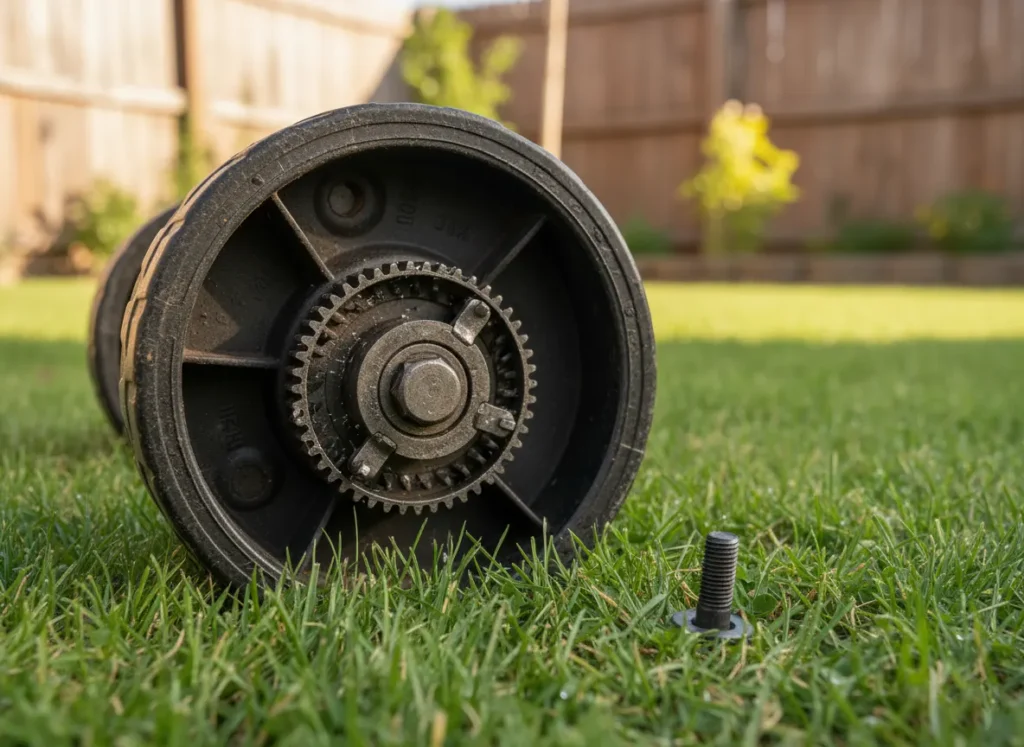
When your self propelled not working on lawn mower isn’t caused by belts or cables, you’re usually dealing with transmission or wheel problems. These repairs are more involved, but still very doable if you’re comfortable with basic mechanical work.
Transmissions on walk-behind mowers come in a few types. Gear-driven transmissions (found on older and budget models) are simple but can wear out. Disc-drive transmissions (common on mid-range mowers) use friction discs that eventually need replacement. Hydrostatic transmissions (high-end models) use fluid pressure and rarely fail, but are expensive when they do.
Symptoms of transmission problems:
- Drive engages, but the mower barely moves
- Grinding or clicking noises during operation
- Fluid is leaking from the transmission housing
- One wheel drives, the other doesn’t
- Intermittent engagement (works sometimes, not others)
For gear-driven transmissions, the usual failure is worn or stripped gears. You’ll hear grinding and see metal shavings if you crack open the case. These aren’t usually worth rebuilding – replacement transmissions cost $80-150 depending on the model, and installation is straightforward. Understanding how small engines work will help you diagnose whether the problem is mechanical or engine-related.
Disc-drive systems can sometimes be serviced. The friction disc wears thin over time, causing slippage. If you can access the disc (not all designs allow this), you can replace it for $30-40. The disc sits between the drive wheel and the pressure plate, held in place by a spring. Remove the old disc, install the new one, reassemble, and adjust the spring tension according to your manual.
Hydrostatic transmissions are sealed units that require very little maintenance. If yours fails, replacement is your only option. The good news? They rarely fail. I’ve seen 15-year-old Honda mowers with original hydrostatic transmissions still working perfectly. According to the Outdoor Power Equipment Institute (OPEI), proper hydraulic fluid maintenance can extend transmission life by 50% or more.
Transmission fluid is sometimes serviceable, sometimes not. Check your manual. If your model has a drain plug and fill plug, changing the fluid might solve sluggish drive problems. Use only the manufacturer-specified fluid – transmission fluids vary by model and are not interchangeable. About 8-12 ounces fills most walk-behind transmissions.
Wheel assemblies are actually separate from the transmission on most mowers. The transmission drives a shaft, and that shaft connects to gears inside the wheel hub. These gears can strip, especially if you’ve done a lot of mowing in reverse or hit obstacles while driving.
To diagnose wheel assembly issues, block the mower securely and jack up the rear wheels (or front wheels for front-drive models). Engage the drive and watch which wheels turn. If one wheel spins freely while the other works normally, that wheel’s drive mechanism has failed.
Replacing wheel assemblies requires removing the wheel from its axle. Most use a bolt through the center with a washer and lock nut. Some models have a pin that needs to be driven out. Once removed, the internal gears and pawls are accessible. You can sometimes find rebuild kits ($20-30) or replace the entire wheel assembly ($40-60).
Here’s a weird issue I see occasionally: the drive key or pin that connects the transmission shaft to the wheel. This small piece can shear off if you hit something hard while the drive is engaged. The symptom is obvious – no drive at all, or drive on one side only. The fix is simple once you find the problem, but it requires removing the wheel to access the sheared pin.
Bearings in wheel hubs wear out, too. If your wheels wobble side to side or feel gritty when spinning, the bearings need replacement. Most wheel bearings are sealed units pressed into the hub. You need a bearing puller to remove them and a socket or pipe to press in the new ones. Not difficult, but requires the right tools.
Brand-Specific Troubleshooting: Craftsman, Husqvarna & Troy-Bilt
Let’s talk about the other common brands that end up in my shop with self propelled lawn mower not propelling issues. Each has its own quirks that you should know about.
Craftsman lawn mower self propelled not working cases usually involve belt problems. Modern Craftsman mowers (2019 and newer) are actually made by MTD, and they share a lot of parts with Troy-Bilt and Cub Cadet. Older Craftsman mowers (pre-2018) were made by Husqvarna and use completely different systems. For insights on Craftsman’s riding mower line, our Craftsman YT3000 review tests their budget-friendly riding options.
For newer Craftsman models, the drive belt is easy to access. Remove three screws from the rear cover, disconnect the drive cable, and the belt is right there. These models use a standard V-belt available at any hardware store for about $12-15. The cable system is basic – either it works or it doesn’t. Replacement cables are readily available and cheap ($10-15).
Older Craftsman mowers with Husqvarna heritage use a more complex system. The transmission is actually a rebranded Husqvarna unit, and it’s quite robust. If you’ve got an older Craftsman that won’t self-propel, first check for a transmission fluid fill plug (usually a yellow plastic plug on top). Some models allow fluid ads, others are sealed.
Husqvarna lawn mower not self propelling on newer models usually points to cable adjustment issues. Husqvarna cables stretch more than other brands – I don’t know why, but I’ve replaced a lot of them. The adjustment is at the transmission end, and you want very little free play in the system for Husqvarna drives to engage properly.
Husqvarna uses a unique belt routing on some models that includes a belt-tightener pulley. This pulley is spring-loaded and applies constant tension to the belt. If the spring breaks or weakens, the belt slips constantly. Check this spring when replacing belts – replacement springs cost about $8.
The wheel drive system on Husqvarna all-wheel-drive models (like the HU800AWDH) uses a differential that can fail. Symptoms are obvious – the mower pulls hard to one side, or only one rear wheel drives. Differential repair requires some mechanical skill, but the part itself only costs $40-50.
Troy-Bilt self propelled not working issues are nearly identical to modern Craftsman since they share the same parent company and parts. The most common problem is the drive belt keeper bending and allowing the belt to slip off during operation. This keeper is a simple piece of stamped metal that guides the belt. If yours is bent, replace it ($6) or you’ll keep throwing belts. If you’re considering Troy-Bilt’s riding mower lineup, our Troy Bilt Pony review examines their entry-level riding options.
Troy-Bilt’s single-speed transmissions are bulletproof simple. When they fail (rarely), it’s usually because someone ran over something that jammed the drive system and stripped the internal gears. Variable speed Troy-Bilt transmissions (usually on models $300 and up) use a disc system that can be serviced.
One Troy-Bilt-specific issue: the bail handle spring. This spring returns the drive control to the off position when you release it. If this spring breaks or falls off, the drive might not disengage properly, or might not engage at all because the cable isn’t returning to its rest position. The spring costs about $3 and takes two minutes to replace.
For all these brands, maintenance is key. I see way more drive failures on mowers that are never cleaned, never get fresh oil, and are stored wet and dirty. Twenty minutes of basic maintenance after each season will prevent most of these repairs.
When to DIY vs When to Call a Pro: Cost Comparison

Here’s where I’m supposed to tell you to bring everything to my shop, right? But honestly, a lot of self propelled mower not working repair is totally DIY-friendly. Let me break down which repairs make sense to tackle and which ones justify professional help.
DIY-friendly repairs (difficulty: easy):
- Drive cable replacement – $10-20 in parts, 30 minutes
- Drive belt replacement – $15-25 in parts, 45 minutes
- Basic cable adjustment – Free, 10 minutes
- Cleaning packed debris from the drive system – Free, 20 minutes
These repairs require only basic tools and mechanical ability. If you can change your car’s oil or replace a bike chain, you can handle these jobs. The shop would charge $80-120 labor plus parts, so you’re saving real money.
DIY-friendly repairs (difficulty: moderate):
- Wheel assembly replacement – $40-60 in parts, 1 hour
- Transmission replacement – $100-150 in parts, 1-2 hours
- Spring and bracket replacement – $5-15 in parts, 30 minutes
These require more mechanical comfort and patience. You might need to make a second trip to the parts store if you forgot something. Shop labor would run $120-180 plus parts. Still worth DIYing if you have the time and tools.
Consider professional help for:
- Transmission rebuilds (unless you’re experienced)
- Complex variable-speed system repairs
- Problems you can’t diagnose after basic troubleshooting
- Mowers still under warranty (DIY might void it)
Call a pro immediately if:
- You smell gas leaking
- The engine runs but makes terrible noises
- There’s visible damage to the mower body or handle
- Multiple systems seem to be failing at once
For a comprehensive overview of when DIY makes sense versus professional repair, check our complete lawn mower maintenance and troubleshooting guide.
Cost comparison for common repairs:
Drive belt replacement:
- DIY: $15-25 parts, 45 minutes of your time
- Shop: $90-120 total
Drive cable replacement:
- DIY: $10-20 parts, 30 minutes of your time
- Shop: $80-100 total
Transmission replacement:
- DIY: $100-150 parts, 1-2 hours of your time
- Shop: $250-350 total
Complete drive system overhaul (belt, cable, adjustment):
- DIY: $30-50 parts, 2 hours of your time
- Shop: $180-250 total
Here’s my honest take: if your mower is older than 10 years and needs more than $200 in repairs, start looking at replacement options. A new self-propelled mower costs $300-600, and you’re getting current technology, a full warranty, and probably better fuel efficiency. Our best push mower guide compares current models across all price ranges to help you choose a replacement.
But if your mower is relatively new (under 5 years) or you’ve got a quality brand like Honda or Toro, absolutely repair it. These mowers are built to last 15+ years with proper maintenance and occasional repairs.
The DIY route also teaches you how your equipment works. Next time something breaks, you’ll diagnose it faster and fix it cheaper. Plus, there’s something satisfying about fixing your own stuff instead of hauling it to a shop every time something goes wrong.
Keeping Your Self-Propelled Mower Running Right
Look, I make my living fixing mowers, but I’d rather see fewer repair bills and more working equipment. Most self propelled lawn mower not self propelling problems are preventable with basic maintenance. Here’s what actually matters:
Clean the undercarriage after every use. I know, nobody wants to do this, but grass clippings pack into every crevice and accelerate wear on belts, pulleys, and drive components. Flip the mower, spray it down, scrape out the packed stuff. Five minutes now prevents hours of repair later.
Check belt tension monthly during mowing season. With the engine off, reach under and feel the drive belt. It should have about half an inch of give when you press on it. Too loose, and it’ll slip. Too tight, and it’ll wear prematurely.
Lubricate cables annually. Pull each cable partially out of its housing and spray in some cable lubricant or even WD-40. Work the control back and forth to distribute the lube. This simple step prevents 90% of cable failures I see.
Change transmission fluid according to your manual, if applicable. Most sealed transmissions don’t need this, but if yours has a drain plug, change the fluid every 2-3 years or 100 hours of operation. Fresh fluid prevents internal wear. Regular engine oil changes are just as critical for overall mower longevity.
Store your mower properly in the off-season. Drain the gas (or add stabilizer), run the engine until it stops, disconnect the spark plug, and store somewhere dry. Moisture and old gas destroy more drive systems over winter than mowing does all summer. For complete winter storage instructions, follow our fall lawn care and winterization guide to protect your investment. When disposing of old gas or transmission fluid, follow the EPA’s guidelines on small engine equipment for environmentally responsible disposal.
Replace belts proactively. If your belt is 3+ seasons old, replace it at the start of the season, even if it looks okay. Belts are cheap; the aggravation of failure mid-season isn’t worth the $20 savings. Our spring lawn care checklist covers all the essential maintenance tasks to perform before the mowing season begins.
Watch your cable adjustments. If you’re starting to notice that you have to squeeze the drive control harder to engage, adjust the cable before it gets worse. Proper adjustment prevents excessive wear on all drive components.
And here’s something nobody talks about: avoid mowing in reverse with the drive engaged. Almost every transmission and wheel assembly failure I see involves someone who regularly mows backward. These systems aren’t designed for reverse operation. If you need to back up, disengage the drive first.
There you have it – everything I’ve learned about diagnosing and fixing self-propelled mowers that won’t move. Most of these repairs are straightforward once you understand how the drive system works. Save yourself some money, learn how your equipment operates, and get that mower moving again. Now stop reading and go check that belt.
The most common cause is a worn or broken drive belt – they typically last 2-3 seasons and cost $15-25 to replace. Check for belt slack, cracks, or that burned rubber smell. The second most likely culprit is a stretched or broken drive cable connecting your control bar to the transmission. Less commonly, you might have low transmission fluid, worn gears, or a failed wheel assembly. Start by visually inspecting the belt with the mower tipped on its side, spark plug facing up. If the belt looks good, check the cable for fraying or excessive slack.
Honda’s Smart Drive system usually fails due to cable stretch or belt wear. First, adjust the Smart Drive cable tension at the transmission end – you want about 1/8 inch free play at the control lever. If adjustment doesn’t help, inspect the belt by removing the drive cover (four bolts typically). Honda belts are surprisingly durable but do eventually wear out after 4-5 seasons. Replace with genuine Honda parts ($25-30) rather than generic belts. If the Honda GCV170 self propelled not working after belt and cable service, the transmission itself might need replacement, but this is rare on Honda mowers.
Toro’s Personal Pace system has unique failure modes because of its speed-sensing design. The most common issue is the Personal Pace cable stretching, which prevents proper speed variation. This cable is thicker than standard drive cables and costs $25-35 to replace. The transmission itself can develop “dead spots” where the internal weights stick or springs lose tension, causing inconsistent speed response. Regular cleaning helps – grass buildup under the deck interferes with the Personal Pace mechanism more than other designs. Belt wear is less common on Toro 22 Recycler self propelled not working cases because their belt access is better designed, but still check it first.
Yes, absolutely – you’ll just be pushing it manually like a standard push mower. Disengage the drive system completely if possible (most models have a lever or pin to do this) so the transmission isn’t dragging against your pushing. Be aware that self-propelled mowers are significantly heavier than manual push mowers, typically weighing 70-90 pounds versus 50-60 pounds, so you’ll definitely feel the difference. It’s a viable temporary solution while you diagnose and fix the problem, but I wouldn’t recommend it long-term, especially on slopes or large yards. Your back and shoulders will hate you by the third mowing session.
DIY repairs are very affordable: drive belts cost $15-25, cables run $10-20, and even full transmission replacement parts are only $100-150. Figure 30-60 minutes of your time for basic belt/cable work. Professional repair costs are significantly higher: expect $80-120 for a simple belt replacement, $100-140 for cable service, and $250-350 for transmission replacement, including labor. If your mower needs both belt and cable work plus adjustments, shops typically charge $180-250 total. For mowers under 5 years old from quality brands like Honda or Toro, repairs make financial sense. Older than 10 years? Compare the repair cost to buying a new mower ($300-600 for decent models).
