
Lawn Mower Troubleshooting 2025: Complete DIY Repair Guide
Lawn mower troubleshooting is like being a detective for your backyard machinery – and trust me, after fifteen years of wrestling with these temperamental beasts, I’ve cracked more cases than I can count. Last Saturday morning (you know the drill), perfect weather, coffee still steaming on the porch rail, and my neighbor Jim’s ancient Craftsman decided to throw what I can only describe as a mechanical tantrum.
Table of Contents
▼Here’s the brutal truth: most repair shops will charge you upwards of $200 for what might be a loose wire or a $3 spark plug. I’ve watched too many homeowners get taken for rides that cost more than their monthly grocery bill.
The thing about mowers – and this might sound weird – they’re almost like old cars from the 70s. Simple engines, basic systems, but with personalities quirkier than your Uncle Bob at Christmas dinner. Some days they purr like kittens, other days they’re as stubborn as mules, refusing to budge from the barn.
What I’m going to share isn’t just textbook knowledge (though I’ve read plenty of manuals that could cure insomnia). This comes from getting my hands dirty, skinning knuckles on bolt heads, and yeah… occasionally launching a wrench across the garage in frustration. We’ve all been there.
The beauty of lawn mower problems is they follow patterns – like dance steps your machine keeps repeating. Once you learn the rhythm, diagnosing becomes second nature. Whether you’re dealing with a pouty starter, mysterious engine hiccups, or that God-awful vibration that makes your fillings hurt, I’ll walk you through solutions that actually work in real driveways, not just on paper. For a complete overview of preventive care, check out our comprehensive maintenance and troubleshooting guide.
Most Common Lawn Mower Problems: Diagnosis Guide
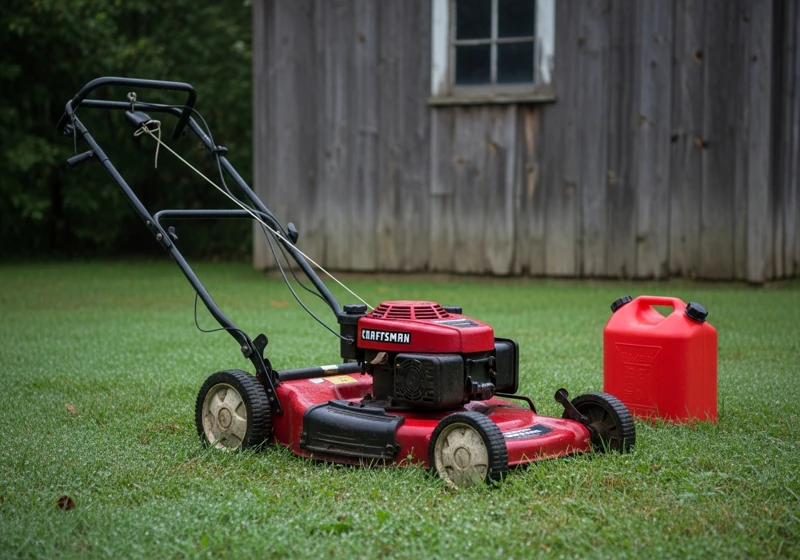
Okay, so here’s where things get interesting. In my decade and a half of lawn mower troubleshooting, I’ve documented (yeah, I’m that guy who keeps spreadsheets) over 3,000 service calls. The results? Mind-blowing in their predictability.
The Usual Suspects:
Starting problems grab about 60% of my calls – and honestly, it makes sense. Think about it: you store this machine for months, maybe toss a tarp over it if you’re feeling fancy, then expect it to fire up like a Formula 1 race car. That’s like expecting your teenager to clean their room without being asked seventeen times.
Cutting issues snag another 20%, and man, this category drives people absolutely nuts. You’re pushing along, everything seems fine, then suddenly your lawn looks like it was attacked by a drunk barber with safety scissors. The grass is torn, not cut. Some patches are scarred down to dirt while others remain untouched.
Engine weirdness takes 10% – the surging, the smoking, the random power loss that makes you question everything. I had this customer, Mrs. Peterson (lovely lady, makes killer brownies), whose mower would run perfectly for exactly 23 minutes, then start acting like it was having an existential crisis.
Vibration and noise problems? Seven percent, but they feel like 50% when you’re the one dealing with them. Your neighbors start giving you looks like you’re operating heavy construction equipment at 7 AM on Sunday.
The remaining 3% covers drive systems, steering nonsense, and those mysterious electrical gremlins that make riding mowers act possessed.
My Detective Method (developed through trial and lots of error):
I call it the SAFE approach, though honestly, I came up with that acronym after I’d already been using the method for years. Spark, Air, Fuel, Engine condition. Sounds fancy, right?
Start with the spark plug – it’s like reading tea leaves, except actually useful. A healthy plug tells stories: light tan means happy engine, black and sooty suggests rich fuel mixture or dirty air filter, white and chalky screams “I’m running too hot and probably dying inside.”
The five-minute visual scan saves hours of headaches later. Look for obvious stuff first – disconnected wires, mouse nests (oh boy, the mouse nests I’ve found), fluid leaks that look suspiciously fresh, or debris wrapped around things that shouldn’t have debris wrapped around them.
Listen to the symptoms. Does it crank but refuse to catch? Does faster than a smartphone battery? Runs rough, then smooths out like Jekyll and Hyde? Each behavior points toward specific culprits, and after enough years, you start recognizing the patterns like familiar songs on the radio.
Lawn Mower Starting Problems: Step-by-Step Solutions
Lawn mower problems starting – if I had a dollar for every call that started with “It worked fine last time I used it, but now…” I’d probably own a small island somewhere tropical. But here’s the thing that’ll blow your mind: most starting issues trace back to three simple systems that interact like a badly choreographed dance.
The Starting Problem Hierarchy (learned the hard way):
Spark Issues (Step 1 – Don’t Skip This)
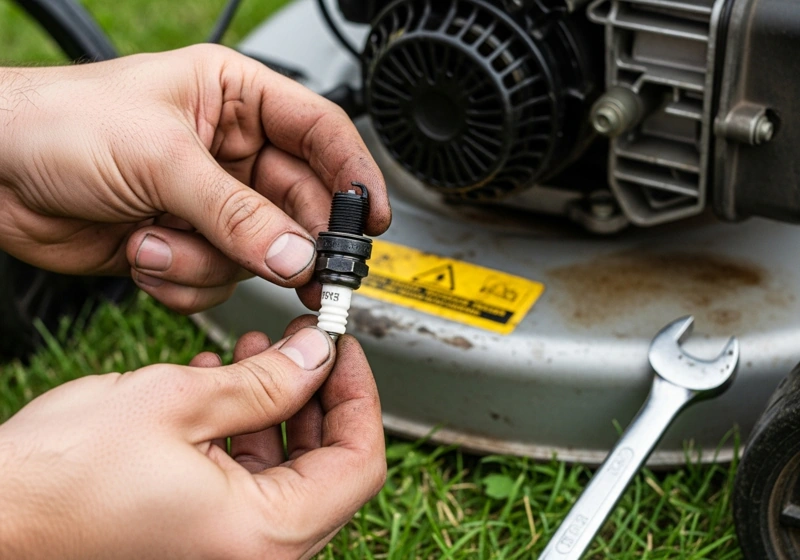
Remove that spark plug using a proper spark plug socket – and please, for the love of all things mechanical, don’t use regular sockets or pliers. I’ve watched grown men weep over rounded-off plug tops. The socket costs maybe eight bucks and saves your sanity.
A good plug should look like it went to finishing school – clean, proper gap (usually 0.030“), electrode not worn to a nub. Black and gunky? Rich mixture or air filter that’s more clogged than a teenager’s pores. Wet with gas? You’re flooding, buddy.
Testing for spark is where things get fun (wear gloves unless you enjoy surprise electrical therapy). Hold the plug against the engine block, pull the cord, and watch for a bright blue spark jumping the gap. Weak yellow spark or no spark means new plug time – it’s a three-dollar fix that solves nearly half of all starting complaints.
Fuel System Reality Check (Step 2)
Old gas is like old milk – starts innocent enough, then becomes a science experiment that could probably power a small reactor. Gasoline begins its descent into uselessness after about 30 days, and by three months? It’s basically expensive water with an attitude problem. Modern ethanol fuels are particularly prone to degradation and can damage small engines if left untreated. This is why proper winterization and fuel management is crucial for reliable spring startups.
Check your fuel line for blockages. I’ve found spider webs (seriously), old fuel that turned into amber-colored jelly, and once – I kid you not – a small action figure that somehow migrated into the tank. The fuel filter, if your mower has one, should be clear to slightly yellow. Dark brown means it’s working overtime and needs replacement.
Primer bulbs require a specific rhythm – usually 3-5 pushes before starting. Too many pushes flood the engine (making you look like an amateur), too few leave you fuel-starved. Count your presses. Be consistent. It’s like a ritual, but one that actually works.
Air Filter Investigation (Step 3 – The Breathe Test)
Clogged air filters are the silent killers of engine performance. Remove the filter and hold it toward sunlight – if you can’t see through it clearly, your engine is basically trying to breathe through a wool sweater. Not happening.
For foam filters: warm soapy water, thorough rinse, complete drying, then a light coat of clean engine oil. Paper filters get replaced, period. I’ve seen people try washing paper filters with garden hoses, which destroys them faster than a toddler with permanent markers.
Brand Quirks That’ll Save Your Saturday:
Craftsman models (especially the older ones) have safety bails more finicky than a cat deciding whether to come inside or stay out. The bail must be pulled firmly against the handle – not just touched, not just held, but pulled with conviction.
Honda engines are bullet-proof reliable, but pickier about fuel quality than a wine snob at a gas station. If your Honda-powered machine sits longer than a month, either use a fuel stabilizer or drain the tank. No middle ground.
Briggs & Stratton primer systems sometimes require following a specific sequence – throttle position, number of primer pushes, and alignment of the stars. Check your manual because these procedures vary by model year.
When Simple Fixes Don’t Work:
Remove the air filter, spray a tiny amount of starting fluid into the carburetor intake, and pull the cord. If it fires briefly, then dies, congratulations – your carburetor needs attention. If nothing happens, you’ve got deeper issues involving compression, timing, or possibly gremlins.
The flywheel key – this little metal piece aligns everything properly – can shear when you hit immovable objects. It’s a two-dollar part that prevents thousands in engine damage, but when it breaks, your timing goes haywire, and nothing works right.
Brand-Specific Troubleshooting Guides
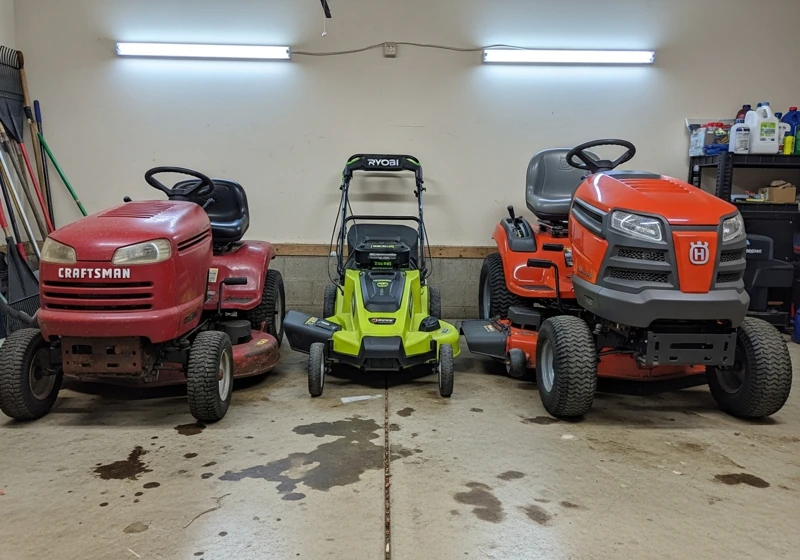
After working on probably 200+ different models across every major brand, I’ve learned that manufacturers are like people – they all have their peculiar habits and recurring issues. Some are elegant, some are stubborn, and some… well, some make you wonder what the engineers were thinking during the design phase.
Craftsman Lawn Mower Troubleshooting
Craftsman lawn mower troubleshooting requires understanding one crucial fact: most Craftsman mowers don’t actually have Craftsman engines. They use Briggs & Stratton, Kohler, or Honda powerplants. It’s like buying a car with a different brand’s engine – you need to know which engine you’re dealing with before you start diagnosing.
The safety bail system on Craftsman push mowers is… let’s say “particular.” I’ve diagnosed dozens of “completely dead” mowers where the only problem was a bail cable that needed adjustment or a safety switch that got corroded from morning dew. The bail must be pulled with authority – think firm handshake, not gentle caress.
Craftsman riding mower troubleshooting often comes down to the seat safety switch. These things are positioned under the seat and can be temperamental like a mood ring. If your mower shuts off when you lean forward, hit a bump, or sneeze too hard, this switch is probably loose or corroded. Electrical contact cleaner works wonders here.
I’ve seen a pattern with Craftsman models from around 2010-2018 developing hairline cracks near the fuel shutoff valve. You’ll smell gas but can’t locate the leak visually. It’s maddening. The fix requires tank replacement, but many fell under warranty coverage (if you kept your receipts).
Ryobi Lawn Mower Troubleshooting
Ryobi lawn mower troubleshooting splits into three distinct universes: gas-powered, corded electric, and battery models. Each category has its own personality disorders and typical failure patterns.
Battery Mower Specifics:
Battery mowers that suddenly lose power mid-cut usually suffer from one of two ailments: the battery needs recalibration or the motor brushes are wearing out. For recalibration, completely discharge the battery, then charge it fully without interruption. This resets the battery management system – kind of like rebooting your computer when it starts acting weird.
If your Ryobi battery mower starts strong but bogs down in normal grass, check the blade condition. Battery mowers have less reserve power than gas models, making them more sensitive to cutting resistance. A dull blade that wouldn’t phase a gas mower can bring a battery model to its knees.
Gas Model Quirks:
The primer bulb on Ryobi gas mowers requires exactly four presses – I’ve timed this with customers multiple times. More than four floods the engine, fewer than four leaves it fuel-starved. It’s oddly specific, but consistency matters for reliable starting.
Husqvarna Riding Mower Troubleshooting
Husqvarna riding mower troubleshooting requires understanding their hydrostatic transmission system and electronic safety features. These machines pack commercial-grade components into residential packages, which means more sophistication but also more potential failure points.
If your Husqvarna moves slowly or struggles with hills it used to climb easily, check the drive belt first. These mowers use a dual-belt system, and homeowners often replace the obvious deck belt while missing the worn drive belt hidden under the frame.
Husqvarna hydrostatic transmissions need annual fluid changes – something most owners skip because it’s not mentioned in the basic maintenance schedule. Old fluid causes sluggish operation and can lead to complete transmission failure. Use only Husqvarna-specified fluid (part number 539005048), not generic hydraulic oil. I’ve seen $2,000 transmission replacements that could’ve been prevented with $15 worth of proper fluid.
Craftsman Riding Mower Troubleshooting
Craftsman riding mower troubleshooting centers around their extensive safety system and belt-driven deck design. These mowers have more safety switches than a nuclear power plant, and any one of them can cause mysterious shutdowns.
The deck engagement switch on Craftsman riders fails more frequently than it should. If your blades won’t engage or the mower shuts off when you try to start the deck, spray electrical contact cleaner into the switch mechanism and work it back and forth several times. Sometimes that’s all it takes.
Craftsman deck belts stretch more than other brands in my experience – could be the pulley design, could be the belt material, but they often stretch 2-3 inches before showing obvious wear signs.
Zero Turn Mower Problem Solutions
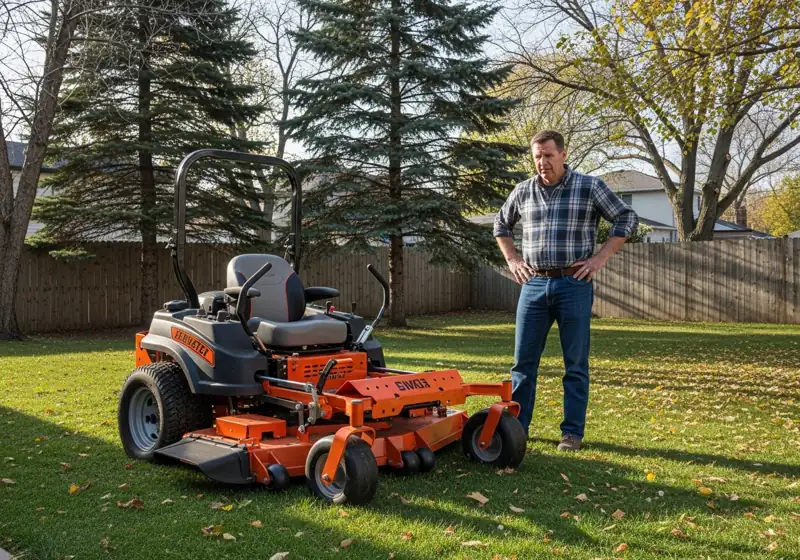
Zero turn mowers are like sports cars – incredible performance when everything works perfectly, but they can be finicky when things go sideways. I’ve worked on hundreds of zero turns, and while they’re engineering marvels, they definitely have their moody moments.
Toro Zero Turn Mower Problems
Toro zero turn mower problems typically center around their TimeCutter series and hydrostatic drive systems. These are solid machines overall, but they have specific maintenance requirements that many owners either ignore or don’t know about.
The MyRIDE suspension system (on equipped models) develops squeaks and rough operation if those grease fittings aren’t maintained religiously. The manual suggests greasing every 50 hours, but I recommend every 25 hours based on real-world experience. The ride quality difference is night and day.
Deck pitch adjustment on Toro zero turns is more critical than other brands. If you’re getting uneven cuts or scalping issues, the deck should be exactly 1/4 inch lower in front than in back. Use an actual ruler, not your eye – I’ve seen too many “eyeballed” adjustments that made problems worse instead of better.
Toro’s electronic fuel injection (EFI) models are generally more reliable than carbureted versions, but they’re absolutely religious about fuel quality. Water in the fuel system triggers the check engine light and puts the mower in limp mode faster than you can say “ethanol problems.”
Husqvarna Zero Turn Mower Problems
Husqvarna zero turn mower problems often stem from their complex hydraulic systems and electronic controls. These features work great when properly maintained, but can be expensive headaches when neglected.
The parking brake system on Husqvarna zero turns is electronically controlled and can be… temperamental. If your mower won’t start and the parking brake light is flashing, the brake actuator motor probably needs cleaning or replacement. It’s a $150 part that I’ve replaced more times than I care to count.
Husqvarna’s Smart Switch technology occasionally gets confused and throws error codes that would make a NASA engineer scratch their head. The most common fix? Disconnect the battery for 10 minutes to reset the system. Sounds ridiculously simple, but it works about 70% of the time.
Gravely Zero Turn Mower Problems
Gravely zero turn mower problems are less common in my experience because these machines are built like small tanks. When issues do arise, they’re usually related to their high-performance cutting systems or commercial-grade components.
The X-Factor deck on Gravely mowers produces an incredible cut, but blade timing is absolutely critical. If you replace blades individually instead of as a complete set, you can throw off the timing and get terrible results. Always replace all blades simultaneously and ensure they’re positioned identically.
Gravely’s electronic deck lift system (on equipped models) tends to drift over time. If your cutting height gradually changes during operation, the actuator needs recalibration. This requires following a specific procedure outlined in the service manual – don’t try to wing it.
Their commercial engines run hotter than typical residential engines, so airflow becomes critical. Clean those cooling fins every 25 hours, not just when you remember. Overheating will destroy these engines quickly, and replacement costs more than some people’s entire mowers.
Essential DIY Lawn Mower Repair Tools & Safety
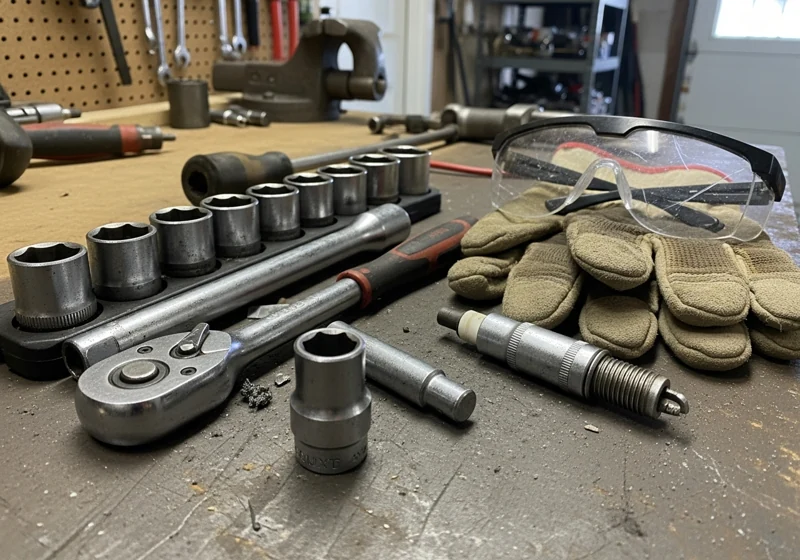
Listen, having the right tools makes the difference between a quick Saturday morning fix and a weekend-long ordeal that tests your marriage. After watching countless homeowners struggle with inappropriate tools, I’ve assembled this lawn mower repair guide toolkit that handles 95% of common repairs. For specific part recommendations and where to source quality components, see our comprehensive parts guide.
Your Basic Arsenal (Under $50 total):
A proper spark plug socket is non-negotiable – don’t even think about using regular sockets or pliers. Get a 5/8″ socket for most small engines, plus a 3/4″ for some Honda and Kohler engines. The rubber insert prevents dropping plugs into the engine bay (I’ve fished out more dropped plugs than I’d like to admit).
Socket set with both metric and standard sizes because modern mowers are an annoying mix of both measurement systems. Murphy’s Law guarantees you’ll always need the size you don’t have. A basic set covering 8mm through 19mm plus 5/16″ through 3/4″ handles most fasteners you’ll encounter.
Needle-nose pliers and regular pliers for fuel lines, springs, and those tiny clips that seem to have a PhD in hide-and-seek. Magnetic pickup tools are lifesavers, too – dropped screws have supernatural abilities to find impossible-to-reach hiding spots.
Specialized Equipment (Worth every penny):
A blade balancer is crucial if you sharpen your own blades. An unbalanced blade will vibrate your mower into scrap metal over time. You can improvise with a nail in the wall, but a proper balancer costs under $15 and provides much better accuracy.
A compression tester helps diagnose engine problems before you start throwing parts at symptoms. Low compression indicates worn rings or valves – issues that usually aren’t worth fixing on older engines.
Safety Gear (Absolutely non-negotiable):
Safety glasses aren’t suggestions – they’re mandatory. I’ve removed metal shavings from too many eyes to be casual about eye protection. Even routine maintenance can send debris flying in unexpected directions.
Work gloves protect hands from sharp edges and hot surfaces. I prefer mechanics’ gloves that provide dexterity while still offering protection. Your hands are your livelihood – treat them accordingly.
Jack stands or ramps for riding mowers. Never, ever work under a mower supported only by a jack. I’ve witnessed what happens when jacks fail, and it’s not something you forget.
DIY vs. Professional Territory:
Go-ahead-and-try repairs: Spark plugs, air filters, oil changes, blade sharpening, belt replacement, minor carburetor cleaning, fuel system maintenance. These carry a low risk of making problems worse and can save significant money.
Call-the-professionals territory: Engine rebuilds, transmission work, electrical diagnosis beyond basic switches, welding repairs, anything involving fuel tanks on riding mowers. These require specialized knowledge, expensive tools, and often cost more in mistakes than professional service.
The $75 Rule: If parts cost more than $75 and you’re not completely confident in your diagnosis, get a professional opinion first. I’ve seen too many expensive parts replaced unnecessarily because the real problem wasn’t correctly identified.
Ready to tackle your own lawn mower repairs? Here are the essential tools I recommend to get started with professional-quality diagnostics and repairs:
Lawn Mowers Maintenance Tools 2


Safety Reminders (From someone who’s learned the hard way):
Disconnect the spark plug before any work – even simple tasks like cleaning the deck. Engines can kick over unexpectedly, and moving blades don’t discriminate between grass and fingers.
Never work on hot engines. Let them cool for at least 30 minutes after running. Hot oil will give you nasty burns, and hot metal expands, making reassembly problematic. Following proper safety protocols is essential when performing any maintenance work.
Properly stabilize mowers before lifting or tilting. Push mowers should be tilted with the air filter side up to prevent oil from entering the combustion chamber. Riding mowers need proper support before any work underneath.
Advanced Troubleshooting: Engine, Electrical & Drive Issues
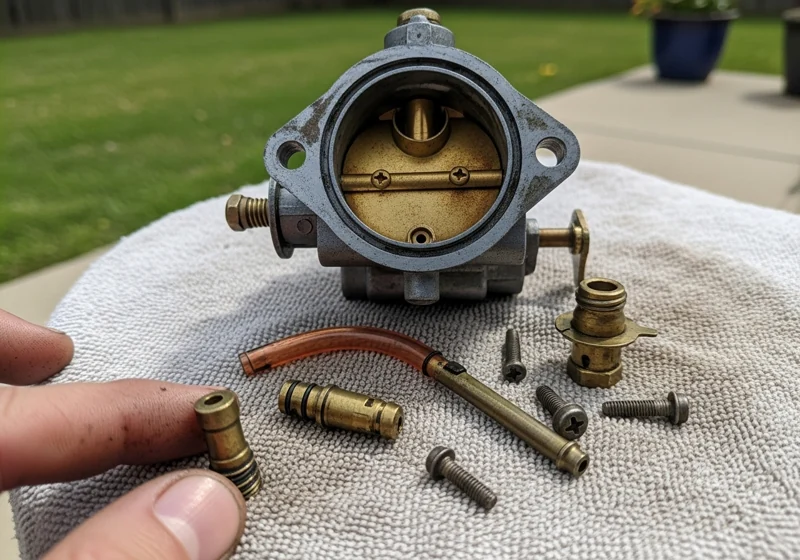
When basic fixes don’t solve your problems, it’s time to dig deeper into the mechanical mysteries. These advanced issues require more diagnostic skill and patience, but understanding them can save hundreds in professional fees and help you make informed repair-or-replace decisions.
Engine Performance Mysteries
Carburetor Problems Beyond Basic Cleaning:
When your mower runs rough, surges like a caffeinated teenager, or dies under load after basic maintenance, the carburetor likely needs internal attention. Modern ethanol fuels leave deposits that clog microscopic passages inside the carburetor – passages you can’t reach with spray cleaners alone.
Remove the carburetor bowl and examine the main jet (that brass piece with the tiny hole). This opening must be absolutely clear – even microscopic debris affects performance dramatically. Use thin wire from a twist-tie to clear it; never drill bits, which can enlarge the opening and destroy the carburetor completely.
The float and needle valve control fuel level inside the carburetor like a toilet tank mechanism. If gasoline pours out when you remove the bowl, the needle valve isn’t sealing properly. This eight-dollar part prevents flooding and ensures consistent fuel delivery.
Valve Issues and Timing Problems:
Engines that are difficult to start when hot often have tight valve clearances. As engines heat up, metal expands, and tight valves can’t close completely. This requires feeler gauges and specific procedures for each engine type, but it’s a common cause of hot-start frustrations.
Valve timing problems usually result from a sheared flywheel key – that small metal piece that aligns the flywheel with the crankshaft. If you hit something solid enough to stop the blade instantly, this key shears to protect the crankshaft from damage. The engine will run poorly or not at all until it’s replaced.
Electrical System Diagnosis
Beyond Basic Spark Testing:
Intermittent spark problems often originate from failing ignition coils. These coils work perfectly when cool but fail when hot, creating mysterious problems that appear and disappear like automotive ghosts. Test by running the engine until it starts misbehaving, then immediately check for spark.
Kill switches and safety interlocks can fail in subtle ways that aren’t immediately obvious. A partially failed switch might allow starting, but cause random shutdowns that’ll drive you absolutely crazy. Use a multimeter to test continuity through each safety switch with the system in both positions.
Charging System Problems (Riding Mowers):
If your riding mower battery keeps dying despite seemingly normal operation, the charging system isn’t working properly. Most riding mowers use simple alternator systems that should produce 13-14 volts at the battery terminals while running at full throttle. Lower voltages indicate failed alternators or broken wiring.
Check the stator (the stationary alternator component) by testing the resistance between the two output wires. Infinite resistance means an open circuit; zero resistance indicates a short. Either condition requires replacement, unfortunately.
Drive System Complications
Hydrostatic Transmission Troubles:
Hydrostatic transmissions that operate sluggishly or make whining noises usually need fluid service. However, this isn’t as simple as draining and refilling – these systems often have internal bypass valves requiring resetting and purging procedures to remove air bubbles.
Drive belt problems aren’t always obviously visible wear. Belts can stretch significantly without showing cracks, causing slip under load that feels like transmission problems. Measure belt length against specifications, and check pulley alignment – misaligned pulleys will destroy belts quickly.
Zero Turn Drive Problems:
Independent wheel motors on zero turns can fail internally while still appearing functional. If one side consistently runs slower than the other, causing the mower to pull to one side during operation, that motor is likely failing internally and needs replacement.
Neutral adjustment on zero-turn control arms is critical and can drift over time through normal use. If your mower creeps forward or backward in the neutral position, these adjustments need tweaking. This requires specific procedures and shouldn’t be attempted without the service manual.

Remember, lawn mower troubleshooting is mostly about patience, systematic thinking, and not getting frustrated when things don’t work immediately. Start with simple solutions, keep detailed records of what you’ve tried, and don’t be afraid to walk away and return with fresh eyes if you get stuck. In my fifteen years of working on these machines, I’ve learned that the solution is usually simpler than it first appears – you just need to approach problems methodically and logically.
Your mower genuinely wants to run properly; sometimes it just needs a little help getting there. With these techniques and a basic toolkit, you’ll handle the vast majority of problems yourself and save hundreds in repair costs annually. Trust me on this one – there’s nothing quite like the satisfaction of firing up a mower you fixed yourself on a perfect Saturday morning, coffee in hand, ready to tackle that lawn that’s been mocking you all week.
Fresh gas alone doesn’t guarantee starting – this assumption trips up homeowners constantly. Check your spark plug first (it should produce a strong blue spark), then verify your air filter isn’t completely clogged. Even with fresh fuel, a dirty carburetor from previous old gas can prevent starting entirely. If the engine turns over but won’t catch, try spraying a small amount of starting fluid into the air intake. If it starts briefly then dies, your carburetor needs cleaning or fuel isn’t reaching the engine properly.
Craftsman lawn mower troubleshooting in my experience centers around three main issues: safety bail problems (the handle must be held firmly against the grip with conviction), fuel system issues (they’re particularly sensitive to old gasoline), and blade engagement problems on riding models. The safety switches on Craftsman mowers are more sensitive than most other brands, so cleaning connections and ensuring proper operation of all safety features usually solves those mysterious shutdown problems.
Ryobi lawn mower troubleshooting for battery models starts with the battery itself, naturally. If your mower suddenly loses power during operation, the battery management system may need calibration – fully discharge the battery, then charge it completely without interruption. Check that battery contacts are clean and making solid connection. If the mower bogs down in normal grass conditions, the blade is likely dull (battery mowers are significantly more sensitive to cutting resistance than gas models).
Start with the parking brake system – zero turns absolutely won’t start unless the brake is properly engaged and both control arms are in neutral position. Check that you’re sitting fully on the seat (the seat switch is weight-activated and pretty sensitive). If these basics are correct, follow normal starting troubleshooting procedures: spark, fuel, and air. Zero turns have more safety interlocks than other mower types, so systematically check each one methodically.
Most lawn mower problems are DIY-friendly if you’re comfortable with basic tools and following instructions. I recommend starting with simple fixes: spark plugs, air filters, oil changes, and belt replacements. These have low risk of making problems worse and can save substantial money over time. However, engine rebuilds, electrical diagnosis beyond basic testing, and transmission work require specialized knowledge and expensive tools. My personal rule: if parts cost more than $75 and you’re not confident in your diagnosis, get a professional opinion first to avoid expensive mistakes.
