
Small Engine Repair: DIY Troubleshooting Guide 2025
Your mower’s sitting in the garage making that clicking sound again. Or maybe it’s your pressure washer that decided this morning wasn’t the morning. Either way, you’re here because something with a small engine repair problem is keeping you from getting work done, and the thought of loading it into your truck and driving to a repair shop makes you want to take a nap instead.
Table of Contents
▼- Understanding Small Engine Repair Basics: What You Need to Know
- Essential Tools for DIY Small Engine Repair
- Diagnosing Common Small Engine Problems: Troubleshooting Guide
- How to Fix Small Engines That Won’t Start
- Small Engine Reconditioning: When to Repair vs Replace
- Lawn Engine Repair: Mower-Specific DIY Fixes
- Small Outboard Repair: Marine Engine Troubleshooting
- Finding Small Engine Places: When to Call a Professional
- Conclusion: Your Small Engine Repair Journey Starts Here
I’ve been there. More times than I care to admit, actually. Fifteen years ago, I paid a shop $220 to fix my Toro mower. Guy had it for three days. Know what he did? Cleaned the carburetor and changed the spark plug. Took him maybe thirty minutes. That’s when something clicked for me (unlike my mower, which was clicking for entirely different reasons). These engines aren’t magic. They’re not even that complicated. They just look intimidating when you don’t know what you’re looking at.
So here’s what happened next: I bought a socket set and started fixing my own stuff. Then my neighbor’s stuff. Then pretty much everyone’s stuff is on my street. Turned into a whole business, which is why I’m writing this now instead of sleeping in on a Tuesday. Because that $220 lesson? It’s worth sharing.
Understanding Small Engine Repair Basics: What You Need to Know
Every small repair engine I’ve torn apart – and we’re talking hundreds at this point – follows the same basic pattern. Doesn’t matter if it’s powering a $200 Walmart mower or a $2,000 generator. Four systems keep these things running, and when one of them throws a fit, your weekend plans go sideways.
You’ve got fuel going in, spark lighting it up, air mixing with everything, and compression making it all explode in the right direction. That’s it. No fancy computers on most of them (yet), no sensors that cost more than the equipment, just mechanical parts doing mechanical things.
The fuel system moves gas from your tank to a carburetor that mixes it with air. The ignition system creates a spark at exactly the right moment. The compression system (piston, cylinder, all that) squeezes everything tight before the explosion. And the cooling system keeps the whole party from melting itself.
When I talk to customers, about 6 out of 10 problems trace back to something in the fuel system. Another 2 or 3 are ignition issues. One is compression-related, and the rest are weird stuff that keeps my job interesting. Point being, if you can figure out fuel and spark, you’re already ahead of 85% of the problems you’ll see.
Four-stroke engines (most lawn mowers and generators) use straight gas and have a separate spot for oil. Two-stroke engines (trimmers, chainsaws, some older stuff) need you to mix oil with the gas. Getting this wrong isn’t a small mistake. A customer of mine dumped straight gas into his two-stroke leaf blower last fall. Seized the engine completely. $180 to replace what could’ve been avoided by reading the cap that literally says “50:1 mix.”
My daughter asked me once why I spend so much time explaining this stuff to people. Fair question from a teenager. But here’s the thing – when you understand what’s happening inside that engine, it stops being this mysterious black box that only mechanics can touch. It becomes a puzzle you can solve. And honestly, most of the time, it’s not even a hard puzzle.
Essential Tools for DIY Small Engine Repair
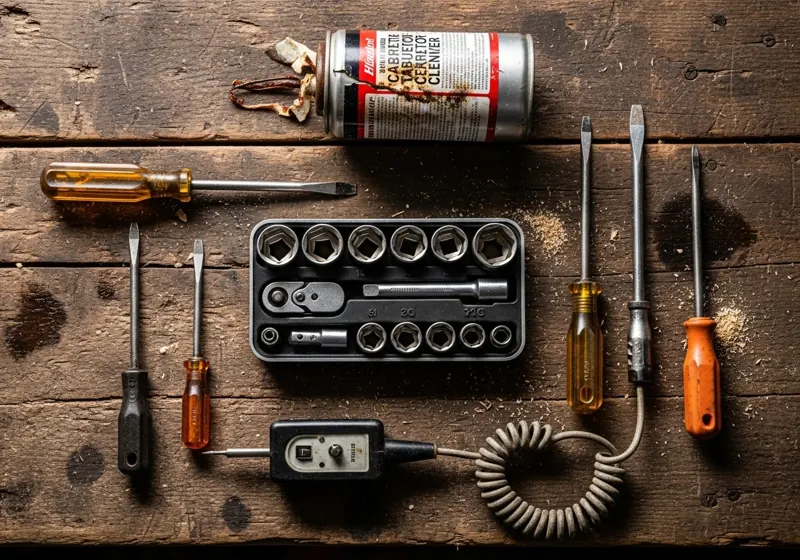
Every spring, someone calls me asking what tools they need for small engine repair. They’re expecting some massive list that requires a second mortgage. Then they’re surprised when I tell them $150 covers pretty much everything for basic repairs. Less if they’ve already got a homeowner toolkit.
Socket set is non-negotiable. You need both metric and standard sizes because manufacturers can’t agree on anything. A decent set from any hardware store runs about $40-60. I’m still using the Husky set I bought in 2012. The aluminum covers on these engines aren’t coming off with positive thinking and a prayer, despite what YouTube comments might suggest.
Screwdrivers next. Phillips and flathead, different sizes. You’ll be taking off air filter covers, adjusting carburetors, and dealing with those tiny screws that determine whether your engine purrs or sounds like it’s mad at you. Get a decent set with comfortable handles. Your hands will thank you after an hour of working on a stubborn carburetor.
Adjustable wrench, 8-inch minimum. For everything designed by someone who hates socket wrenches. You’ll use it more than you think.
Needle-nose pliers saved my sanity more times than I can count. Pulling fuel lines, grabbing springs that don’t want to cooperate, fishing out that clip you dropped into the engine shroud. Sometimes I think small engine manufacturers deliberately design things to require needle-nose pliers just to test our patience.
Carburetor cleaner spray is basically magic in a can. I go through maybe twenty cans every season. Get the kind with the little red straw attachment. You’ll need to spray into tiny passages, and that straw makes all the difference between fixing the problem and making a mess.
Spark plug socket with the rubber insert is worth the $5. A regular deep socket might work, but why risk cracking the porcelain when spark plugs are already the most fragile thing you’re handling?
Spark tester changed my life. Ten bucks. Tells you instantly if your ignition system works. Way better than the old method of holding the plug near the engine and hoping you don’t become a human ground wire. Don’t do that. Just spend the ten bucks.
Those are must-haves. Nice-to-haves include a compression tester ($25-40) for checking engine health, a multimeter ($20-30) for electrical stuff, wire brushes ($10) for cleaning carbon buildup, and a shop vacuum if you don’t have one already. But I fixed fifty engines before owning any of those nice-to-haves.
One more thing, and this matters more than any tool: work in a clean space. I learned this after spending an hour looking for a carburetor jet in my gravel driveway. Turned out it had bounced under my workbench, but I didn’t know that until after I’d already ordered a replacement. Put down cardboard. Work on a bench. Even just cleaning off your garage floor helps. Future, you will send current you a thank-you card.
Diagnosing Common Small Engine Problems: Troubleshooting Guide
Before you start taking things apart – and I know the temptation is strong because I feel it too – you need to figure out what’s actually wrong. Can’t tell you how many times someone’s described their problem as “it just won’t run” when the actual issue was anything from an empty tank to a broken flywheel key.
I use what I call the three-check method. Works about 90% of the time, takes maybe ten minutes, and saves you from replacing parts that didn’t need replacing.
Check One: Fuel Flow
Fresh gas in the tank? And I mean fresh. Gas starts going bad after about thirty days without a stabilizer. Smells different, too. Good gas has that sharp, chemical smell. Old gas smells sweet and wrong, almost like varnish. Because that’s basically what it’s turning into.
Can you see gas flowing to the carburetor? Sometimes the easiest check is just disconnecting the fuel line at the carb (have a rag ready) and seeing if anything comes out. If not, you’ve got a blockage somewhere between the tank and your problem.
Is the fuel shutoff valve actually open? Laugh if you want. I check this first on every service call because it’s been the problem enough times that I stopped feeling dumb about checking it.
Check Two: Spark
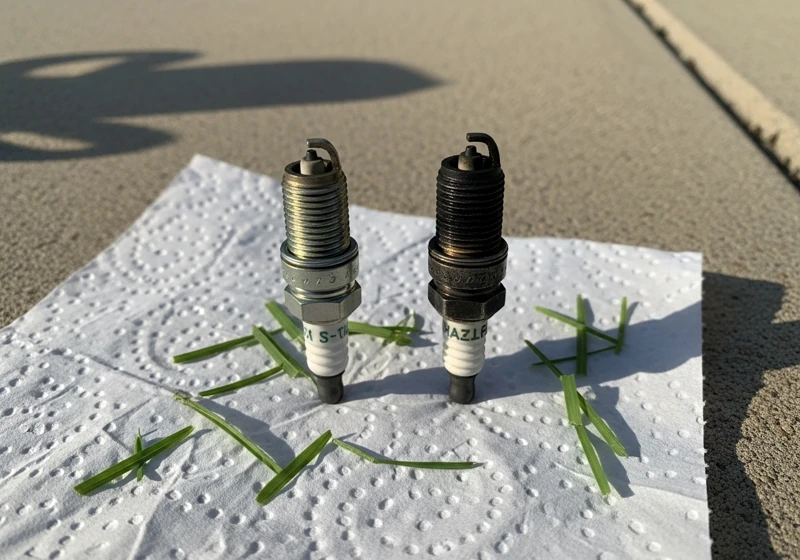
Pull the spark plug. Look at it. Should be tan or light brown. Black and crusty means it’s been running rich or getting oil where oil shouldn’t be. White and crusty means it’s running too lean or it’s the wrong heat range for your engine. Wet with gas means you’ve got flooding issues and probably a stuck carburetor float.
Hook up your spark tester or ground the plug against the engine (carefully). Pull the starter rope. You should see a strong blue spark jumping the gap. Weak orange spark or no spark at all means your ignition system needs attention, usually the coil.
Check Three: Air Flow
Take out the air filter and look at it. Foam filters should feel like a sponge when you squeeze them, not like a piece of hardened foam from a couch your grandpa owned in 1987. Paper filters should let light through when you hold them up. If they don’t, they’re done.
Try starting the engine with the filter out. Don’t run it long, but if it suddenly starts without the filter, well, you just found your problem.
Now here’s where people usually ask about compression. Why don’t I check that first? Because compression problems are actually pretty rare unless something obviously broke. Thrown rod, cracked block, valve failure – these are catastrophic failures you usually know about because they make expensive noises or won’t turn over at all. If you’ve got fuel, spark, and air but still no start, then yeah, grab the compression tester.
Reading symptoms helps too. Engine cranks but won’t start? Nine times out of ten, it’s fuel or spark. Starts but dies immediately? Carburetor or fuel flow issue almost every time. Runs rough or surges? Carburetor adjustment, or you’ve got an air leak somewhere. No power? It could be a governor, blocked exhaust, or worn compression. Hard starting when cold? Choke problem or carburetor. Excessive smoke? Wrong oil level, wrong fuel mix on two-strokes, or worn rings.
I keep a notebook – yes, an actual paper notebook because I’m apparently 70 years old – where I write down symptoms and what fixed them. After a while, you start recognizing patterns. That specific sputter pattern? Dirty main jet in the carburetor. That particular rattling knock? Loose flywheel. But until you’ve built up that experience, stick to the systematic approach and you’ll be fine.
How to Fix Small Engines That Won’t Start
The wo n’t-start problem is where most repair bills happen. Also where you can save the most money learning to fix it yourself. So let’s walk through this like we’re standing in your garage right now, looking at your equipment that refuses to cooperate.
Fuel First
Pull the fuel line off at the carburetor. Have a rag ready because gas is probably going to go places. Turn your fuel valve on or tip the equipment if there’s no valve. Gas should flow freely. No flow means a clogged fuel filter, a blocked tank vent, or a bad fuel valve. Replace the filter first. They’re $5-8 and clog up all the time, especially if you’re like most people and don’t change them until something goes wrong.
Spark Plug Reality Check
Take out the spark plug and actually look at it. I mean, really look. The gap should be 0.030″ for most small engines, though your manual might say different. If it’s been in there more than a season, or if it looks questionable, just replace it. They’re $3-6. I’ve wasted hours troubleshooting problems that a four-dollar spark plug would’ve solved instantly.
Test for spark using the spark tester we talked about earlier. Strong blue spark that jumps consistently? Your ignition system is probably fine. Weak orange spark or no spark? Time to replace the coil, which runs about $25-40 depending on your engine.
Air Filter Situation
Foam filter? Wash it in warm, soapy water. Let it dry completely – and I mean completely, not “eh, feels pretty dry.” Then put a few drops of motor oil on it and squeeze it around. Paper filter? Tap it gently against something to knock debris loose. Or just replace it for $8-15 because they’re not really designed to last forever, despite what the package claims.
The Carburetor Problem
Here’s where things get interesting. The carburetor on your lawn engine repair project is probably the source of your frustration. Gas sitting over winter turns into varnish that clogs up all the tiny passages inside. It’s chemistry, and chemistry doesn’t care about your weekend plans.
Quick carb cleaning attempt before pulling it apart:
Remove the air filter with the engine off. Spray carburetor cleaner directly into the throat of the carb – that round opening where air normally flows in. Let it sit for ten minutes. Try starting. If it starts (even if it runs rough), keep giving it short bursts of cleaner while it’s running until it smooths out. Sometimes this is enough. Sometimes it’s not.
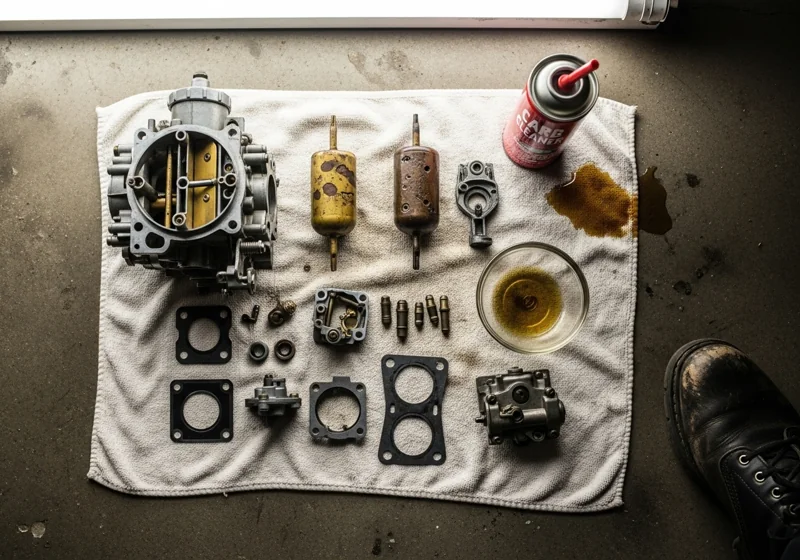
If that doesn’t work, you’re pulling the carb. Sounds scarier than it is. Take pictures with your phone before you disconnect anything. I’m serious about this. You will not remember where that spring goes. Nobody ever remembers where that spring goes. For lawn mower owners dealing with persistent carburetor issues, our detailed carburetor cleaning and repair guide walks through every step with photos and troubleshooting tips.
Carb usually comes off with 2-4 bolts and a couple of hoses. Remove the bowl (bottom part). Take out all the jets and small brass pieces. Spray everything thoroughly with carb cleaner. Use a small wire – not a drill bit, never a drill bit because you’ll make the holes bigger – to clear any blocked passages.
Reassemble everything using your photos as a guide. If your carb looks really crusty inside, you can buy rebuild kits for $10-20. If it looks like someone stored it at the bottom of a lake, just buy a new carb. They’re $25-60 on Amazon for most small engines, and sometimes spending three hours fighting with a fifteen-year-old carburetor just isn’t worth it.
Starting Procedure
Most engines have a primer bulb – that squishy button thing. Push it 3-5 times to pump fresh gas into the carb. If you’ve got a choke instead, close it all the way for cold starts.
Pull the starter rope with complete, smooth pulls. Not those wimpy half-pulls where you’re barely trying. The engine needs to spin fast to generate a spark and build compression. Really commit to it.
Starts but dies immediately? Fuel delivery problem. The carburetor isn’t getting enough gas, or there’s still varnish blocking something.
Here’s a tip that cost me some frustration to learn: once you get it running, let it run for at least fifteen minutes. This lets the carburetor cleaner finish clearing out any remaining deposits and confirms everything actually works. Too many times I’ve gotten an engine started, shut it off after thirty seconds, feeling proud of myself, then had to start the whole process over the next day.
Small Engine Reconditioning: When to Repair vs Replace
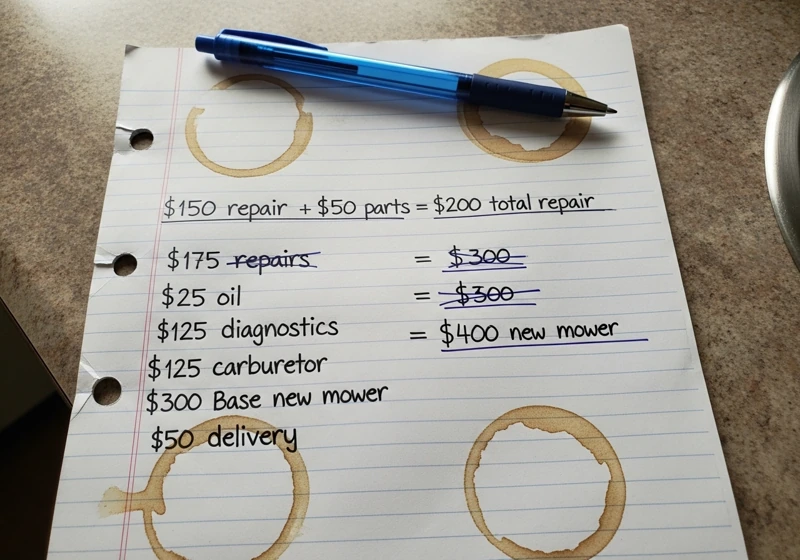
Nobody wants to have this conversation, but sometimes your equipment isn’t worth fixing. I’ve watched people dump $300 into repairing a mower that cost $200 new. I’ve also watched people throw away a $600 machine that needed a $20 carburetor. Both extremes hurt to witness.
My rule of thumb for small engine reconditioning decisions comes down to math and common sense:
Fix it if the equipment is less than five years old, repair costs less than 40% of replacement cost, it’s a quality brand like Honda or Kawasaki, the problem is basic fuel or ignition stuff, and the frame and major components are solid.
Think about replacing it if it’s ten years old, with multiple problems stacking up, repair would cost more than 60% of a new one, it’s a budget brand that’s already given you trouble, you need major internal parts like pistons or crankshafts, or the frame is rusted through.
Definitely replace if you’ve got a cracked engine block, thrown rod (you’ll know because there’s a new hole in your engine that shouldn’t be there), seized engine that won’t turn even with the plug out, multiple major failures happening at once, or the whole unit costs less than $150 new.
Environmental impact matters too. If you can fix it with a $30 carb kit and an hour of work, that’s better than sending it to a landfill. But don’t throw good money at something that’s fundamentally worn out. There’s a difference between fixing something and putting it on life support.
What Shops Charge vs What You Pay
Let me break down real numbers from 2025 so you can see why I push DIY so hard:
Shops charge $75-150 just to diagnose what’s wrong, sometimes waived if you do the repair. Carburetor cleaning runs $80-150. Carburetor replacement is $120-200. Ignition coil replacement costs $100-180. Basic tune-up is $90-140. Full engine reconditioning can be $300-600 or more.
DIY costs for the same work? Carburetor kit is $10-20. New carb is $25-60. Spark plug is $3-6. Air filter is $8-15. The fuel filter is $5-8. Ignition coil is $25-40. Complete tune-up parts together cost about $30-50.
That’s why I’m passionate about this stuff. You’re saving $50-100 minimum per repair by doing it yourself. Over a season, that adds up to real money.
When Reconditioning Makes Sense
Sometimes an engine is worth saving but needs more than basic maintenance. Quality equipment like a $700 Honda mower or $1,200 generator with low compression but no catastrophic damage, or high-quality two-stroke equipment burning too much oil but still running – these might be worth reconditioning.
Reconditioning typically means new piston rings, valve work, carburetor rebuild, new gaskets throughout, and timing adjustment. Shops charge $300-600. You can do it yourself for $100-150 in parts if you’re comfortable getting deeper into mechanical work.
I’ve reconditioned maybe thirty engines over the years. It’s satisfying to bring a tired engine back to life. But I only do it for equipment worth the effort. Commercial-grade engine on expensive equipment? Worth it. Twenty-year-old consumer-grade engine on a mower that’s seen better days? Probably not.
Lawn Engine Repair: Mower-Specific DIY Fixes
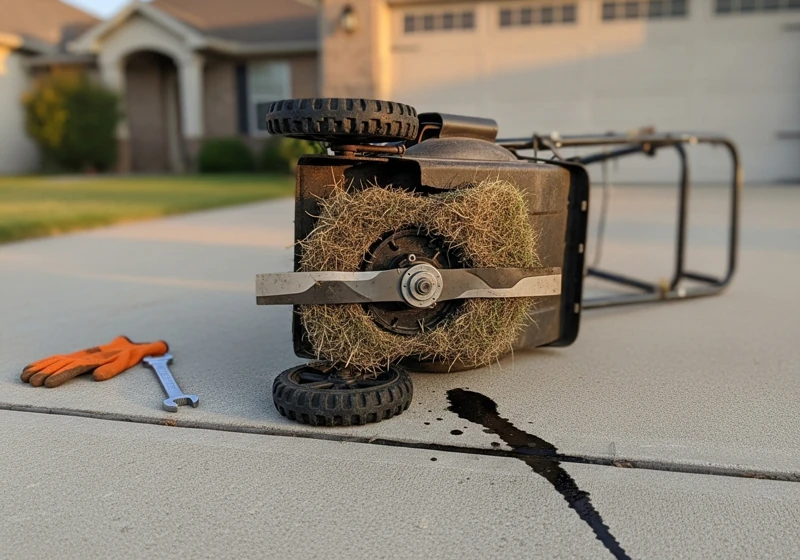
Lawn engine repair has its own quirks that other small engines don’t deal with. Let’s get specific about what actually breaks on mowers and how to fix it without calling someone who charges by the hour.
Walk-behind mowers have that blade brake system that stops the blade when you release the handle. This adds complexity. Cable adjustment goes out of whack. Brake pads wear down. Spring break. The blade should stop within three seconds of releasing the handle. If it doesn’t, you need to adjust or replace the brake system. This isn’t optional – it’s a safety thing that actually matters.
Problems You’ll Actually Face
Hit a rock and now your mower won’t start? Probably sheared the flywheel key. It’s a little metal alignment piece that times your ignition. Costs about three bucks. Takes fifteen minutes to replace. The flywheel has to come off, which means you need a flywheel puller ($15-25), but the job isn’t complicated.
Excessive vibration usually means a bent blade or a loose blade bolt. Take off the blade after disconnecting the spark plug wire – don’t skip that step. Lay the blade on something flat and spin it. Both ends should touch the surface evenly. If one side sits higher, the blade is bent. Replace it ($15-40). Never try straightening a bent blade. They’re hardened steel and will crack, then you’ll have shrapnel spinning at 3,000 RPM under your mower. Bad plan.
Loss of power under load happens when the mower starts fine but bogs down in thick grass. Check your governor adjustment first, then drive belt tension on self-propelled models, then blade sharpness, because dull blades need way more power, then look for grass buildup under the deck, creating resistance.
White or blue smoke usually means burning oil. Check your oil level first – it might be too high. Maybe you tipped the mower the wrong way, and oil got into the cylinder. Or you’ve got worn piston rings that need reconditioning or replacement. If you tipped it wrong, just run it for 5-10 minutes, and the smoke should clear. If not, you’ve got internal wear happening.
Seasonal Issues
Spring startup problems trace back to winter storage every single time. Either run your carb dry before storing or use a fuel stabilizer. I can’t stress this enough. The number of mowers I see with varnished carburetors because someone left gas in over winter could fund a small tropical island vacation for me and my family. Don’t be that person. Our complete winterization guide covers fuel stabilization, proper storage techniques, and end-of-season maintenance that prevents expensive spring repairs.
Fall issues are often air filter-related. All that dust and dried grass clogs filters fast. Clean or replace monthly during peak season.
Maintenance Schedule That Actually Works
Before each use: Check oil, scrape off grass buildup, and look at the blade.
Every 25 hours: Change oil, clean or replace air filter.
Every 50 hours: New spark plug, sharpen blade.
Every year: Complete tune-up, check cables and controls.
Every 2 years: Replace fuel lines because they get brittle.
And here’s my personal recommendation that my wife thinks is excessive: keep a mower log. Write down when you change oil, replace parts, and fix problems. When something goes wrong, you’ll know exactly what you did and when. Has saved me countless hours of troubleshooting.
Small Outboard Repair: Marine Engine Troubleshooting
Small outboard repair shares similarities with lawn equipment but adds water, salt, and corrosion to the fun. I don’t work on these as much as mowers, but I’ve fixed enough fishing boat engines to know where things go wrong.
Small outboards under 25 HP are almost always two-stroke engines. Simpler in some ways – no valves, no oil changes – but pickier about fuel mixture. You need the right gas-to-oil ratio, typically 50:1 for modern outboards. Use the wrong ratio or straight gas, and that engine seizes faster than you can say “well, that was expensive.”
Common Problems
Won’t start after sitting? Same basic issues as lawn equipment multiplied by water exposure. Check your fuel line bulb – it should be firm when primed. Check the fuel filter for gunk from the tank. Check spark plugs for moisture and corrosion. Check the choke adjustment because cold engines need it.
Runs but has no power? Usually, propeller issues or lower unit problems. Check for fishing line wrapped around the prop shaft because it’s ridiculously common. Look for damage or missing prop blades. Check for leaking gear oil – milky oil means water got inside, which is bad.
Overheating on outboards shows up as a weak or missing telltale stream (that little pee stream of water that shoots out). It could be a water pump impeller failure because those rubber blades wear out. It could be a blocked intake screen. It could be the thermostat stuck closed. Impellers should be replaced every 2-3 years, even if they look fine. They’re $15-30 and prevent $500 overheating damage.
Marine Maintenance
After every saltwater use: flush the engine with fresh water, spray fogging oil into the carburetor to prevent corrosion, and check for water in the fuel.
Storing for more than a month? Treat fuel with marine stabilizer (different from regular) and fog the engine. Marine environments destroy small engines if you let them.
When to Call Marine Mechanics
I’m confident with most small repair jobs, but outboards have situations where getting professional help makes more sense. Lower unit seal replacement requires special tools. Powerhead rebuild on outboards is trickier than regular small engines. Electrical system diagnosis on marine equipment gets complex fast. Anything with tilt and trim systems makes me nervous.
Marine mechanics charge $100-150 per hour around here. Try basic troubleshooting first, but if you’re dealing with internal problems or electrical gremlins, call someone who specializes in marine work.
Finding Small Engine Places: When to Call a Professional
I’m all about DIY small engine repair, but let’s be honest about when you need professional help. Sometimes, swallowing your pride and calling a shop is the right move.
Call a pro if you’ve tried basic troubleshooting and the problem persists. If the issue requires specialized tools you don’t have and don’t want to buy. If you’re not comfortable working on the repair, no shame in knowing your limits. If safety devices like blade brakes aren’t working right. If you need warranty work. If the problem is electrical, and multimeters make you nervous.
You can probably handle it yourself if it’s fuel system stuff, basic ignition problems, maintenance items like oil changes and filters, or simple adjustments.
Finding a Good Shop
Ask at your local independent hardware store – not big box stores. They know who’s reliable. Check for authorized service centers for your brand. Look for shops specializing in small engines, not general mechanics who also “do mowers.” Read reviews smartly – look for comments about diagnostic accuracy and honest pricing, not just “they were nice.”
Call and ask questions before dropping off your equipment. “Do you work on my brand?” “What’s your diagnostic fee?” “How long for typical repairs?” Shops giving clear answers earn trust.
Red Flags
Won’t give you a diagnostic fee estimate upfront. Insists on repairs without explaining what’s wrong. Pushes replacement when repair is clearly possible. Doesn’t offer a warranty on work. Can’t give you a timeframe. Doesn’t have parts access for major brands.
Lead Times in 2025
Spring (March through May): 2-4 weeks because everyone’s mower broke at once.
Summer (June through August): 1-2 weeks.
Fall (September through November): 1-2 weeks for leaf blowers and pressure washers.
Winter (December through February): Same day to one week. Best time for repairs.
Need it NOW? Shops usually have expedited service for an extra $50-75. Sometimes worth it, sometimes you could fix it yourself in that timeframe.
What Shops Cost
Diagnostic fee: $50-100, might be free or credited toward repair.
Labor rate: $75-120 per hour.
Parts: Retail price plus 20-40% markup.
Shop supplies fee: $10-25, which is normal.
Does that carburetor cleaning cost you $15 in parts and an hour? Shop charges $100-150 total. Fair enough – they’ve got overhead, expertise, and liability insurance. But it’s also why DIY makes financial sense for basic repairs.
Questions to Ask
“What exactly is wrong, and how did you diagnose it?”
“What’s the total cost, including parts and labor?”
“Are there cheaper options like rebuilding instead of replacing?”
“What’s the warranty on this repair?”
“How long will it take?”
Good shops appreciate informed customers asking questions. Sketchy shops get defensive. That tells you everything you need to know.
Even if you end up using a shop, understanding small engine repair basics makes you a better customer. You’ll know when someone’s feeding you nonsense about needing a new carburetor when cleaning would work fine. Not sure which parts you actually need? Our comprehensive lawn mower parts guide explains OEM versus aftermarket options, where to find quality replacements, and how to avoid buying the wrong components.
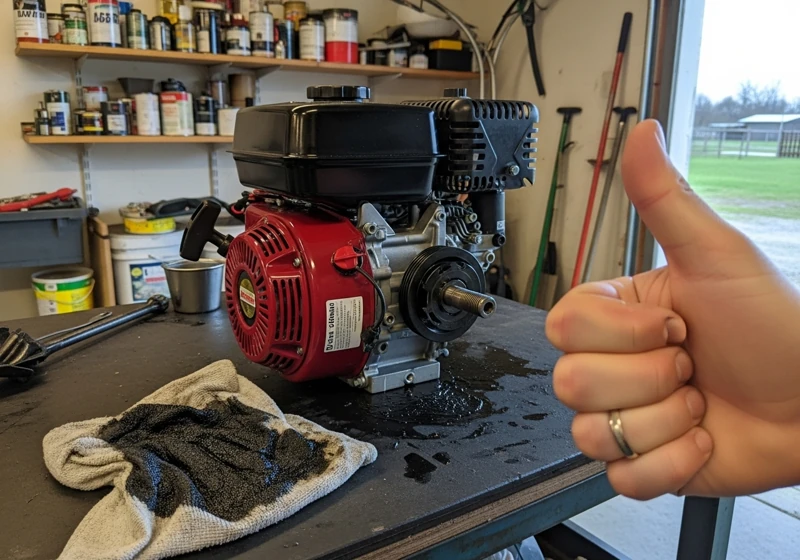
Conclusion: Your Small Engine Repair Journey Starts Here
That’s everything I wish someone had told me before paying $220 for a carburetor cleaning I could’ve done myself in forty-five minutes. Small engine repair isn’t the mysterious art that shops make it seem. It’s methodical troubleshooting, basic mechanical work, willingness to get your hands dirty.
Start simple next time your mower won’t start. Work through the three-check method: fuel, spark, air. The problem reveals itself in those first few minutes more often than you’d think. Keep a notebook of what you fix and how – becomes your personal troubleshooting guide over time.
Buy quality tools once, and they last twenty years. Learn to clean a carburetor properly, save hundreds every season. Understand when to DIY and when to call for help, never overpay for repairs again.
Don’t be intimidated by that small repair engine sitting in your garage. It wants to run. It’s designed to run. Usually just needs you to clear out old gas, clean a few parts, and give it a fresh spark plug. You can handle this.
There’s something satisfying about fixing your own equipment, too. That sense of accomplishment when you get a dead engine running again, knowing you saved $200 and learned something valuable. Worth more than the money to me.
My teenage daughter told me last week that my articles are “actually not boring,” which might be the highest praise I’ll ever receive from a sixteen-year-old. So if she can find this stuff interesting, maybe you will too.
Now get out there and fix something. Your equipment is waiting, and honestly, it’s probably not as broken as you think. Whether you’re maintaining a push mower, riding mower, or zero-turn, explore our complete seasonal lawn care guide for model-specific advice and year-round maintenance schedules.
DIY repairs run $10-50 in parts for common stuff like carburetor cleaning, spark plug replacement, and fuel filter changes. Professional shops charge $100-300 for the same work because of diagnostic fees ($50-100) and labor rates ($75-120 per hour). Major repairs like engine reconditioning cost $300-600 at shops but only $100-150 in parts if you do it yourself. Most homeowners save $150-200 per repair by doing basic maintenance themselves. I track this stuff because I’m weird like that, and the savings add up fast over a season.
Yes. About 85% of small engine problems are fuel or spark issues that anyone with basic tools can fix. You don’t need special training to clean a carburetor, change a spark plug, or replace an air filter. I started with zero mechanical experience and learned through YouTube videos and making mistakes. Start with basic troubleshooting – check fuel flow, test spark, ensure air flow. If you can follow instructions and don’t mind getting your hands dirty, you can handle most repairs. Worst case, you learn something new and still have the option to take it to a shop.
Essential tools cost about $100-150 total: socket set ($40-60), screwdrivers ($15), adjustable wrench ($10), needle-nose pliers ($8), carburetor cleaner ($6), spark plug socket ($5), spark tester ($10). Nice additions include a compression tester ($25-40), a multimeter ($20-30), and wire brushes ($10). I fixed my first fifty engines with just the essentials. Most repairs need stuff you probably already own if you’ve got a basic homeowner toolkit. Don’t let tool requirements stop you from trying.
Most common reasons: old or contaminated fuel (40% of cases), dirty carburetor (30%), fouled or wrong-gap spark plug (15%), clogged air filter (10%), ignition system failure (5%). Start by checking fuel flow, then test for spark, then inspect the air filter. About 90% of won’t-start issues fall into these three categories. If you’ve got fresh fuel, good spark, and clean air, but it still won’t start, then look at compression or other complex issues. But check the simple stuff first because it’s usually simple stuff.
Repair if the equipment is less than five years old, costs less than 40% of replacement value to fix, is a quality brand (Honda, Kawasaki, commercial Briggs), and has basic problems. Replace if it’s ten-plus years old, needs repairs costing more than 60% of replacement, has multiple major problems, or is a budget brand showing wear. Simple test: would you buy this exact equipment used for what the repair costs? If no, replace it. If yes, fix it. Sometimes the answer isn’t clear, and that’s when you go with your gut feeling about whether the equipment has more good years left.
Use the three-check method. Check fuel flow first – fresh gas in tank, fuel reaching carburetor, shutoff valve open. Check spark second – remove plug, test for strong blue spark using spark tester. Check air flow third – inspect and clean the air filter, make sure it’s not clogged. This approach catches about 90% of problems. Take pictures before taking anything apart. Work in a clean area. Tackle one issue at a time. Don’t skip steps trying to save time because that’s how you end up replacing parts that didn’t need replacing.
Top five repairs: carburetor cleaning or replacement (40% of everything I see), spark plug replacement (20%), air filter replacement (15%), fuel system work like filters and lines (12%), ignition coil replacement (8%). Everything else combined makes up 5%. Fuel system issues dominate because people store equipment with old gas that turns to varnish and clogs everything. Using a fuel stabilizer or running the carburetor dry before storage prevents most problems. It’s way easier to prevent than fix.
Check your local independent hardware store for recommendations – not big box stores. Search for authorized service centers for your equipment brand. Look for shops specializing specifically in small engines rather than general mechanics. Good shops give upfront diagnostic fees ($50-100), explain problems clearly, offer repair versus replace options, provide warranties, and give realistic timeframes. Avoid shops that won’t provide estimates, push unnecessary work, or can’t answer basic questions. Spring is busiest (2-4 week wait), winter is fastest (same day to one week). Plan accordingly.
