
Eco-Friendly Lawn Mower Maintenance: Tips for Longevity
You know that sinking feeling when you pull the cord on your mower and get… absolutely nothing? Yeah, I’ve been there. Last spring, my neighbor Dave came over looking defeated, dragging his two-year-old electric mower behind him. “Mike, this thing’s toast,” he said. “Guess I’m buying another one.”
Table of Contents
▼- Why Eco-Friendly Mower Maintenance Matters
- The Ultimate Guide to Annual Mower Maintenance
- Step 1: The Detective Work (Complete Inspection)
- Step 2: Electrical System Reality Check
- Step 3: Blade Reality Check
- Step 4: Deck and Housing Deep Dive
- Step 5: Wheels and Drive Components
- Step 6: Handle and Control Systems
- Step 7: Test Run and Documentation
- Seasonal Care: Winterizing and Spring Prep
- Winter Storage: Protecting Your Investment
- Spring Awakening: Getting Back to Work
- Key Tips for Electric and Reel Mowers
- Electric Mower Maintenance: Power Management
- Reel Mower Maintenance: Precision Mechanics
- DIY Repairs for Common Mower Issues
- Power Problems You Can Fix
- Cutting Performance Fixes
- Mechanical Problems Within Reach
- The Importance of Blade Sharpening
- Why Sharp Blades Transform Everything
- Sharpening Schedule That Works
- DIY vs. Professional Service
- Safety Isn’t Optional
- Your Next Steps to Mower Longevity
Twenty minutes later, after a quick cleaning and some basic maintenance, that “dead” mower was purring like a kitten. Dave’s jaw dropped. “That’s it? That’s all it needed?”
Here’s the thing – after fixing thousands of mowers over the past 15 years, I can tell you that most “broken” eco-friendly mowers just need a little TLC. The problem is, nobody teaches you how to maintain these machines properly. You buy them, use them until they quit, then toss them. But with the proper eco-friendly lawn mower maintenance routine, your equipment can outlast your mortgage.
Trust me, I’ve seen 12-year-old electric mowers that still cut better than brand-new gas models. The secret? Their owners actually took care of them. For a detailed comparison of gas vs. electric performance, you might be surprised by what proper maintenance can achieve.
Why Eco-Friendly Mower Maintenance Matters
Look, I get it. Maintenance sounds boring. However, let me explain why it’s actually the smartest thing you can do for your wallet and the planet.
When I first started in this business, I was shocked by how many perfect mowers ended up in dumpsters. We’re talking about equipment that could’ve run for another decade with proper care. It drove me crazy – all that waste for no good reason.
The Money Factor
Here’s some real math for you. A decent electric mower costs around $400-600 these days. With basic maintenance, that same mower will serve you for 12-15 years. Skip the maintenance, and you’re shopping for a replacement in 5-6 years. If you’re still deciding between different models, our guide on choosing between corded vs. cordless electric mowers can help you make the smartest investment.
I still have customers who are using Honda mowers I serviced in 2010. That’s real money staying in their pockets instead of going to the manufacturer.
Environmental Reality Check
Every mower that ends up in the landfill represents approximately 80 pounds of metal, plastic, and electronics. Multiply that by the 6 million mowers sold every year, and we’re creating a mountain of unnecessary waste. The EPA’s waste reduction guidelines emphasize how proper maintenance significantly reduces environmental impact.
However, here’s the thing that really gets me fired up – most of these mowers fail due to simple, preventable problems. Dead batteries that were never properly maintained. Rusty decks that were never cleaned. Dull blades that stressed the motor until it burned out.
The Performance Difference
I can spot a well-maintained mower from across the yard. It cuts cleaner, runs quieter, and the owner isn’t fighting with it every weekend. Compare that to the poor souls wrestling with neglected equipment that barely limps through each mowing session.
The best part about eco-friendly mowers? They’re designed to be maintained by regular folks like you and me. No complex carburetors or finicky engines. Just simple, reliable machines that respond beautifully to basic care. If you’re exploring your options, our comprehensive guide to eco-friendly lawn mowers helps you understand why maintenance-friendly design matters for long-term ownership.
The Ultimate Guide to Annual Mower Maintenance
Every March, I get the same question: “Mike, what should I do to get my mower ready for the season?” After doing this dance thousands of times, I’ve boiled it down to seven essential steps that’ll keep your equipment running strong.
Step 1: The Detective Work (Complete Inspection)
I always start with my hands and eyes before touching any tools. Unplug that electric mower first – I’ve seen too many accidents from folks getting eager with tools while the power’s still connected.
Now, get down and dirty. I’m talking about really taking a look at your mower. Run your hands over the cutting deck, feeling for rough spots or damage. I found a crack in a customer’s deck last month that would’ve split wide open mid-season if we hadn’t caught it.
Grass buildup drives me up the wall because it’s so preventable. I see mowers come in looking like they’ve been dipped in concrete because the owner never scraped off the clippings. That buildup doesn’t just look bad – it holds moisture against the metal and turns your deck into Swiss cheese.
Pro tip from my repair days: Use a plastic putty knife for scraping. Metal tools can nick the deck’s protective coating, and once that’s gone, rust moves in fast.
Step 2: Electrical System Reality Check
This is where electric mower maintenance gets serious. I’ve seen house fires caused by damaged extension cords, so be cautious here.
Start at the plug and work your way down the entire length of the cord. I’m looking for any cuts, kinks, or spots where the outer jacket seems worn. If you find damage, replace the cord immediately. No duct tape fixes, no electrical tape band-aids. Replace it.
Battery connections are another trouble spot. I keep a wire brush in my toolbox specifically for cleaning corroded terminals. That white or green crusty stuff isn’t just ugly – it kills electrical connections and can ruin expensive batteries.
Here’s something most people miss: test every safety switch. The blade engagement, the handle controls, everything. These switches save body parts, and I’ve seen too many fail silently until someone needs them most.
Step 3: Blade Reality Check
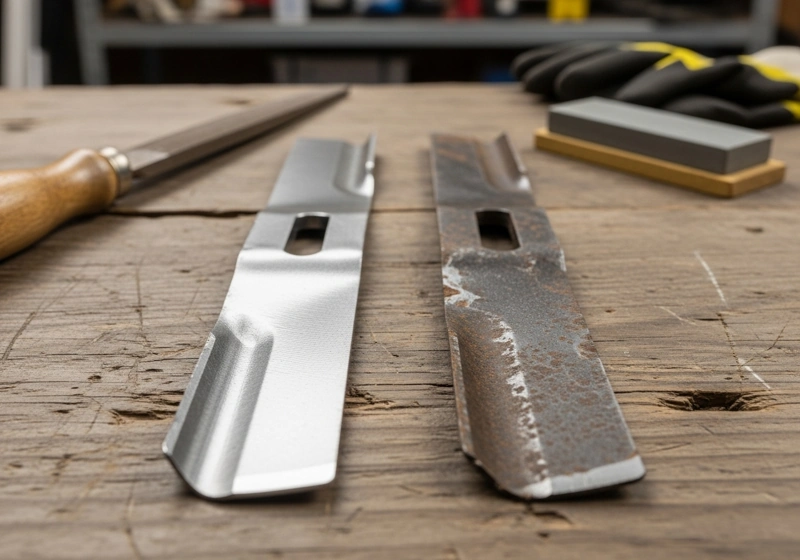
Let me be blunt – most people have no idea how bad their blades really are. I pull blades that look like they’ve been gnawing through concrete, and the owner swears they “just sharpened it last year.”
Remove the blade (with power disconnected, of course) and thoroughly examine it. A good blade should look sharp enough that you’d hesitate to run your finger along the edge. If it’s rounded over, nicked up, or has chunks missing, it needs professional help.
I sharpen a lot of blades in my shop, but I always tell customers: invest in learning to do basic sharpening yourself. A bench grinder and 30 minutes of practice will save you $20-30 every time you need blade service. Our step-by-step blade sharpening guide guides you through the entire process, and understanding different blade types ensures you sharpen correctly.
Step 4: Deck and Housing Deep Dive
The cutting deck takes more abuse than any other part of your mower. After 15 years of inspecting damaged decks, I can usually predict failure points just by reviewing the maintenance history.
Small rust spots are no big deal if you catch them early. Sand them smooth, apply some touch-up paint, and they’ll last for years. Ignore them, and you’ll be shopping for a new deck or a new mower.
Deck level is something most folks never check, but it’s enormous for cut quality. An unlevel deck creates scalping on one side and long grass on the other. It also stresses drive components because the mower is working harder to compensate for the increased load.
Step 5: Wheels and Drive Components
Wobbly wheels make me cringe because they’re usually an early warning sign of bigger problems. Check each wheel for smooth rotation and proper mounting. If a wheel wobbles, the bearing is likely defective, and this issue will spread throughout the drive system if left unaddressed.
For self-propelled models, belt tension is critical. Too loose, and you lose drive power. Too tight, and you’re putting unnecessary stress on bearings and pulleys. Most belts should have about half an inch of deflection when you press on them.
Step 6: Handle and Control Systems
Loose handles aren’t just annoying – they’re dangerous. I’ve seen mowers where the handle attachment was so loose that the operator lost control and damaged property.
Check every bolt, but here’s the key: don’t over-tighten. I see stripped threads all the time from people who think tighter is always better. Hand-tight plus a quarter turn is usually perfect.
Test all your controls while you’re at it. Height adjustment should move smoothly without binding. If it’s stiff, clean out the debris and add a drop of oil to the pivot points.
Step 7: Test Run and Documentation
Fire it up and listen. A well-maintained mower should sound smooth and confident. Excessive vibration, unusual noises, or performance issues indicate that you may have missed something during your inspection.
Keep a simple log of what you’ve done and when it was done. I can’t tell you how many times customers call asking when they last sharpened their blade or changed their battery. A basic maintenance record helps prevent confusion and allows you to spot patterns.
Blade Maintenance Products


750-087 Lawn Mower Blade Balancer - Professional Magnetic Wall-Mount Precision Tool


Seasonal Care: Winterizing and Spring Prep
Living in Ohio has taught me that seasonal transitions can absolutely destroy lawn equipment if you’re not prepared. The temperature swings, humidity changes, and storage challenges here will test even the most robust mower.
Winter Storage: Protecting Your Investment
Here’s where I see the most expensive mistakes. Improper winter storage has cost my customers more money than any other single factor.
Battery Care That Actually Works
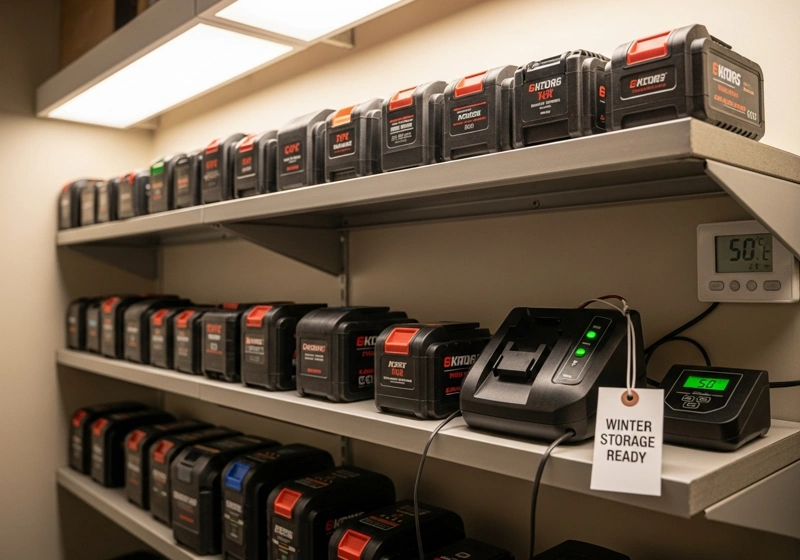
Those lithium batteries in your cordless mower? They hate extreme cold almost as much as they hate extreme heat. I learned this the hard way when I left a battery in my unheated garage one fierce winter. Come spring, it wouldn’t hold a charge.
Now I tell everyone: bring those batteries inside. Store them in your basement, utility room, or any other location that maintains a temperature between 40°F and 70°F. Charge them to about 50% before storage – not full, not dead, right in the middle.
Check them once a month and top off the charge if needed. I know it sounds like a pain, but replacing batteries is expensive, and this simple routine can double their lifespan.
The Cleaning That Saves Money
I cannot stress this enough – never store a dirty mower. That innocent-looking grass residue turns into moisture-holding, rust-promoting concrete over the winter months.
I spend 15 minutes with each of my mowers in the fall, removing every bit of debris from the deck, housing, and metal surfaces. It’s 15 minutes that saves me hours of rust repair come spring.
Use a hose, a scraper, whatever it takes. Just clean it before storing it.
Lubrication Strategy
A light coat of oil on exposed metal surfaces works wonders for preventing winter rust. I use regular 3-in-1 oil and apply it to every bolt, every adjustment point, and any bare metal that might oxidize over the winter.
Don’t go crazy with the oil – you’re not trying to preserve the mower in amber. Just a light protective coating that’ll shed moisture and prevent corrosion.
Spring Awakening: Getting Back to Work
Spring prep is where you set yourself up for a successful mowing season. Rush through it, and you’ll pay the price all summer long. If you skipped proper storage last fall, our complete winterization guide will help you avoid those mistakes next season.
Battery Revival
Reinstall those batteries and run a complete charge cycle. This is your first real test of how well your winter storage went. If the battery takes a standard charge and delivers a normal runtime, you’ve done well. Reduced performance typically indicates battery degradation, and you may need to consider replacements.
I always test the runtime on the first mow of the season. If you’re getting significantly less time than last fall, start budgeting for new batteries.
Blade Sharpening Timing
Winter is perfect for blade maintenance because you’re not in a hurry. I sharpen all my blades during the off-season so they’re razor-sharp for that first spring cut.
Starting the season with sharp blades sets the tone for the entire year. Your mower runs more easily, your grass looks better, and you’re not fighting dull equipment when the growing season kicks into high gear.
Key Tips for Electric and Reel Mowers
Different mower types have their own personalities and quirks. After working on hundreds of each type, I’ve learned what really matters for each design.
Electric Mower Maintenance: Power Management
Electric mowers are incredibly reliable when you understand their needs. The key is thinking electrically, rather than mechanically. For deeper insights into comprehensive electric mower care strategies, including seasonal maintenance schedules, we’ve got you covered.
Cord Management Reality
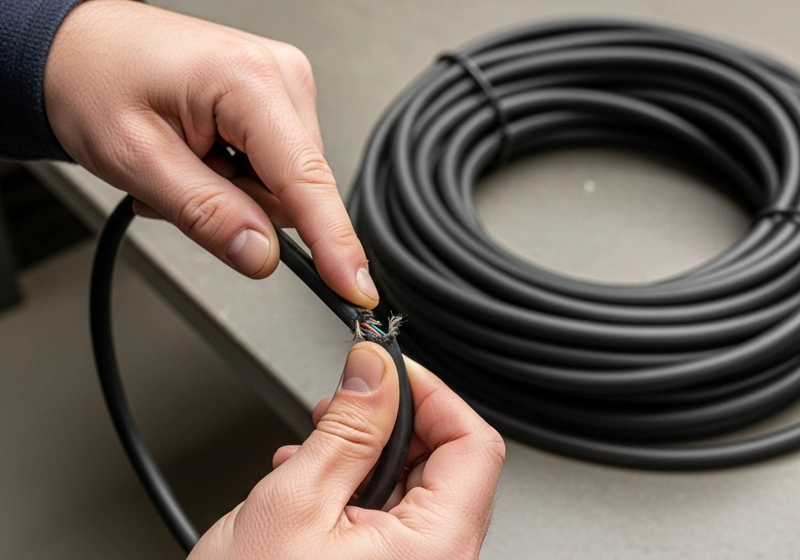
Damaged cords are the leading cause of electric mower failures, according to my observations in the shop. The problem is that cord damage often occurs gradually. A small nick becomes a bigger cut, which eventually fails catastrophically.
I inspect cords monthly during mowing season. I’m looking for any changes in the outer jacket, such as cuts, compression marks, or areas where the coat appears thin or worn. If I find anything questionable, I replace the cord immediately.
Here’s a tip most people miss: coil your cord properly after each use. Loose coiling creates kinks and stress points. Tight coiling establishes a memory that causes the cord to want to twist. Figure-eight coiling is perfect – no stress, no kinks, no memory.
Motor Ventilation
Electric motors generate heat, and blocked ventilation vents are the fast track to motor failure. I use compressed air to blow out motor vents after every few uses, especially during periods of heavy mowing.
Look for grass clippings, leaves, or any debris around the motor housing. That stuff blocks airflow and turns your motor into an Easy-Bake oven.
Connection Maintenance
Clean, tight electrical connections are everything with electric mowers. Corroded connections create resistance, which in turn generates heat, and excessive heat can damage or even destroy components.
I keep a small wire brush for cleaning terminals and connections. A light coating of dielectric grease prevents future corrosion, especially in humid climates like ours.
Reel Mower Maintenance: Precision Mechanics
Reel mowers are mechanical art. I’ve worked on reel mowers from the 1940s that still cut like new, and modern ones that failed after two seasons. The difference is always maintenance. If you’re considering a reel mower, our complete guide to manual push reel mowers covers everything from selection to long-term care.
Adjustment Precision
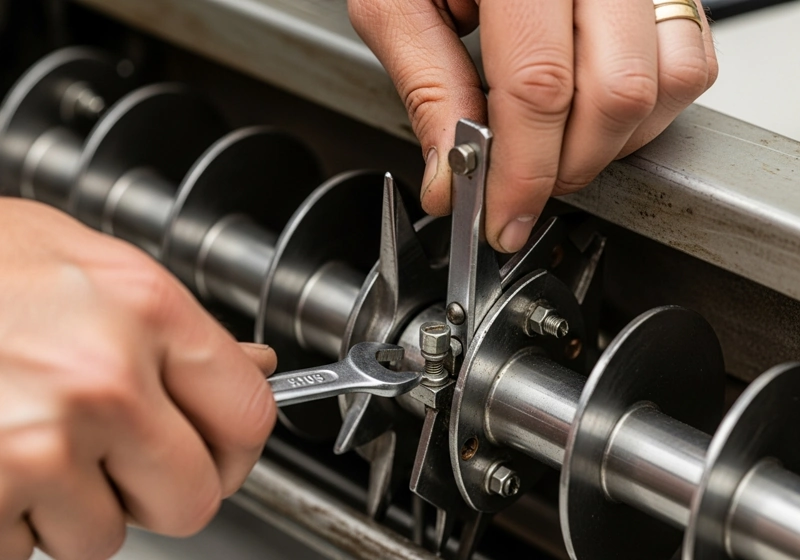
The reel-to-bed knife adjustment is crucial for achieving clean cuts. Too loose, and you get ragged grass that looks chewed. Too tight, and you create excessive wear, making pushing unnecessarily difficult.
The adjustment should be just tight enough that the reel blades barely contact the bed knife along their entire length. You should be able to slip a piece of paper between them, but just barely.
Lubrication Points
Reel mowers have several lubrication points that need regular attention. The bearing assemblies require light machine oil to be applied monthly during use. The adjustment mechanisms require an occasional drop of oil to keep them moving smoothly.
Avoid heavy grease that collects grass and debris. Light machine oil penetrates better and doesn’t create debris magnets.
Sharpening Considerations
Professional reel sharpening involves precision grinding that most homeowners can’t duplicate at home. However, you can maintain edges between professional services using a backlapping compound.
Run the reel backwards while applying the compound. It’s like using fantastic sandpaper to touch up the cutting edges. Not a substitute for professional service, but it’ll keep you cutting cleanly between sharpenings.
DIY Repairs for Common Mower Issues
Some problems you can definitely handle yourself, while others need professional attention. After years of teaching customers basic repair skills, I’ve identified the repairs that most people can tackle safely.
Power Problems You Can Fix
Dead Electric Mower Diagnosis
Please start with the obvious things that make me feel silly when I find them in my shop. Check that the outlet has power by plugging in a different device. Verify the mower’s cord is fully seated in the outlet. Make sure any switches are in the “on” position.
If the obvious issues are resolved, you’re likely dealing with a cord or internal wiring problem. Wiggle the cord while it’s plugged in (mower off) and watch for any change in the power indicator lights. Movement that affects power means cord damage.
Intermittent Power Issues
These are usually connection problems. Loose plugs, corroded terminals, or damaged cord sections that only fail under certain conditions.
Test different cord positions to identify the specific area causing the issue. Mark any spots where cord movement affects power. These problem areas usually need cord replacement or professional repair.
Battery Performance Problems
Reduced runtime in cordless mowers usually means battery degradation or charging system issues. Try a different battery if one is available. If the problem is related to the battery, it’s likely a battery issue. If the problem persists with the mower, inspect the charging system.
Cutting Performance Fixes
Uneven Cut Patterns
Almost always a deck-level problem or a worn wheel issue. Measure deck height at multiple points to identify high and low spots. Most decks have adjustment points that allow you to level them properly.
Worn or damaged wheels can also create uneven cuts. Check each wheel for wobble, proper inflation (if pneumatic), and smooth rotation.
Poor Cut Quality Solutions
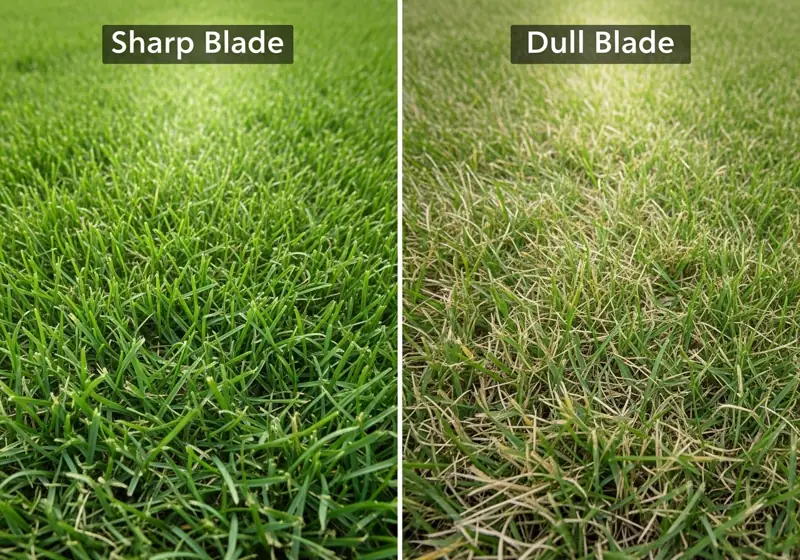
Ninety percent of cutting quality problems can be traced back to blade condition. Remove the blade and inspect it closely. Even slightly dull blades should be sharpened for optimal performance.
A sharp blade cuts grass cleanly, leaving smooth edges that heal quickly. A dull blade tears and shreds, creating ragged wounds that turn brown and invite disease.
Excessive Vibration Troubleshooting
Usually indicates a bent or unbalanced blade. Remove the blade and check for straightness by rolling it on a flat surface. An unbalanced blade needs professional service or replacement.
Loose blade bolts can also create vibration. Check the blade mounting hardware and tighten as needed, but avoid over-tightening and stripping the threads.
Mechanical Problems Within Reach
Handle Tightening
Loose handles are more common than you might think, and they can be potentially dangerous. Check all handle mounting bolts and tighten as needed.
The key is not to over-tighten. Stripped threads are much more challenging to repair than loose bolts. Hand-tight plus a quarter turn is usually perfect.
Height Adjustment Issues
Sticky height adjustment mechanisms typically require only cleaning and lubrication. Remove debris from the adjustment points and apply a light coating of machine oil to the pivot points.
Avoid heavy grease that collects debris. Light oil penetrates better and doesn’t create problems down the road.
Wheel Repairs
Wobbly wheels often indicate worn bearings that can be replaced with basic tools. You’ll need to source the correct bearings for your mower model, but the replacement procedure is usually straightforward.
Remove the wheel, note the bearing arrangement, and take the old bearings to your local hardware store to find matches.
The Importance of Blade Sharpening
Sharp blades are absolutely critical for both cut quality and mower longevity. After sharpening thousands of blades, I can tell you that this single maintenance task has more impact on performance than anything else you can do.
Why Sharp Blades Transform Everything
A sharp blade cuts grass cleanly, leaving smooth edges that heal quickly and resist disease. The grass looks better, stays healthier, and requires less water and fertilizer to maintain its health.
Dull blades tear and shred grass, creating ragged wounds that turn brown quickly and invite fungal infections. I’ve seen lawns transform from mediocre to magnificent simply by maintaining sharp blades.
But here’s what most people don’t realize – sharp blades also protect your mower. A dull blade requires more power to cut through grass, putting extra strain on motors, belts, and drive components. That increased workload shortens component life and increases energy consumption.
Sharpening Schedule That Works
Most homeowners should sharpen blades twice per season – early spring and mid-summer. However, usage and conditions significantly affect this schedule.
Sandy soil dulls blades much faster than rich loam. Cutting tall, thick grass requires more frequent sharpening than maintaining regularly mowed lawns. I have customers who sharpen their blades monthly, and others who wait a whole season between sharpenings.
The key is learning to recognize when your blade needs attention. Grass tips that look brown after mowing indicate a dull blade. Increased mowing effort or reduced battery life in electric mowers often points to blade problems.
DIY vs. Professional Service
I always recommend professional sharpening for severely damaged or incredibly dull blades. We have the equipment to properly balance blades and repair damage that’s beyond DIY capabilities.
However, homeowners can definitely handle routine sharpening with the right tools and techniques. A basic bench grinder typically pays for itself quickly compared to the costs of professional service.
The key is maintaining the original blade angle – typically 45 degrees – and removing equal amounts of material from both ends to maintain balance.
Safety Isn’t Optional
Always disconnect power before removing blades. Use the proper tools and wear the necessary safety equipment, including eye protection and gloves. These essential safety practices apply to all mower maintenance tasks, not just blade work.
Mark the blade orientation before removal so you can reinstall it correctly. An upside-down blade won’t cut properly and can be dangerous.
Take your time and work carefully. A moment of carelessness with blade work can result in serious injury.
Your Next Steps to Mower Longevity
Here’s the bottom line after 15 years of fixing mowers: the ones that last are the ones that get basic, consistent care. It’s not rocket science, and you don’t need to be a mechanic. You need to develop good habits and stick with them.
Start simple. Pick one thing from this guide and make it a habit. Perhaps it’s as simple as cleaning your mower after each use or checking the sharpness of your blade on a monthly basis. Once that becomes routine, add another maintenance task.
The customers who succeed aren’t necessarily the most mechanically gifted – they’re the ones who develop consistent routines and stick with them. Whether you’re running a basic reel mower or a sophisticated battery-powered model, these principles will serve you well. For help choosing the right type for your specific needs, our complete guide to all mower types breaks down the maintenance requirements and long-term costs of each option.
Remember, every hour you invest in maintenance saves money, prevents headaches, and keeps excellent equipment out of landfills. That’s a win for your wallet, your weekend schedule, and the planet.
So grab your tools, give your mower some attention, and start building habits that’ll keep it running strong for years to come. Trust me, your future self will thank you.
Oh, absolutely! It’s like comparing a bicycle to a motorcycle – both get you where you’re going, but the upkeep is entirely different. Electric mower maintenance is actually simpler in most ways: no oil changes, no spark plugs, no air filters, no carburetor adjustments. However, you have different concerns – including cord inspection, electrical connections, and battery care. I spend way more time checking cords and connections on electric mowers than I ever did on engine components with gas models. The good news is that once you understand the electrical side, maintenance becomes pretty straightforward.
I tell my customers to think of it like going to the dentist – a good annual checkup prevents most problems, but you need some regular care in between visits. Do a comprehensive tune-up every spring before the mowing season starts. But don’t ignore your mower the rest of the year. Check blade sharpness monthly, inspect cords regularly, and keep everything clean after use. High-use mowers may require mid-season attention, while occasional-use equipment can sometimes extend the intervals a bit. The key is staying ahead of problems instead of chasing them.
Great question! Maintenance is like exercise and good nutrition for your mower – stuff you do regularly to prevent problems. Cleaning, lubrication, blade sharpening, and inspections. It’s scheduled, predictable, and relatively inexpensive. Repair is like emergency surgery – fixing something that’s already broken. Replacing damaged cords, rebuilding worn components, and fixing broken handles. It’s unscheduled, inconvenient, and usually more expensive. The primary goal of good maintenance is to minimize unexpected repairs and keep your equipment running smoothly for as long as possible.
Without question! I’ve been tracking customer equipment for years, and the difference is dramatic. Properly maintained electric mowers routinely last 12-15 years. Neglected ones typically fail within 5 to 7 years. That’s not a slight difference – that’s literally doubling the equipment life. But it’s not just about longevity. A well-maintained 10-year-old mower often outperforms a neglected 3-year-old one. Regular maintenance ensures optimal performance throughout the equipment’s lifespan, so you’re not just extending its life – you’re enhancing its quality.
