
How to Sharpen Your Lawn Mower Blade: Step-by-Step
So your mower just chewed through your grass like my old dog going after a tennis ball – lots of enthusiasm, messy results. Been there. Actually, I was there just last weekend when I realized I’d been putting off sharpening my blade for way too long. Again. Blade maintenance is just one part of keeping your mower running smoothly, but it’s probably the most important one.
Table of Contents
▼- Why This Actually Matters (Beyond Just Looking Good)
- How to Tell When Your Blade Needs Help
- Safety Stuff (Because I Like Having All My Fingers)
- What You Actually Need
- Getting That Blade Off Without Breaking Anything
- Actually, Sharpening the Thing
- The Balance Test (Don’t Skip This)
- When Files Don’t Cut It
- My Real-World Sharpening Schedule
- Stuff That Goes Wrong (And How to Fix It)
- Professional Tricks I Wish Someone Had Told Me
- When to Just Buy a New Blade
- Bottom Line
Look, after running a lawn care business for fifteen years, I should know better. But life gets busy, and suddenly you’re looking at grass tips that are brown and frayed like they got attacked by a dull butter knife. Here’s what I’ve learned: you can sharpen a lawn mower blade yourself in about fifteen minutes with a basic file. No fancy equipment, no trip to the repair shop.
And honestly? Once you do it yourself a few times, you’ll wonder why you ever paid someone else twenty bucks for something this straightforward.
Why This Actually Matters (Beyond Just Looking Good)
Okay, real talk for a minute. I used to think a dull blade was just about appearance. Wrong. Dead wrong.
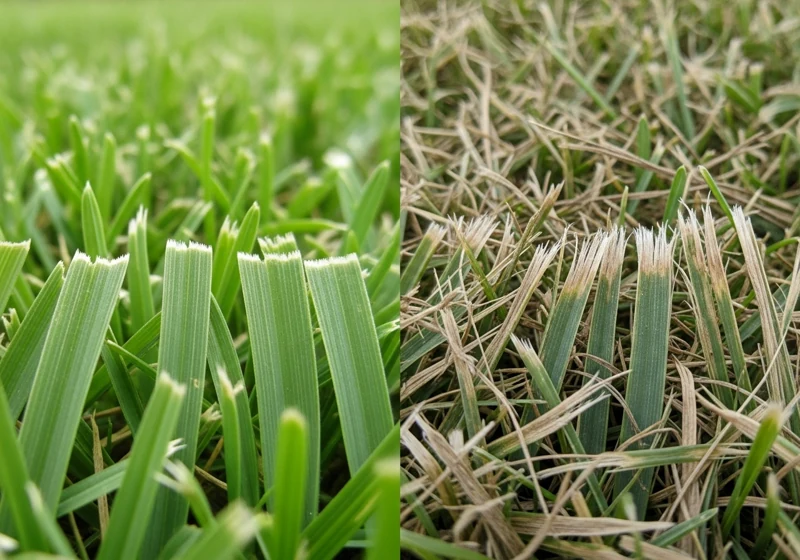
Picture this: you’re cutting a tomato with a dull knife. Instead of slicing clean through, you’re crushing and tearing. That’s exactly what’s happening to your grass. Each blade of grass is getting beaten up instead of getting a clean cut. The result? Those brown tips you see the next day aren’t just ugly – they’re wounds that make your grass vulnerable to disease and stress. Clean cuts are essential for grass plant health and disease resistance.
I figured this out the hard way during my second year in business. Had a customer call me up, pretty upset. “Jake, my lawn looks worse after you mowed it than before.” That stung. Went back to look, and sure enough – every grass blade had brown, ragged edges. Cost me that customer and taught me a lesson I’ll never forget.
Sharp blades cut clean. Dull blades tear and crush. It’s really that simple.
How to Tell When Your Blade Needs Help
Most people wait until their mower sounds like it’s having a heart attack before they check the blade. Don’t be like most people.
I check mine every month during mowing season, which sounds obsessive until you realize it takes about thirty seconds. Flip the mower up (safely – we’ll get to that), and take a look. A sharp blade has a crisp, clean edge. Dull ones look rounded off, like someone took sandpaper to them.
But the grass tells the real story. If you’re seeing brown tips a day or two after mowing, your blade is basically giving your lawn a bunch of tiny injuries. Fresh cuts stay green. Torn grass turns brown.
Also, pay attention to how your mower feels. Struggling through grass that used to be easy? Engine working harder? That blade is fighting instead of cutting. Three sharpening sessions per season usually do it for most folks – spring startup, mid-summer maintenance, and fall prep.
Safety Stuff (Because I Like Having All My Fingers)
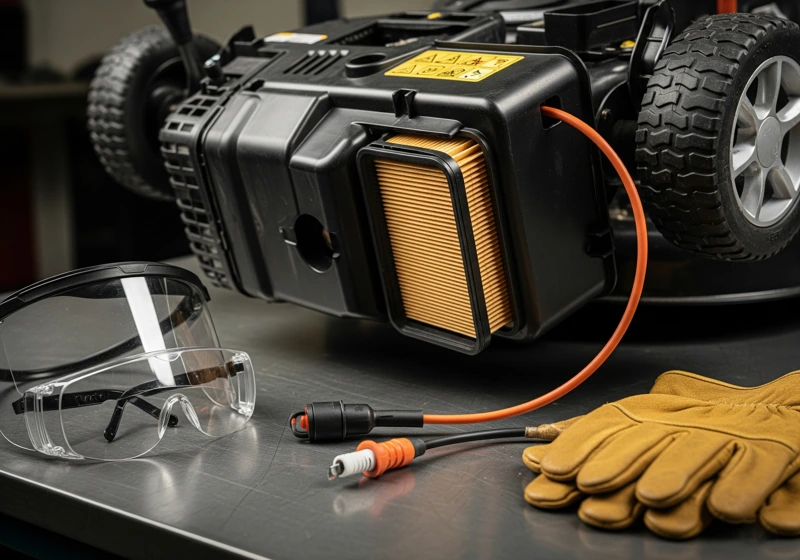
Alright, before we get to the fun part, let’s talk about not getting hurt. Mower blades are serious business. They spin at over 3,000 RPM when running, which means they’ll cut through skin faster than you can say ‘oops.’ If you’re new to mower maintenance, check out our complete guide to lawn mower safety essentials before you start.
Always disconnect the spark plug wire first. Not just loose – completely off. Let the engine cool down for at least thirty minutes after your last use. Trust me, hot engines and gas vapors don’t play nice together.
Safety glasses are non-negotiable. I don’t care if you think you look silly. I’ve had metal shavings fly off during filing, and your eyes are worth more than your ego. Work gloves with a good grip help too.
When you’re removing the blade bolt, never try to hold the blade still with your hand. Use a block of wood or buy a blade holder tool. Fifteen bucks is way cheaper than emergency room bills.
What You Actually Need
The beauty of the file method is that you probably already have half this stuff in your garage. Unlike choosing the right lawn mower, where you might spend hundreds, blade sharpening is refreshingly affordable.
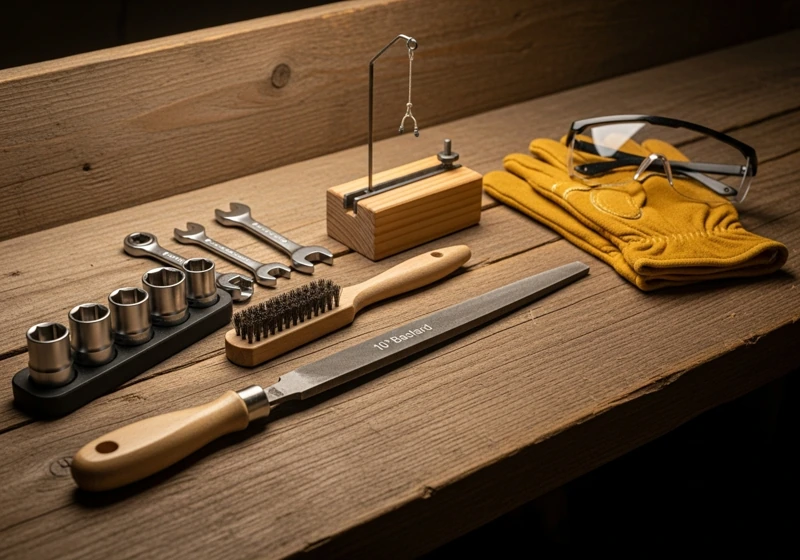
You need a good file – 10 or 12 inch, bastard cut. That’s not me being rude, that’s the actual technical term for a medium-coarse file. I’ve been using the same eight-dollar Nicholson file for three years now. Still works great.
A socket wrench set or a good adjustable wrench for the blade bolt. A wire brush for cleaning off all that caked-on grass. And something to balance the blade on – could be a screwdriver in a vise, could be a nail in the wall. I use an old screwdriver clamped horizontally.
Optional but nice: bench vise or clamps to hold the blade steady, and a shop vacuum because metal shavings get everywhere.
Sharpen Tools


Getting That Blade Off Without Breaking Anything
First things first – position your mower on level ground. If it has a parking brake, use it. Now comes the tricky part: most people tip their mowers the wrong way and end up with oil in their carburetor. Always tip with the air filter side up. Oil flows down, not up.
Find the blade bolt in the center. Here’s something that trips people up – most mower bolts are reverse thread. That means you turn clockwise to loosen. I know, it’s backwards from everything else in your life, but it prevents the bolt from working loose while the blade spins.
Use your block of wood to jam the blade so it can’t rotate, then carefully break the bolt loose. Keep track of any washers or spacers – they go back exactly where they came from. I learned this one by spending twenty minutes trying to figure out why my blade was wobbling after reinstall.
Actually, Sharpening the Thing
Clean the blade first with your wire brush. Get all that built-up grass and gunk off so you can see what you’re working with. Look for cracks, especially around the center hole. If you find any, stop right here and buy a new blade. Cracked blades can come apart at 3,000 RPM, and that’s not a fun experience. When it’s time to replace, our guide to choosing the right lawn mower blade types will help you pick the perfect replacement.
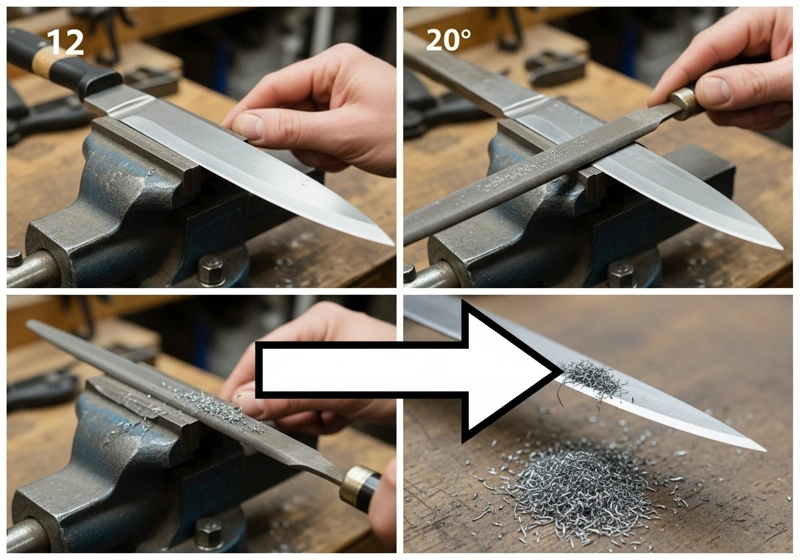
Clamp the blade in your vise or to your workbench with the cutting edge facing up. If you don’t have a vise, get creative – I’ve clamped blades to sawhorses, workbenches, even my truck’s tailgate. Just make sure it’s solid.
Most mower blades have about a 30 to 45-degree angle on the cutting edge. Your job is to maintain that angle while removing the dull, rounded metal. Start at one end and work toward the center with long, smooth strokes. Then do the other side.
Count your strokes so you file each side equally – unbalanced blades will shake your mower apart. The file should bite into the metal and produce visible shavings with each stroke. If it’s skipping or not cutting, either you need more pressure or your file is dull.
Usually takes me 20 to 30 strokes per side for a typical dull blade. You’ll know you’re done when you have a clean, sharp edge with no rounded spots or nicks.
The Balance Test (Don’t Skip This)
Here’s where a lot of people mess up. An unbalanced blade will destroy your engine bearings and make your mower vibrate like it’s having a seizure. Understanding rotational balance principles helps explain why even small weight differences matter at 3,000+ RPM.
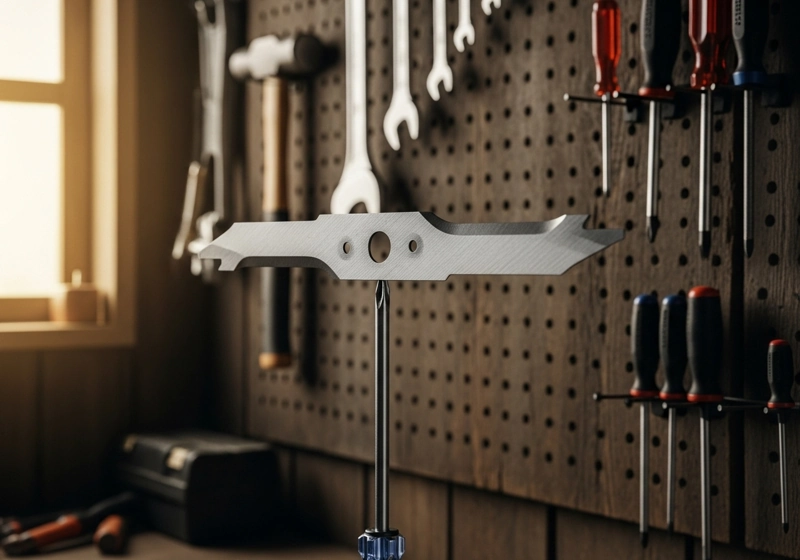
My balance test is simple: drive a nail into your garage wall or clamp a screwdriver horizontally in your vise. Hang the blade through the center hole like you’re hanging a picture.
Balanced blade hangs level or close to it. If one side drops significantly, you need to file more material off the heavy side. Work conservatively – easier to remove metal than add it back.
Don’t get obsessive about perfect balance. If it hangs within about 15 degrees of level, you’re good for residential use.
When Files Don’t Cut It
Sometimes your blade is too far gone for the file method. If you’ve got significant nicks or damage, you might need an angle grinder or bench grinder. I prefer the bench grinder for control, but it takes practice to maintain the right angle.
Angle grinders work faster, but it’s easy to overheat the metal or remove too much material. Work in short bursts and keep water nearby for cooling.
When in doubt, take it to the shop. Fifteen or twenty bucks for professional sharpening beats buying a new engine because you destroyed the bearings with an unbalanced blade.
My Real-World Sharpening Schedule
Theory says one thing, reality says another. Here’s what actually works:
Spring startup – always start with a sharp blade. Grass is tender coming out of winter. Spring is also the perfect time to properly winterize your lawn mower if you didn’t get to it last fall.
Mid-season check around July – usually need a touch-up by then.
End of season – sharpen before storage so you’re ready next spring.
If you’re mowing twice a week or dealing with sandy soil or lots of debris, you might need monthly attention during peak season. The blade will tell you what it needs if you pay attention.
Stuff That Goes Wrong (And How to Fix It)
File not biting into the metal? Either your file is shot, or you’re not using enough pressure. A good file should grab immediately.
Edge looks wavy after filing? You’re not holding a consistent angle. Try marking the bevel with a Sharpie so you can see where you’re filing.
Still cuts lousy after sharpening? Check if the blade is bent (replace it) or if you got all the spacers back in the right order.
Vibrates like crazy after reinstall? Balance problem. Take it off and check again.
Professional Tricks I Wish Someone Had Told Me
Buy a decent file and take care of it. Cheap files from the discount bin will make you crazy. Hang them up or store them separately so the teeth don’t get damaged by banging against other tools.
Keep a spare blade if you can swing it. Lets you swap quickly and sharpen at your convenience instead of when you’re trying to beat the rain.
Mark your calendar when you sharpen. Helps you figure out your specific wear patterns.
Most importantly – don’t overthink this. It’s a lawn mower blade, not brain surgery.
When to Just Buy a New Blade
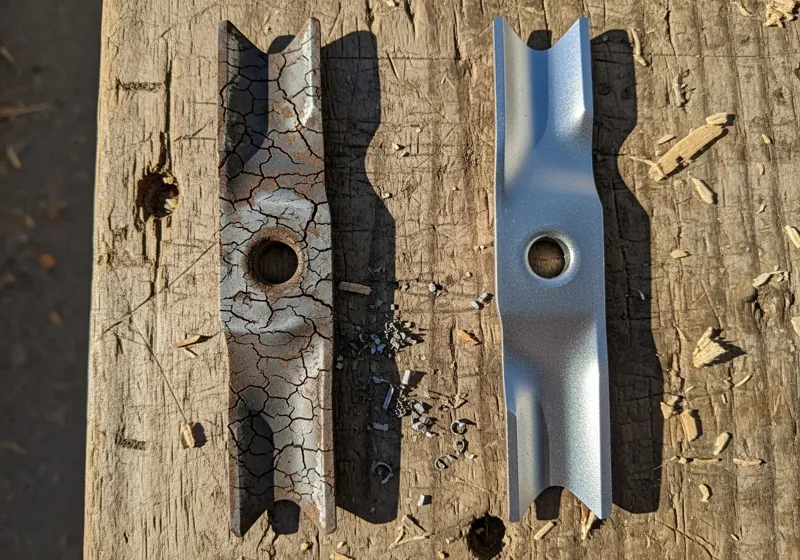
Sometimes the smart move is replacement, not sharpening. If there are cracks anywhere, if you’ve lost more than a quarter inch of blade width, if it’s bent or warped, or if you’ve sharpened it four or five times already – just buy new.
New blade runs fifteen to forty bucks, depending on your mower. That’s cheaper than a new engine. Speaking of engine health, don’t forget about regular oil changes – they’re just as important as sharp blades for long-term performance
Bottom Line
Learning to sharpen a lawn mower blade with a file is like learning to change your own oil – it seems intimidating until you do it once, then it’s just routine maintenance.
Those fifteen minutes you spend filing will save you hours of dealing with a beat-up lawn. Plus, there’s something satisfying about taking care of your own equipment. Even my wife admits our lawn looks better than the neighbors’, though she still thinks I get too excited about sharp blades.
Start with this file method. Get comfortable with it. Your grass will show the difference immediately – cleaner cuts, healthier growth, that crisp look that makes you proud when you pull in the driveway.
Now quit putting it off and go give that dull blade some attention. Your lawn’s been waiting long enough.
For most homeowners, the file method is hands down the best approach. I’ve tried every method out there – angle grinders, bench grinders, even those fancy sharpening jigs – and I keep coming back to a simple 10-inch bastard file. It’s foolproof, gives you complete control, and you can’t really mess it up badly enough to ruin the blade. The file method takes about 15 minutes, costs under $10 in tools, and produces results that are just as good as professional sharpening. Sure, grinders are faster, but files let you feel exactly what you’re doing and maintain that critical cutting angle without overheating the metal.
This is exactly what the file method is perfect for. Remove the blade safely, clean it thoroughly with a wire brush, then clamp it securely to your workbench. Use a 10-inch bastard file and work along the cutting edge with smooth, consistent strokes, maintaining the existing 30-45 degree bevel. Count your strokes so you file each side equally – takes about 20-30 strokes per side for a moderately dull blade. I actually prefer this method over grinders for most situations because you get better control, there’s no risk of overheating the metal, and you can feel exactly when you’ve achieved a sharp edge.
Most residential mower blades come with a 30 to 45-degree bevel from the factory, and that’s what you want to maintain. Don’t try to change the angle – just follow what’s already there. The exact degree doesn’t matter as much as consistency across the entire cutting edge and making sure both ends of the blade have identical angles. I check the angle by holding the file against the existing bevel – it should lie flat against the angled surface. The blade manufacturer already figured out the optimal angle for that particular design, so stick with what they gave you.
No, and this is a common mistake that can actually damage your blade. You only sharpen the angled cutting edge – the beveled side that faces down when installed. The top side should stay flat because it creates the suction that lifts grass for cutting, while the angled bottom edge does the actual cutting. If you file both sides, you’ll change the blade’s aerodynamics and reduce its lifting power. I made this mistake exactly once about twelve years ago, filed both sides thinking I was being thorough, and the blade cut terribly afterward. Stick to sharpening just the beveled cutting edge and leave the top alone.
Generally speaking, you can sharpen a quality mower blade 4 to 6 times before replacement, but it depends on how much material you remove each time. I track this by measuring blade width – once you’ve lost about 1/4 inch from the original width, it’s time for a new blade because the metal gets too thin to hold a good edge. Also watch the center hole, which can wear oval-shaped after multiple sharpenings and years of use. In my real-world experience, a decent blade that gets sharpened 2-3 times per season usually lasts about two seasons before replacement, while cheaper blades might only give you 2-3 sharpenings total.
