
Lawn Mower Belt Replacement: DIY Step-by-Step Guide
So there I was, Saturday at 7:23 AM, standing in my driveway staring at my Craftsman rider that wouldn’t move. Engine running fine. Blades spinning. But the thing just sat there like a stubborn mule. My neighbor Bob walks over with his coffee and goes, “Lawn mower belt, right?”
Table of Contents
▼- Understanding Lawn Mower Belts: Types, Functions & When to Replace
- Signs Your Lawn Mower Belt Needs Replacement
- Tools & Parts Needed for Belt Replacement
- DIY Belt Replacement: Step-by-Step by Mower Type
- How to Replace Craftsman Riding Mower Belts
- John Deere Belt Replacement Guide
- Husqvarna, Cub Cadet & Troy Bilt Belt Replacement
- Toro & Push Mower Belt Replacement
- Deck Belt vs Drive Belt Replacement: Key Differences
- Where to Buy Replacement Lawn Mower Belts
- Common Belt Replacement Mistakes to Avoid
- How to Extend Your Lawn Mower Belt Life: Maintenance Tips
Yep. Snapped clean through.
Look, I’ve been fixing lawn equipment for almost two decades now, and I gotta tell you – a broken mower belt is probably the most common repair I see besides mowers that won’t start. The good news? It’s honestly one of the easiest fixes you can do yourself. We’re talking 20-30 minutes, maybe $25-$40 in parts, and you’ll feel like a mechanical genius when you’re done. I mean, the first time I did this, I was terrified. Called my buddy Mike, who’s a small engine guy, and he literally laughed at me. “Dude, it’s just a belt.”
He was right. But here’s what nobody tells you – there are a couple of tricks that make this job either super easy or a knuckle-busting nightmare. And I’m gonna show you both, because I’ve done it the hard way more times than I care to admit.
Understanding Lawn Mower Belts: Types, Functions & When to Replace
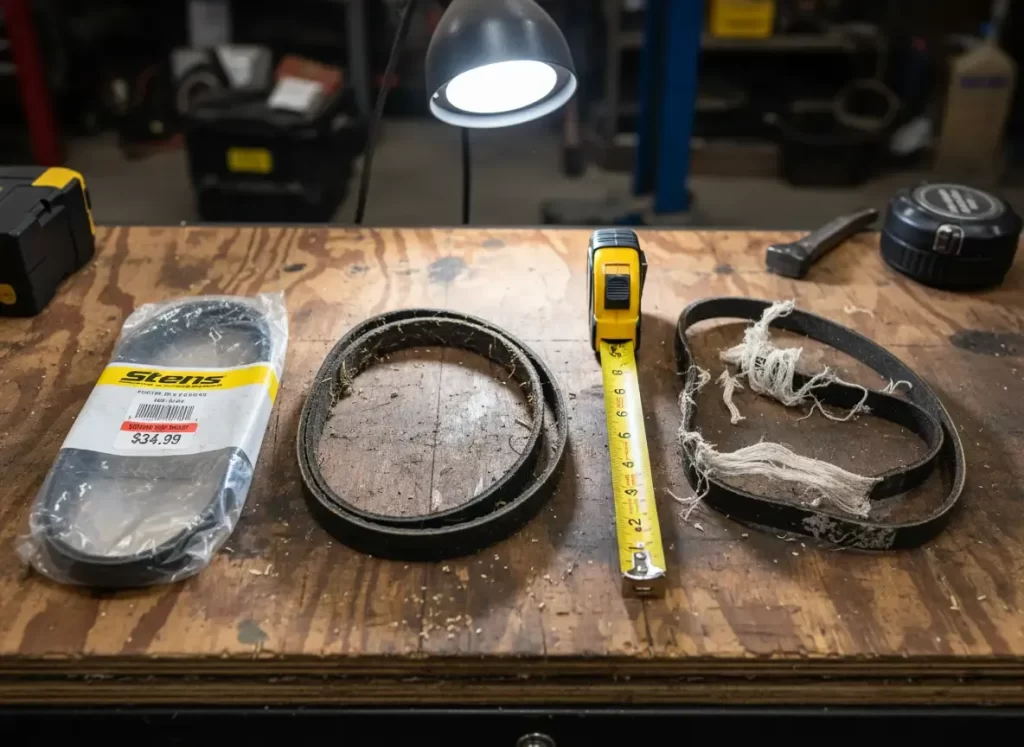
Alright, so here’s the deal with lawn mower belts. Most people don’t realize there are actually different types doing different jobs on your mower. And yeah, I used to think a belt was just a belt too. Then I ordered the wrong one from Amazon and had to wait another three days with an unmowed lawn that looked like a prairie. My wife was thrilled.
Riding lawn mower belts typically come in two main flavors: deck belts and drive belts. The deck belt (sometimes called the mower deck belt) is what spins your blades. It runs from the engine pulley down to your blade spindles. When this one goes, your engine runs fine, but your blades don’t spin. You’ll just be driving around accomplishing nothing, which I’ve definitely done for a full minute before realizing what was happening.
The lawn mower drive belt is what makes you actually move. This belt connects your engine to your transmission (on riders) or helps engage the self-propel mechanism (on walk-behinds). When this one snaps, you’re not going anywhere. You become the world’s loudest lawn ornament.
Now here’s where it gets fun. Some mowers have multiple belts. My Craftsman 42 inch deck belt setup? Three belts total. One drive belt, one deck belt, and one PTO belt. I learned this the expensive way when I bought just one replacement belt, thinking I was all set. Nope.
Riding lawn mower belts are usually V-belts, which means they have that triangular cross-section that fits into grooved pulleys. Push mowers might use flat belts or toothed belts depending on the model. The Toro lawn mower belt on my old push mower was this super specific toothed design that you absolutely could not substitute with a generic belt. Trust me. I tried. It lasted exactly 4.7 minutes before shredding itself.
Here’s what I tell everyone: belts wear out. Period. It’s not if, it’s when. Rubber degrades, gets stretched, develops cracks, and gets glazed from slipping. Heat and friction are constantly destroying them. On average, you’re looking at 3-5 years of life on a mower belt if you’re maintaining it properly. But if you’re running your mower hard, mowing thick wet grass (guilty), or letting debris build up around the pulleys, you might get way less.
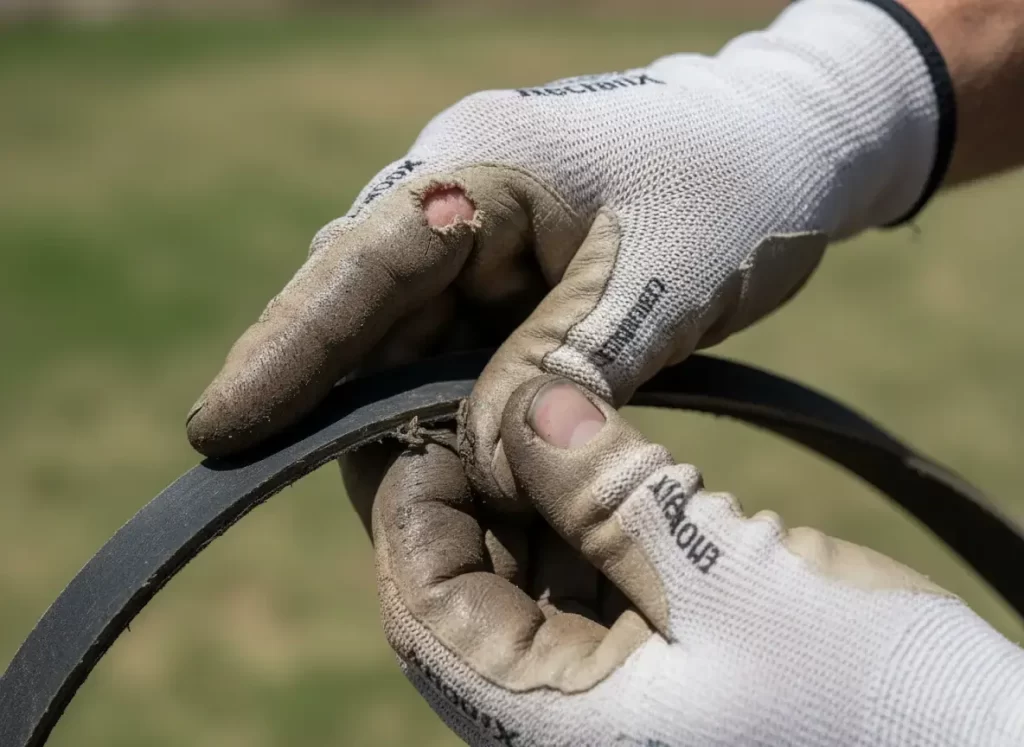
Signs of wear? Look for cracks on the sides, glazing (that shiny, smooth surface instead of the normal rubber texture), fraying edges, or if the belt looks skinnier than it used to. Sometimes you’ll smell burning rubber before the belt actually breaks. That’s the belt slipping and getting hot. And yeah, that smell will stick in your nose for hours. Ask me how I know.
But here’s the thing nobody talks about – sometimes the belt isn’t even the problem. I’ve probably replaced fifty belts over the years, where the real issue was a seized pulley bearing or a bent spindle. The belt was just the symptom. So before you start tearing into your mower, spin all your pulleys by hand (engine off, obviously). They should rotate smoothly with no grinding or wobbling. If one’s stuck or making noise, fix THAT first, or your new belt will die just as fast.
Signs Your Lawn Mower Belt Needs Replacement
Okay, so how do you know when your lawn mower belt is actually toast? Because I’ve seen people replace perfectly good belts just because they looked a little dirty. And I’ve also seen people running belts that were literally held together by hopes and prayers.
The most obvious sign? The belt snaps. You’ll hear a loud SNAP or THWACK, the mower will suddenly lose power to either the blades or the wheels (depending on which belt broke), and you might see the belt flopping around or just lying there in pieces. This happened to me once in the middle of a stripe pattern I was doing for my lawn. Just… SNAP. Now I had half a striped lawn for three days while I waited for the part. Looked ridiculous.
But usually, you get warning signs before the catastrophic failure. The belt starts squealing. Not just a little chirp when you engage the blades – I’m talking about that constant high-pitched screaming sound that makes your neighbors hate you. That’s the belt slipping on the pulleys because it’s stretched out or glazed. I ignored that sound for like two weeks once because I’m stubborn (and honestly, partially deaf from years of mower noise). The belt finally snapped while I was mowing a hill, and the mower rolled backward into my wife’s flower bed. She still brings that up.
You might notice the blades are spinning slower than they used to, or not engaging at all. Pull the PTO lever or push the blade engagement button, and nothing happens. Or maybe they spin for a second, then stop. That’s often a riding lawn mower belt that’s so worn it can’t maintain tension anymore. It’ll slip right off the pulleys or just spin uselessly without transferring power.
For drive belts, you’ll feel it in how the mower moves. Sluggish acceleration. Loss of power going up hills. The self-propel function that used to zip you along now barely helps. Or worse – the mower stops moving entirely, but the engine’s running fine. That’s usually a snapped or completely worn lawn mower drive belt.
Here’s a peculiar one that took me a long time to figure out: sometimes a faulty belt can cause your mower to vibrate excessively. I had a similar issue with my old Cub Cadet, where the entire machine would shake as if it were possessed. Turned out the Cub Cadet drive belt had stretched unevenly, causing the pulleys to wobble. New belt, problem solved. Felt like an idiot for not checking that first.
Physical inspection time. Pop the deck off (we’ll talk about how in a minute) and really look at that belt. Roll it over in your hands. See any cracks? Even tiny surface cracks mean the rubber’s breaking down. Is one edge more worn than the other? That indicates pulley misalignment, which you’ll need to fix. Is the belt shiny instead of matte? That’s glazing from heat and slipping. Does it smell like burnt rubber even when cold? Yeah, that belt’s cooked.
Here’s a test I learned from a mechanic at the shop I worked at briefly: flex the belt. A healthy belt should be somewhat pliable but still firm. If it’s hard and stiff, the rubber’s degraded. If it’s super floppy and loose, it’s stretched beyond use. The perfect belt has just a little give when you squeeze it, like a good bike tire.
One more thing, and this is important. If you’re doing riding lawn mower belts replacement more than once every couple years, something else is wrong. Belts shouldn’t be wearing out that fast. Check your pulley alignment, look for debris buildup, make sure your blade engagement mechanism isn’t sticking. For comprehensive troubleshooting help, you’ll want to dig deeper into the root causes. I had a customer once who went through four belts in one season. Turned out a wasp nest had built up inside the deck, causing the belt to rub against it. $8.47 worth of wasp spray fixed a hundred-dollar problem.
Tools & Parts Needed for Belt Replacement
Alright, let’s talk about what you actually need to do this job. And honestly? Not much. This isn’t rocket surgery.
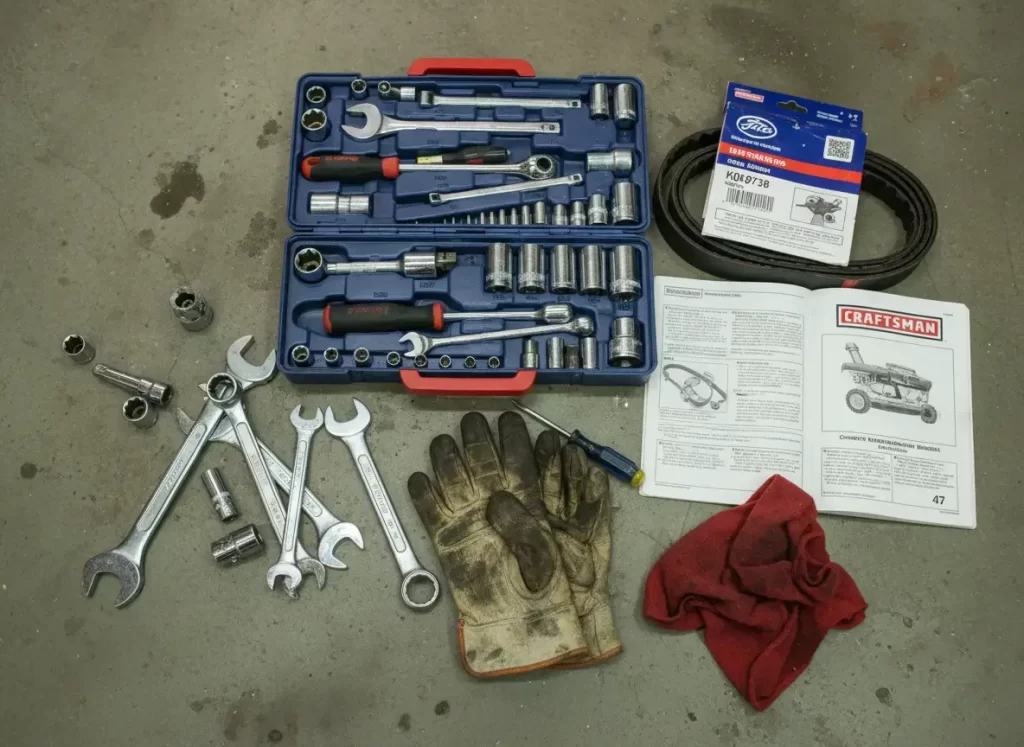
Basic tool list: socket set (you’ll probably need 1/2″, 9/16″, or 3/4″ sockets depending on your mower), maybe a couple of box wrenches in those same sizes, a flathead screwdriver, and possibly a belt installation tool (though I rarely use mine). That’s it. I’ve done belt replacements with literally just a 1/2″ socket and a ratchet before, when I was helping my neighbor and didn’t have my full toolbox.
For safety gear, wear gloves. I can’t stress this enough. The edges of mower decks are sharp, the undersides are covered in dried grass that’ll slice your hands, and if you’re working on the belt system there’s grease everywhere. The Consumer Product Safety Commission recommends proper protective equipment for all mower repairs. I’ve got a scar on my left palm from the time I thought I was tough enough to skip the gloves. Wasn’t. Also, disconnect the spark plug wire. Just do it. I know it seems paranoid, but I’ve seen a mower blade spin when someone accidentally bumped the key. Not on my watch anymore.
Now, finding the right replacement belt. This is where people screw up constantly. You need the EXACT part number for your specific mower model. Not “a belt that looks about right.” Not “the guy at the hardware store said this would work.” The. Exact. Part. Number.
Your owner’s manual has it. If you lost your owner’s manual (no judgment, I’ve lost mine approximately twelve times), look on the mower itself. Most manufacturers put a parts diagram sticker somewhere on the machine. On riders, check under the seat or inside the deck. On push mowers, it’s often on the top of the deck near the handle mount.
Still can’t find it? Google “[your mower brand and model] parts diagram.” For example, “craftsman 42 inch deck belt diagram” will pull up exploded views with part numbers. You can also call a dealer – just have your model number ready. It’s usually stamped on a metal plate somewhere on the frame.
Let me give you real examples because this helps. My Craftsman lawn mower drive belt? Part number 954-04219. My buddy’s John Deere lawn mower belt for his X300? Part number M158131. My neighbor’s Husqvarna belt for his YTH22V46? 532140294. See how specific these are? You can’t just walk into a store and say, “I need a lawn mower belt.” Doesn’t work that way.
Where to buy? You’ve got options. OEM (Original Equipment Manufacturer) belts from the dealer are always the safest bet. They’re made to the exact specs. Yeah, they cost more. My Craftsman belt was $34.67 at the dealer vs $18.99 for an aftermarket one on Amazon. But the OEM belt lasted 4 years. The aftermarket one my cheapskate brother-in-law bought? Eight months. Math that out and OEM wins. For a complete breakdown of OEM vs aftermarket parts, I’ve written an entire guide.
That said, some aftermarket belts are fine. Brands like Gates, Dayco, and Stens make quality stuff. Just make sure the dimensions match EXACTLY. Belt length, width, and the angle of the V-profile all matter. If the listing says “fits most Craftsman riders,” that’s not specific enough. You want one that says “replaces part number [your exact number].”
Local options for lawn mower belt near me searches: your dealer obviously, but also Tractor Supply, Home Depot, Lowe’s (though their selection is hit or miss), Ace Hardware, and independent small engine shops. I actually prefer the small shops because the old guys there actually know their stuff. Last time I was at my local place, the guy behind the counter looked at my worn belt, said “M158131,” and had it pulled before I even told him what I needed. That’s expertise you don’t get at big box stores.
Online? Amazon’s fine if you know your part number. eBay’s got good deals, but watch for counterfeits. The manufacturer’s website obviously has the right parts, but shipping can take forever. I once waited 11 days for a Troy Bilt drive belt direct from the manufacturer when I could’ve driven 20 minutes to a dealer. Learned that lesson.
Oh, and while you’re ordering, get two belts if it’s a common failure point on your mower. Future you will thank present you when it snaps again in three years, and you don’t have to wait for shipping. I keep a spare 42 inch deck belt in my garage at all times now. Takes up like six inches of shelf space and has saved my butt twice.
One more thing: some mowers need special tools to access the belt. My old Toro required this weird pulley removal tool that I had to buy separately for $12.99. Check a YouTube video of someone doing your specific model before you start. Nothing worse than getting halfway through the job and realizing you need a tool you don’t have. On a Saturday. When everything’s closed. While your lawn looks like garbage. I’m not bitter about that or anything.
DIY Belt Replacement: Step-by-Step by Mower Type
Okay, real talk. Every mower’s a little different, so I’m gonna break this down by brand and type. But the general concept is always the same: remove the old belt, route the new one correctly, adjust tension if needed, and test it. Simple in theory. Sometimes annoying in practice.
How to Replace Craftsman Riding Mower Belts
Let’s start with Craftsman because I’ve probably done a hundred of these. Most Craftsman riding mower belts are pretty straightforward, but that doesn’t mean they’re fun.
For the deck belt on most Craftsman models with a 42 inch deck belt, you’re gonna start by removing the mower deck entirely. I know, I know. Sounds intimidating. It’s not. Promise.
First, set the deck to the lowest cutting position. This gives you slack in the belt and makes everything easier. Disconnect your battery (or at least the negative terminal) and pull that spark plug wire. Safety first, death never.
Now, the deck on most Craftsman riders is held on by a few things: the lift links (usually two in front, one or two in back), the belt keeper rod, and sometimes an anti-sway bar. On my 917.28851 model, I had to remove three clevis pins and slide the belt off the engine pulley. Each clevis pin has a little hairpin cotter pin holding it in. Pull those out, slide the clevis pins free, and the deck basically drops down.
Well, “drops” is generous. More like “reluctantly separates after you wiggle it and curse at it for five minutes.” The front hangers usually slide right off the deck brackets. The rear ones sometimes need… persuasion. I keep a rubber mallet handy specifically for this. Not to beat things (okay, maybe sometimes), but to tap stubborn parts loose.
Once the deck’s down, slide it out from under the mower. You’ll probably scrape your knuckles on something. That’s normal. Now flip that deck over, and you can see the whole belt routing system.
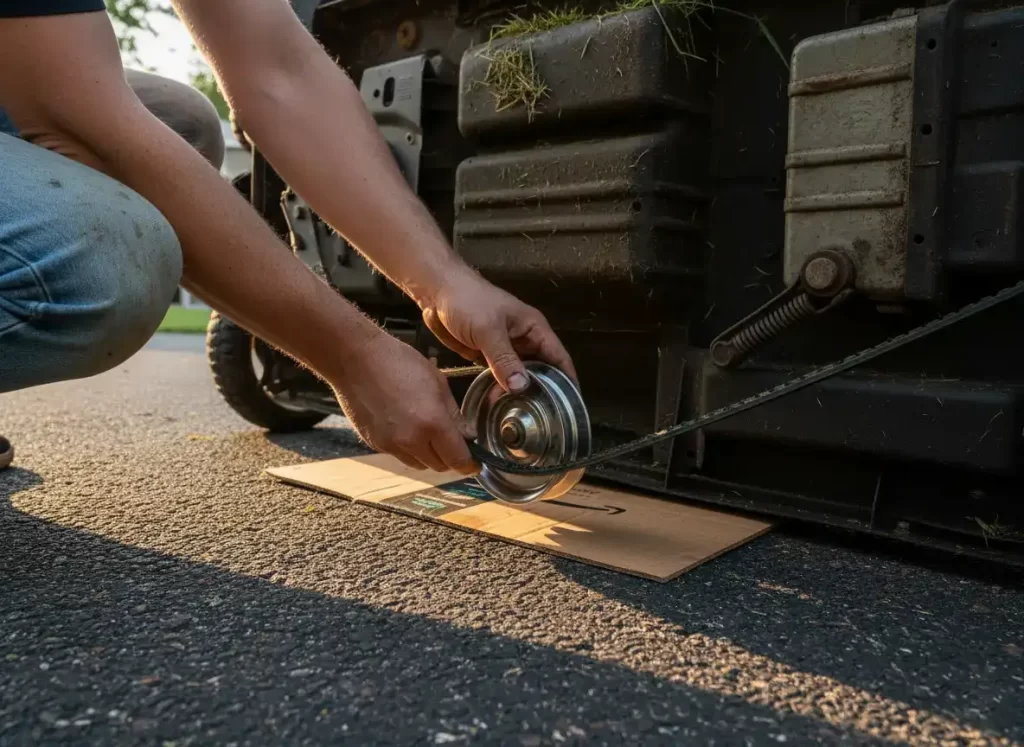
The old Craftsman 42 inch deck belt should come off pretty easily at this point. There’s usually a spring-loaded idler pulley that you can push or pull to release tension. On mine, I push the idler arm forward, which creates enough slack to slip the belt off. Sometimes there are keeper pins you gotta remove first. Study how the old belt is routed before you take it off. I cannot stress this enough. Take a picture with your phone. Draw a diagram. Whatever works for you. Because the routing pattern matters, and if you get it wrong, the belt will either slip off or shred itself in about 30 seconds of runtime.
The new belt goes on in reverse order. Loop it around all the pulleys following your picture. The V-part of the belt goes down into the pulley grooves. Seems obvious, but I’ve seen it installed upside down. Didn’t work well.
The tricky part is getting the belt over that last pulley while maintaining tension. This is where a belt installation tool helps, but honestly, I just use a screwdriver to pry the idler pulley over while I slide the belt into place. Takes a little finesse. And maybe some colorful language.
Belt’s on? Spin the pulleys by hand. Everything should rotate smoothly with no binding. If something feels tight or catches, the belt’s probably not seated correctly in one of the grooves. Fix it now before you reinstall the deck.
Speaking of which, reinstalling the deck is just the reverse of removal. Slide it back under, lift the front onto the hangers, reconnect the rear lift links, replace all those clevis pins and hairpin cotter pins. Don’t lose those little hairpin pins. They’re tiny and they disappear into the grass like they’re trying to escape. I keep extras in a baby food jar in my garage now because I’ve lost so many.
The Craftsman lawn mower drive belt replacement is actually easier because you don’t have to remove the deck. It’s usually accessible from underneath or through a panel on the side. On most models, you’ll see the belt running from the engine pulley down to the transmission pulley. There’s typically a spring-loaded idler system here, too.
I usually just jack up the mower (safely, with jack stands, not just a jack), slide under there, and look at the routing. The drive belt on my Craftsman goes around the engine pulley, then back to an idler, then down to the transmission input pulley. When I’m replacing it, I release tension on the idler (there’s usually a spring you can unhook or a rod you can move), slip the old belt off, route the new one on, and reconnect the tension spring.
Test it before you put everything back together. Sit on the mower, start it up, and slowly engage the drive. You should move smoothly with no slipping or weird noises. If it’s slipping, your tension might be off or the belt might not be seated properly in the pulleys.
John Deere Belt Replacement Guide
John Deere lawn mower belt replacement is similar to Craftsman, but with a few quirks. John Deere tends to over-engineer things, which is both good and annoying.
Most John Deere riders have the deck removal process down to a science. They use these clever bracket systems where the deck basically slides out without removing a ton of pins. On my neighbor’s X300, there’s two pins in front and a sliding bracket in back. Remove the pins, slide the bracket, and the whole deck rolls out the front. Slick.
The belt routing on John Deere mowers is usually pretty clearly marked with little arrows and diagrams on the deck itself. Which is great, except that paint wears off over time. So again, take a picture before you remove the old belt.
One thing with John Deere – they use these belt guides (little metal fingers) that hold the belt in the correct path. Don’t remove these. They’re not in your way; they’re there to keep the belt from jumping off during operation. I made the mistake once of thinking they were just extra brackets and removed them. The belt lasted exactly one lap around the yard before popping off.
The John Deere lawn mower belt itself is usually high quality. The OEM belts are Kevlar-reinforced and last forever if you maintain them. But they’re also expensive. We’re talking $45-$60 depending on the model. Aftermarket options exist and some are fine, but I’ve had mixed results. The $22 one I got for my buddy’s mower stretched out in one season. Ended up buying OEM the second time.
Husqvarna, Cub Cadet & Troy Bilt Belt Replacement
These three brands are all kinda similar in their belt systems, probably because they’re all owned by the same parent companies at various points.
Husqvarna belts typically route through a complex pulley system with multiple idlers. The removal process is similar to Craftsman – drop the deck, release tension, slip the belt off. But Husqvarna likes to hide fasteners. I spent 20 minutes once looking for the third deck hanger bolt before realizing it was under a plastic cover. So look carefully.
The Cub Cadet drive belt on most models is accessed through a panel on the right side of the machine. Remove three bolts, pull the panel off, and you can see the whole drive system. Release the tension spring, slip the old belt off, route the new one following the diagram that’s hopefully still visible on the frame, and reconnect everything.
Troy Bilt is generally the most straightforward of these three. The Troy Bilt drive belt usually comes off without removing the deck at all. There are access panels on both sides. I’ve done complete belt replacements on Troy Bilts in under 15 minutes because they made it so accessible.
One quirk with all three brands: they sometimes use dual-belt systems where two belts work together. If one breaks, replace both. I learned this the hard way when I replaced just the broken belt on a Cub Cadet, and the old belt broke two weeks later. Just do both while you’re in there.
Toro & Push Mower Belt Replacement
Push mower belts are a whole different animal. The Toro lawn mower belt on my old 22″ self-propelled was the most annoying repair I’ve ever done on a push mower.
For most push mowers, you have to remove the blade to get to the belt. So first things first: tip the mower on its side (air filter side UP, or you’ll leak oil and gas everywhere. Ask me how I know.). Remove the blade bolt. This sometimes requires an impact wrench because those things are TIGHT.
With the blade off, you can usually see the belt system underneath. On Toro mowers, the belt runs from a transmission pulley up through the deck to the engine pulley. There’s a cover you have to remove (usually held on by screws or clips) to access it.
The old belt just slides off once you release the tension. The new one goes on in reverse. BUT – and this is a big but – the belt has to be the right length. Too short and it won’t fit. Too long and it won’t maintain proper tension. The tolerances are way tighter than on riding mowers.
I’ve done push mower belt replacements where the hardest part was just getting the stupid cover back on. The clips don’t want to line up, the belt is in the way, and you’re lying on the ground getting frustrated. Take your time. Force equals broken clips.
Some push mowers have additional complications. My buddy’s Honda has this super complex transmission system where the belt connects to a variable speed pulley. That repair required a service manual and about 45 minutes of careful work. Not all push mowers are created equal.
Deck Belt vs Drive Belt Replacement: Key Differences
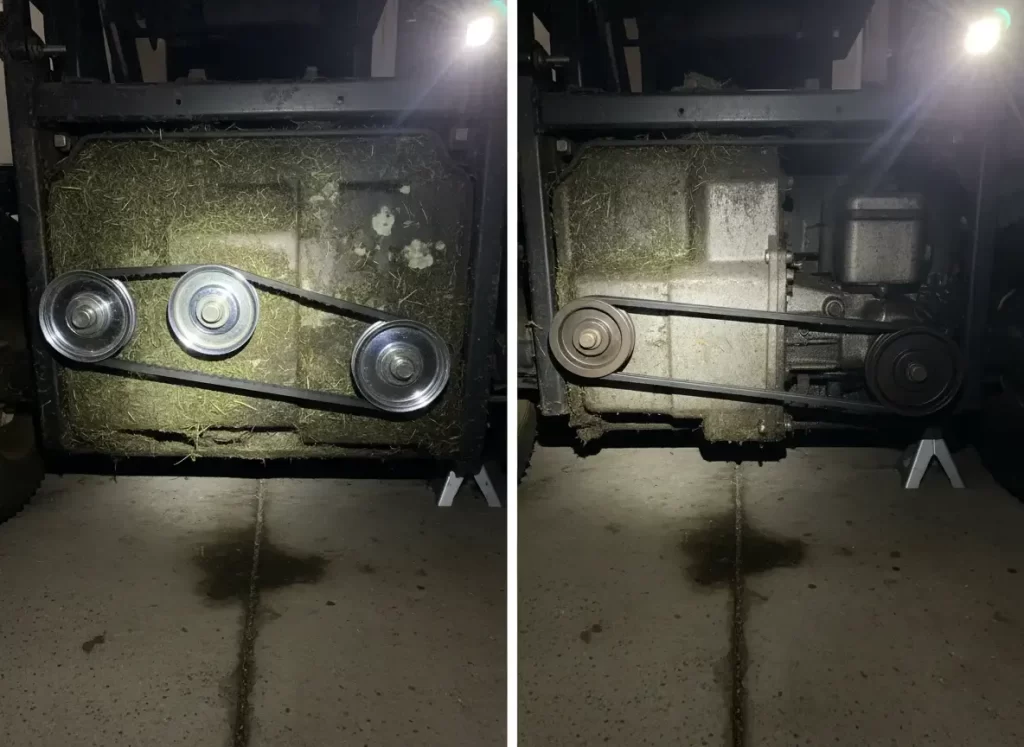
Let me clear this up because I get asked this constantly. Deck belts and drive belts are NOT interchangeable; they do different jobs, and they wear differently.
The mower deck belt powers your blades. It’s under constant load when you’re mowing, dealing with high speeds and sudden impacts (every time you hit a stick or rock, that belt absorbs shock). These belts usually fail from outside edge wear, cracking from flexing around multiple pulleys, or from debris damage.
A riding mower drive belt moves your mower. It’s under variable load – more load going uphill or in thick grass, less on flat ground. These belts typically fail from stretching, glazing from slipping, or from contamination (oil leaks are murder on drive belts).
Replacement process differences? Deck belts almost always require removing the deck from the mower to access the pulleys and properly route the belt. Drive belts can usually be accessed through panels or from underneath without major disassembly.
The 42 inch deck belt on most riders’ routes has around 3-5 pulleys in a complex pattern. Get the routing wrong and the belt either won’t work or will self-destruct. Drive belts are usually simpler – engine pulley to transmission pulley, maybe one or two idlers in between.
Tension adjustment is different, too. Deck belts typically use spring-loaded idler pulleys that automatically maintain tension. You don’t adjust anything; you just install the belt, and the spring does its job. Drive belts sometimes have adjustable tension, especially on older mowers. There might be a rod or lever system that you set to maintain proper belt tension. Too loose and the belt slips. Too tight and you wear out bearings prematurely.
Cost-wise, deck belts and drive belts are usually similar – $20-$40 for aftermarket, $35-$60 for OEM. But deck belts typically last longer because they’re not dealing with the continuous friction and heat that drive belts endure.
Here’s something interesting: on some newer mowers, particularly zero-turns, the deck engagement is electric and there’s no deck belt at all. They use electric PTO clutches. But even those mowers still have drive belts (sometimes multiple drive belts) to power the hydrostatic transmissions.
Where to Buy Replacement Lawn Mower Belts
Alright, so you know what belt you need. Where do you actually buy it?
Your first stop should be an authorized dealer for your brand. Yeah, it’s usually the most expensive option, but there are benefits. They’ll have the exact OEM part, they can verify you’re getting the right one for your specific model, and if something goes wrong, you have someone to blame besides yourself. Plus, most dealers stock common belts in-house. I’ve walked into my John Deere dealer and walked out 10 minutes later with a belt. Can’t beat that.
Lawn mower belt near me searches will also turn up local options. Tractor Supply Company stocks a pretty good selection of mower belts for popular brands. I’ve bought Craftsman 42-inch deck belts there before for about $28. Home Depot and Lowe’s carry some belts, but the selection is limited to common sizes. If you have a standard Craftsman or MTD rider, they’ll probably have what you need. If you have anything else, probably not.
Independent small engine shops are my secret weapon. There’s a place about 15 minutes from me called Willie’s Small Engine Repair (old guy named Willie, naturally), and he stocks more belt part numbers than the corporate stores combined. He’s also always willing to cross-reference part numbers and suggest alternatives if the OEM belt is backordered or stupidly expensive.
Ace Hardware is hit or miss. Some Aces are amazing for lawn equipment parts, others have basically nothing. The one near me has a whole wall of belts organized by brand. The one across town has like six belts total. Your mileage may vary.
For online shopping, Amazon is the obvious choice. Fast shipping, easy returns, tons of options. But you MUST know your exact part number. Don’t trust “fits most” listings. I’ve been burned by those. Read the reviews – if multiple people say “didn’t fit my Craftsman model XYZ,” then it probably won’t fit yours either.
eBay can have good deals, especially on OEM belts from people parting out mowers. I’ve scored brand new OEM belts for 40% off retail there. But watch the shipping costs and seller ratings. I’ve also received the wrong belt from eBay sellers who clearly had no idea what they were actually selling.
The manufacturer’s website or their parts portal is always an option. JohnDeere.com has a full parts store. Husqvarna’s got one. Toro’s got one. They’ll all sell you the exact right part. But shipping can be slow and expensive. I ordered a Husqvarna belt once that took 12 days to arrive and cost $8 in shipping for a $32 belt. The dealer down the street had it in stock for $35 total. Live and learn.
RockAuto is primarily an auto parts site, but they carry small engine belts, too. Their interface is a little clunky, but prices are competitive. I’ve used them for hard-to-find belts on older equipment.
PartsTree.com is great for finding part numbers and cross-references, and then you can buy from whoever has the best price. It’s like a parts lookup database. Type in your model number, and it shows you exploded diagrams with every part number. Super useful.
OEM vs aftermarket debate? I mostly go OEM for critical drive components. For a lawn mower drive belt or the main deck belt, I want the factory part. For secondary belts or on older equipment where I’m just keeping it running, quality aftermarket (Gates, Dayco, Stens) is fine. I stay away from no-name Amazon Basics-type belts. The $11.99 belt is cheap for a reason, and that reason is it’ll last four months.
One pro tip: buy your belt during the off-season. November through February, everything goes on sale. I’ve gotten OEM belts for 30% off just by buying in January instead of June. Stock up then, and you’re set for the season.
Common Belt Replacement Mistakes to Avoid
Let me save you from the mistakes I’ve made. Because I’ve made them all.
Mistake #1: Not taking a picture of the belt routing before removal. Look, your memory is not as good as you think. That complex path the belt takes around five pulleys? You’ll forget it. I promise. Take multiple pictures from different angles. I now take a video where I trace the belt path with my finger while narrating it. Sounds ridiculous, but it’s saved me multiple times.
Mistake #2: Installing the belt upside down or twisted. The V-belt needs the narrow edge pointing into the pulley groove. Seems obvious when I say it, but when you’re lying under a mower deck covered in old grass and spider webs, it’s easy to mess up. I once installed a Cub Cadet drive belt twisted 180 degrees and couldn’t figure out why it kept slipping off. Twenty minutes of troubleshooting before I realized I was an idiot.
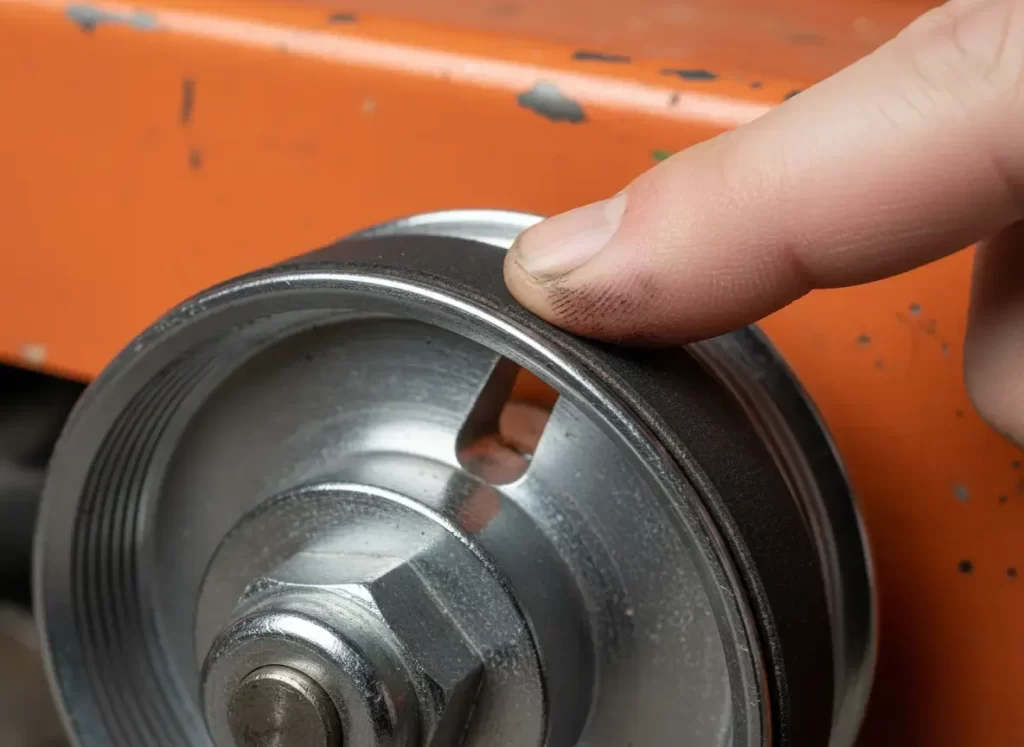
Mistake #3: Not cleaning the pulleys before installing the new belt. Old belts leave behind rubber residue, dirt, and grease in the pulley grooves. That contamination will cause your new belt to slip and wear prematurely. I take a rag with some degreaser and wipe out every pulley groove before the new belt goes on. Takes three minutes and extends belt life significantly.
Mistake #4: Not checking pulley alignment and condition. A new belt on bad pulleys is just wasting money. Spin every pulley by hand. Any roughness, grinding, or wobble means that the pulley bearing is going bad. Replace it now, or plan on replacing the belt again soon. I fought chronic belt failure on a mower once before discovering one of the blade spindle bearings was shot. New bearing, no more belt problems.
Mistake #5: Over-tightening or under-tensioning. Most modern belts use spring-loaded idlers, so tension is automatic. But on older equipment with manual tension adjustment, this matters. Too loose and the belt slips, gets hot, glazes, and dies. Too tight and you put excess load on bearings and the belt, causing premature failure. You want just enough tension that the belt doesn’t slip under load. There should be about 1/4″ to 1/2″ of deflection when you press on the belt between pulleys.
Mistake #6: Not replacing multiple belts when needed. If your mower has two or three belts and one breaks, at least inspect the others carefully. If they’re all the same age, they’ll probably all fail around the same time. I’ve seen people replace the deck belt, then have the drive belt fail a week later. Just do them all while you’re in there if they’re questionable.
Mistake #7: Buying the wrong belt. This should be obvious but it’s the most common mistake I see. Someone needs a Troy Bilt drive belt, goes to the store, sees one that looks close, buys it, then can’t figure out why it doesn’t fit. This ties back to what I covered in my parts guide about matching specifications. Measure twice (or in this case, verify your part number twice), cut once. The belt needs to be the exact right length and width for your specific mower model.
Mistake #8: Not adjusting the blade engagement or drive engagement mechanism after installation. Sometimes these systems need minor adjustment after a belt replacement. If your blades are slow to engage or your mower’s sluggish even with a new drive belt, check the linkage and cable adjustments. There are usually adjustment nuts or slots to fine-tune everything.
Mistake #9: Running the mower at full throttle immediately after belt installation. New belts need to be broken in gently. Run the mower at half throttle for the first 10-15 minutes to let the belt seat into the pulleys properly. Going straight to wide-open throttle can cause slipping and glazing right away. I killed a brand new Toro lawn mower belt once by immediately mowing thick wet grass at full speed. Made it about 20 minutes before the belt started smoking.
Mistake #10: Not properly securing belt keepers and guards. Those little metal fingers and covers aren’t just decoration. They keep the belt in place during operation. I once left a belt keeper unbolted (forgot to tighten it after checking the belt routing), and the belt jumped off after five minutes. Now I double-check every fastener before I start the mower.
How to Extend Your Lawn Mower Belt Life: Maintenance Tips
Okay, so you’ve got your new belt installed and it’s working great. How do you make it last?
First and most important: keep your pulleys clean and free-spinning. Every month during mowing season, blow out the deck and drive system with compressed air. Get all that accumulated grass, dirt, and debris out of the pulley grooves. Takes five minutes and prevents a ton of problems. I’ve seen belts last twice as long just from this simple maintenance.
Don’t mow wet grass. I know, I know. Sometimes you gotta. But wet grass clumps up, sticks to everything, and puts extra load on the belts. It also creates that humid environment that promotes rust on pulleys and corrosion on bearings. If your grass is soaked, wait a few hours. Your belts will thank you.
Avoid sudden starts and stops with the blade engagement. Don’t just yank that PTO lever like you’re starting a chainsaw. Pull it smoothly. Same with the drive system – gradual inputs instead of abrupt ones. Sudden shock loads are hell on belts.
Keep your blades sharp. Dull blades require more power to cut, which means more load on the deck belt. That extra load creates heat and wear. According to Purdue University Extension, sharp blades also reduce disease in grass by making clean cuts. I sharpen my blades every 8-10 hours of mowing. Takes 10 minutes with a grinder and the mower runs so much better.
Check belt tension periodically. Even on spring-loaded systems, that spring can weaken over time. Press on the belt – you should feel firm resistance. If it’s super loose, something’s wrong. Maybe the spring’s weak, a pulley’s worn, and the belt’s seated too deeply. Figure it out before the belt fails.
Don’t overload your mower. If you’re trying to cut 8-inch-tall wet grass in one pass, you’re putting massive stress on everything. Raise the deck, do multiple passes, or just don’t let your grass get that tall. I see people trying to bush-hog with a lawn mower and wonder why their belts keep breaking. The machine has limits.
Store your mower properly in the off-season. Belts don’t like sitting in tension for months in a humid garage. The Outdoor Power Equipment Institute provides detailed storage guidelines to extend equipment life. Some people release the belt tension during winter storage (if possible on your model). I just keep my mower in a dry place and start it up once a month even in winter to keep everything moving.
Inspect your belts regularly. Once a month, pop the deck or cover and just look at the belt. Cracks? Fraying? Glazing? Unusual wear? Catch problems early, and you can plan the replacement instead of dealing with it as an emergency on Saturday morning when you need to mow.
Here’s one nobody talks about: avoid getting oil or fuel on your belts. Petroleum products destroy rubber. If you spill gas while refueling, wipe it up immediately. If you notice an oil leak, fix it before it soaks the belt. I’ve seen drive belts disintegrate from prolonged contact with leaked hydraulic fluid.
Replace idler pulleys when they get noisy. That squeaking or grinding you hear when the belt’s running? That’s a bearing going bad. The pulley’s not spinning freely anymore, which means extra friction on the belt. A $15 pulley bearing replacement can save you from chronic belt problems.
Don’t cheap out on replacement belts. I’ve said this already, but it’s worth repeating. That $12 generic belt might fit, but it won’t last. Spend $30-$40 on a quality belt and get years of service instead of months. The math works out in your favor every time.
Last thing: if you’re burning through belts faster than normal, something else is wrong. Don’t just keep replacing the belt and hope for the best. Find the root cause with proper diagnostic steps. Bad bearing? Misaligned pulley? Seized blade spindle? Foreign object stuck somewhere? Fix the actual problem.
Look, bottom line? Lawn mower belt replacement isn’t scary. It’s not some mystical skill that requires a mechanic certification. It’s just a belt. You can do this. Take your time, follow the steps, get the right part, and you’ll save yourself a hundred bucks and feel pretty accomplished when you’re done.
I’ve been doing this for almost 20 years, and honestly, belt replacement is one of my favorite repairs. It’s straightforward, doesn’t require expensive tools, and the results are immediate – broken mower to working mower in under an hour. That’s satisfying.
Just remember to take those pictures before you remove the old belt. Seriously. Don’t be like past-me, who’s stood there holding a new belt, wondering where the hell it goes.
Now go fix that mower. And hey, let me know in the comments if you’ve ever installed a belt backward and couldn’t figure out why nothing worked. Can’t just be me, right?
You’ll know when it snaps. But seriously, look for squealing noises, visible cracks or fraying on the belt, blades that won’t engage or spin slowly, loss of drive power, or if the belt looks shiny and glazed instead of matte rubber. If you smell burning rubber or see smoke coming from the belt area, yeah, that belt’s done. I usually replace them when I see multiple surface cracks or if the edges are fraying. Don’t wait until it actually breaks, because that always happens at the worst time.
Absolutely. I’d say 90% of homeowners can do this with basic tools and a little patience. It’s not rocket science, it’s just a belt on some pulleys. The hardest part is usually just figuring out the belt routing, which is why you take pictures before removal. If you can change a car tire or assemble IKEA furniture, you can replace a lawn mower belt. Give yourself 30-45 minutes the first time, 20 minutes once you’ve done it before. Honestly, the job would be way easier if I weren’t 50 years old with a bad back. If you’re young and flexible, this is a piece of cake.
Deck belt spins your blades. The drive belt moves your mower. They’re different belts in different locations doing different jobs. The deck belt usually routes around multiple pulleys under the cutting deck and is under high-speed, constant load when you’re mowing. The drive belt connects your engine to the transmission and is under variable load depending on terrain and grass thickness. You can’t swap them – they’re specifically designed for their purpose.
For someone who’s done it before? 15-20 minutes for most models. First time? Budget 45 minutes to an hour. That includes time to figure out what you’re doing, remove the deck (if necessary), route the belt correctly, and test everything. I’ve done riding lawn mower belts replacement in under 10 minutes on models I know well, but I’ve also spent two hours on unfamiliar mowers with weird belt routing. Plan for 30 minutes and you’ll probably be fine.
Check your owner’s manual for the part number, or look for a parts diagram sticker on the mower itself (usually under the seat or inside the deck). Once you have the model number, Google “[brand] [model] parts diagram” or call a dealer with your model number. They can look up the exact belt you need. Sites like PartsTree.com are great for finding part numbers. Then buy from wherever has the best price – dealer, Amazon, Tractor Supply, or local repair shop. Just make absolutely sure you’re getting the exact part number for your specific mower.
Depends on the brand. Quality aftermarket belts from companies like Gates, Dayco, or Stens are often just as good as OEM and sometimes cheaper. The sketchy $11 Amazon basics belt from a brand you’ve never heard of? Pass. I use OEM for my primary mower because I need it to be reliable. For my old backup mower, I’ll use good aftermarket belts. But I stay away from the ultra-cheap no-name options. You generally get what you pay for with belts.
DIY? Just the cost of the belt, which runs $20-$60 depending on OEM vs aftermarket and which belt you need. Plus maybe an hour of your time. Having a shop do it? You’re looking at $80-$150 typically – $30-$50 for the belt markup, and $50-$100 in labor. It’s one of those repairs that’s so easy to DIY that paying someone else feels wasteful. But if you’re not handy or don’t have time, it’s still cheaper than most mower repairs.
If you’re replacing belts frequently, something else is wrong. Common causes: seized or rough-spinning pulley bearings, misaligned pulleys causing uneven wear, debris buildup in the belt path, damaged blade spindles, an engine pulley that’s bent or wobbly, spring tension that’s too tight or too loose, or you’re just overloading the mower by cutting grass that’s too tall or too thick. I had a customer who kept breaking belts until we found a bent deck spindle that was causing the whole system to bind. Fix the root cause, not just the symptom.
