
Robotic Lawn Mower Installation: A Step-by-Step Guide
So your neighbors are giving you those looks again – you know, the ones they offer when your grass is looking a little shaggy while theirs stays perfectly trimmed. I get it. After fifteen years in the lawn care business, I’ve seen many people struggle to keep up with regular mowing. That’s precisely why robotic lawn mower installation has become such a game-changer. If you’re still deciding which model is right for you, check out our complete buyer’s guide to the best robot mowers of 2025.
Table of Contents
▼- What You Need Before Starting Your Robot Lawn Mower Setup
- Step 1: Planning Your Robotic Lawn Mower Installation Layout
- Step 2: Installing the Charging Station
- Step 3: Robot Lawn Mower Boundary Wire Installation
- Step 4: Connecting and Testing Your Robot Mower Wire Installation
- Step 5: Setting Up Robotic Lawn Mower Programming and First Run
- Troubleshooting Common Installation Issues
- Final Thoughts on DIY Robot Lawn Mower Installation
- Robotic Lawn Mower Installation FAQs
Here’s the thing nobody tells you: most dealers charge $300 to $500 for professional installation, but this is honestly one of the easier DIY projects you’ll tackle. Last spring, I helped my neighbor Bob install his Husqvarna Automower 315X in about two hours, and he saved himself $400. You can also reference Husqvarna’s official installation guidelines for model-specific details. The look on his face when that little robot started its first perfectly straight pass? Priceless.
Now, you might be thinking this sounds too complicated – all that talk about boundary wires and charging stations. But honestly? If you can install a sprinkler system or set up holiday lights, you can absolutely handle a robot lawn mower setup. I’ll walk you through the exact process I use when installing these systems for my commercial clients.
What You Need Before Starting Your Robot Lawn Mower Setup
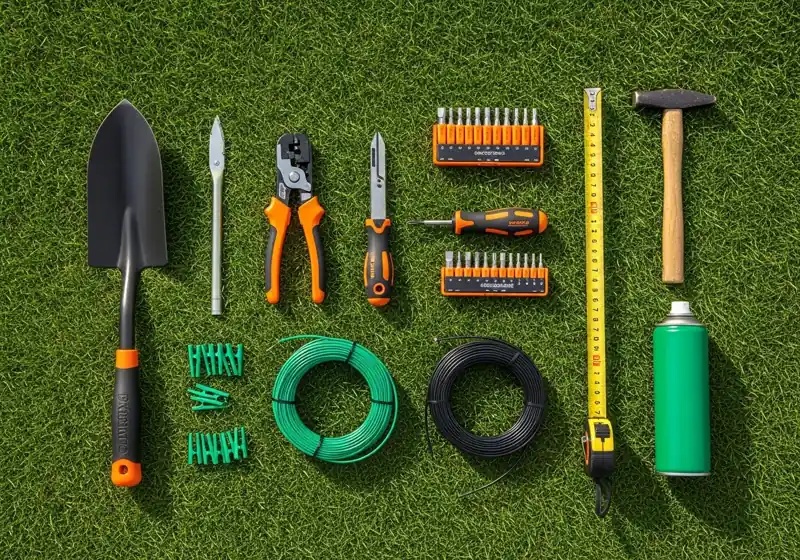
Let me save you a trip back to the store. Before opening the box, ensure you have all the necessary items ready. I learned this lesson the hard way when I had to drive to three different stores on a Saturday afternoon in search of 12-gauge wire connectors.
Tools You’ll Actually Need:
- Spade or edging tool (nothing fancy – your basic $15 Home Depot spade works fine)
- Wire strippers
- Screwdriver set
- Measuring tape (at least 100 feet)
- Spray paint or flour for marking
- Small hammer for securing wire clips
What Comes in Most Robotic Mower Boxes:
- Boundary wire (usually 500-800 feet, depending on your model)
- Wire connectors and clips
- Charging station
- Installation guide pegs
- The robot mower itself (obviously)
Here’s what drives me crazy about some installation guides – they assume you have perfect conditions. Reality check: you probably don’t. If your lawn has sprinkler heads, existing landscaping, or that decorative border your spouse insisted on, factor in an extra 30 minutes for planning.
Pro tip: Download your mower’s app before you start. Most modern robot mowers, such as the Husqvarna Automower series or Worx Landroid, connect to your phone, so you’ll want that ready for the final programming steps. For a detailed comparison of robotic lawn mowers from these and other top brands, see our comprehensive review guide.
Step 1: Planning Your Robotic Lawn Mower Installation Layout
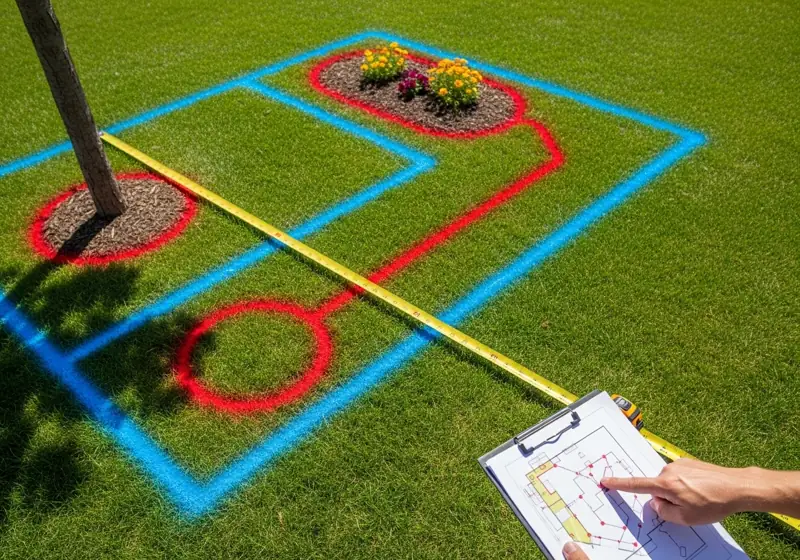
This is where most DIY installations go wrong. People get excited and start laying wire without a proper plan. Trust me – spending 20 minutes planning will save you hours of do-overs.
Walk your property with a measuring tape and really examine your lawn. I mean, really look. Here’s what you’re identifying:
Obstacles to Mark:
- Sprinkler heads (your wire needs to stay at least 12 inches away)
- Flower beds and landscaping
- Trees and bushes
- Slopes steeper than 35 degrees (most robots can’t handle more than that)
- Areas where kids play regularly
The 15-Inch Rule: Your boundary wire should run about 15 inches from any hard surface – sidewalks, driveways, flower beds. This provides your robot mower with sufficient space to turn around without bumping into anything. I’ve seen too many scratched-up robots because someone tried to maximize their cutting area.
Start at your chosen charging station location (we’ll cover placement in the next section) and mentally trace the path your wire will take. You’re creating a complete loop – think of it like outlining your cutting area with a giant invisible pen.
Seasonal Consideration: If you’re installing in the spring, like most people, remember that your landscaping will fill out as the season progresses. That small bush might become a significant obstacle by July.
Step 2: Installing the Charging Station
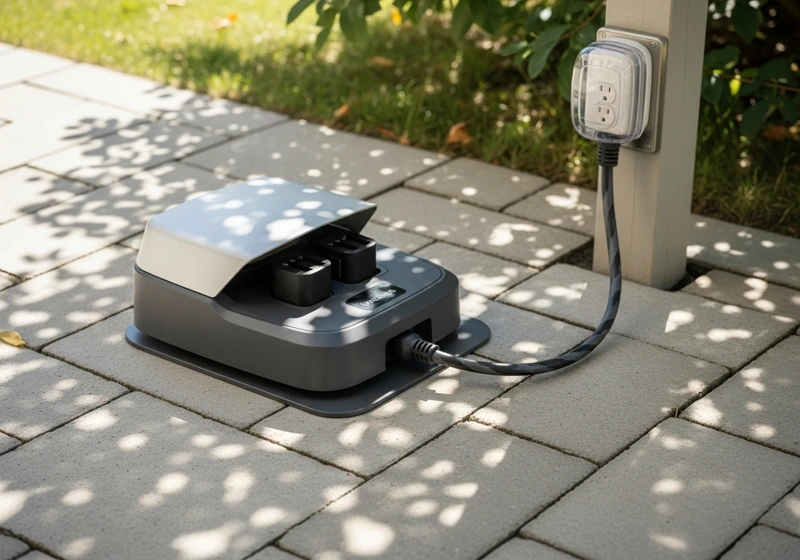
The charging station is like your robot’s home base, so placement matters more than you might think. I’ve moved more charging stations than I care to count because someone didn’t know about the impact of sun exposure or drainage.
Perfect Charging Station Spot:
- Level ground (seriously, even a slight slope can cause charging issues)
- Some shade during the hottest part of the day
- Within 30 feet of a GFCI outdoor outlet
- Away from sprinklers (water and electronics don’t mix)
- Easily accessible for you, but not in a high-traffic area
Installation Steps:
- Clear a 4×4-foot area of any debris
- Level the ground if needed (a small amount of sand works great)
- Connect the power supply to your outdoor outlet
- Place the charging station and make sure it’s stable
Here’s something the manual won’t tell you: if you live in an area with harsh winters like I do here in Ohio, consider making your charging station easily removable. A few concrete pavers create a stable base that you can level each spring.
Wire Connection Preparation: Before proceeding, identify where your boundary wire will connect to the charging station. Most models have clearly marked terminals, but take a photo with your phone – you’ll thank me later when you’re connecting 400 feet of wire and can’t remember which terminal is which.
Step 3: Robot Lawn Mower Boundary Wire Installation
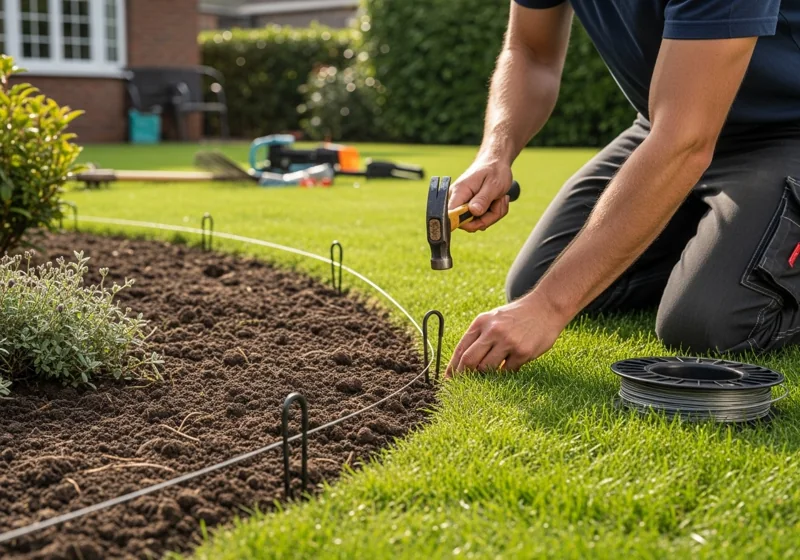
Alright, here’s where the real work happens. Robot lawn mower boundary wire installation is, in fact, the most time-consuming part of the entire process, but it’s not difficult – just methodical.
Starting the Wire Run: Begin at your charging station and work clockwise around your lawn. Why clockwise? Most robots are programmed to follow the wire in a specific direction, and clockwise tends to be the standard. Check your manual, but when in doubt, follow the direction indicated by the arrow.
Wire Depth and Placement: You’ve got two options here, and honestly, both work fine:
Surface Installation (My Recommendation for Beginners):
- Lay the wire on the grass surface
- Secure with provided clips every 3-4 feet
- Wire will naturally work its way down into the soil over 2-3 months
Buried Installation:
- Cut a shallow trench 1-2 inches deep
- Lay wire in a trench and cover with soil
- More permanent but harder to adjust later
I usually recommend surface installation for first-timers. Here’s why: you’ll likely want to make adjustments after your first few weeks of operation. Perhaps that corner is too tight, or you’d like to include the area by the mailbox. Much easier to move clips than to dig up buried wire.
Handling Corners and Obstacles: Sharp corners are your robot’s enemy. Instead of creating 90-degree angles, make gentle curves. I use a simple rule: if I can’t walk the boundary line smoothly, neither can my robot.
For obstacles like trees, create a “virtual fence” by running wire to the tree, around it, and back to your main boundary. This tells your robot “don’t go here” without creating a separate loop.
Wire Tension Tips: Keep the wire taut, but not as tight as a guitar string. You want enough tension to prevent sagging, but remember – this wire will expand and contract with temperature changes. Too tight, and you’ll have breaks come winter.
Crossing Driveways: When you need to cross a driveway or sidewalk, you have a few options. Most folks use shallow concrete saw cuts and seal the wire in with outdoor caulk. If you’re not comfortable cutting concrete, wire protectors that lay flat work fine – expect them to be visible.
Step 4: Connecting and Testing Your Robot Mower Wire Installation
You’ve just spent an hour or two running wire around your property, and now it’s time to see if all that work pays off. This is where having that photo of the charging station terminals comes in handy.
Making Connections: Most robotic mowers use simple twist connectors for joining wires. Strip about half an inch of insulation from each wire end, twist the copper strands together, and secure with the provided connectors. Here’s what they don’t tell you in the manual: a tiny dab of electrical grease on these connections will prevent corrosion issues down the road.
The Continuity Test: Before connecting to your charging station, test your boundary loop with a multimeter, if available. You’re looking for a complete circuit – no breaks, no shorts. Don’t have a multimeter? No problem. Most robot mowers will display an error code if there’s a wiring issue once you’ve connected everything.
First Connection: Connect your boundary wire to the charging station terminals. Most models have clear markings – usually “Guide 1,” “Guide 2,” and “Boundary.” Follow your specific manual here because different brands have different configurations.
The Moment of Truth: Power up your charging station and check for error codes. Green lights or “boundary signal detected” messages are what you want to see. If you encounter error codes, don’t panic – most are simple fixes, such as loose connections or wire breaks in high-traffic areas.
Common First-Time Issues:
- “No boundary signal”: Usually, a loose connection at the charging station
- “Boundary wire crossed”: You’ve accidentally created a figure-eight pattern somewhere
- “Outside working area”: The robot can’t detect the boundary signal where it’s sitting
Step 5: Setting Up Robotic Lawn Mower Programming and First Run
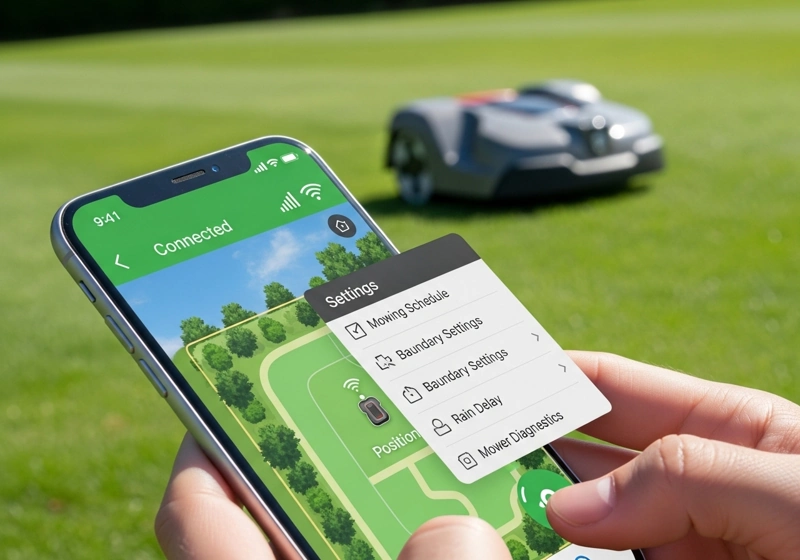
Now comes the fun part – programming your new robot lawn mower. Before diving into programming, it helps to understand how robotic lawn mowers work and the technology behind their navigation systems. This is where that app download I mentioned earlier pays off. Most modern systems, like Husqvarna Automower setup or Worx Landroid programming, are surprisingly user-friendly.
Initial Programming Basics: Start conservatively with your settings. You can constantly adjust later, but it’s better to under-program than overwhelm your new system. Here’s my standard first-run setup:
Cutting Schedule:
- Start with 3-4 hours per day
- Avoid early morning (dew makes cutting less effective)
- Skip rainy days (most robots are intelligent enough to do this automatically)
Cutting Height: Set your initial cutting height approximately half an inch higher than your normal cutting height. Robot mowers work best with the “little and often” approach – they’re designed to trim grass tips, not tackle overgrown lawns. To understand how this compares to other types of lawn mowers, check out our comprehensive guide.
Security Settings: Set up your PIN code and theft protection. Most modern robot mowers have GPS tracking and alarm systems, but they’re only effective if you activate them during setup. For more comprehensive lawn mower safety essentials, including traditional mower safety, see our detailed guide.
The First Test Run: Here’s where you’ll feel like a proud parent watching your kid ride a bike for the first time. Start with a short, supervised run – maybe 30 minutes during daylight when you can observe how your robot handles the boundary wire and obstacles.
What to Watch For:
- Smooth turns at the boundary wire
- Proper docking at the charging station
- Consistent cutting pattern
- No getting stuck in problem areas
Fine-Tuning After First Run: After that first test, you’ll probably want to make adjustments. Perhaps the wire needs to be adjusted by a few inches in one corner, or maybe the garden gnome your spouse loves is causing navigation issues. This is totally normal – I’ve never seen a perfect installation on the first try.
Troubleshooting Common Installation Issues
Let me share some of the most common problems I encounter and how to resolve them without needing expensive service.
A robot gets stuck in the same spot repeatedly: This usually means you have a slight depression or soft spot in your lawn. The solution? Either level the area with some topsoil or adjust your boundary wire to avoid it. I keep a small bag of sand in my truck specifically for these quick fixes.
Poor Cutting Performance: In nine out of ten cases, this is a blade issue, not an installation problem. Robot mower blades are designed to be replaced frequently – think of them like razor blades, not traditional mower blades. Sharp blades make all the difference. If you’re dealing with conventional mower blade issues, here’s how to sharpen your lawn mower blade properly.
Won’t Return to Charging Station: This is almost always a boundary wire issue near the charging station. The guide wire (the path your robot follows home) might be positioned incorrectly or have a connection problem.
Boundary Wire Breaks: This typically occurs, especially during the first year, as the wire settles into its new position. Most breaks occur at connection points or where the wire crosses high-traffic areas. Keep spare connectors handy – they’re cheap insurance. Speaking of maintenance, proper lawn mower maintenance extends far beyond just robotic models.
App Connectivity Issues: If you’re experiencing trouble with Husqvarna Automower setup or similar app-based systems, start with the basics: check your WiFi signal strength in your yard and ensure your router’s firmware is up to date.
Final Thoughts on DIY Robot Lawn Mower Installation

Here’s what I want you to remember: robotic lawn mower installation isn’t rocket science, but it does require patience and attention to detail. I’ve watched plenty of weekend warriors rush through the process only to spend more time troubleshooting than they saved on professional installation.
Take your time with the planning phase. Get that boundary wire layout right, and everything else falls into place. Your robot mower is going to be working your lawn for years – a few extra hours of careful installation will pay dividends in reliable operation.
And honestly? There’s something satisfying about watching that little robot methodically maintain your lawn while you’re inside enjoying a cold drink. My neighbor Bob still grins every time his Automower starts up, and it’s been two years since we installed it.
If you run into issues during installation, don’t get frustrated. Most problems are simple fixes that become obvious once you step back and think through the system logically. The money you save on professional installation can go toward other lawn improvements – maybe that new edging you’ve been putting off, or finally fixing that sprinkler head that’s been shooting water sideways all season. If you’re still deciding between robotic and traditional options, our guide to choosing the right lawn mower for your yard covers all the factors to consider.
Now get out there and give your neighbors something to really be jealous about. Just don’t be surprised when they start asking for installation advice – apparently, I’m not the only one who enjoys helping folks tackle these projects.
Robotic Lawn Mower Installation FAQs
For a typical quarter-acre lawn, plan on 2-3 hours for your first installation. I can do one in about an hour now, but I’ve installed dozens. Take your time – rushing leads to mistakes that cost more time in the long run.
Nothing fancy – a spade, wire strippers, a screwdriver set, and a measuring tape cover 90% of installations. The most expensive tool you may need is a concrete saw blade, especially if you’re crossing driveways; however, this is optional.
Honestly? It’s about as tricky as installing landscape lighting. If you can follow a property line and use basic tools, you can handle the installation of boundary wire. The planning takes longer than the actual wire laying.
Absolutely. The manufacturers wouldn’t include detailed DIY instructions if they didn’t expect customers to self-install. I’d say 70% of my customers do their own installations without any issues.
Planning the wire layout. Once you’ve got a good plan, the physical installation is straightforward. Most people underestimate the amount of time they should spend walking their property and identifying potential obstacles.
Professional installation typically runs $300-$500, depending on your area and lawn complexity. The DIY approach costs you maybe $20 in extra supplies (mainly spare connectors and wire clips). That’s real money for most folks.
